
Standard
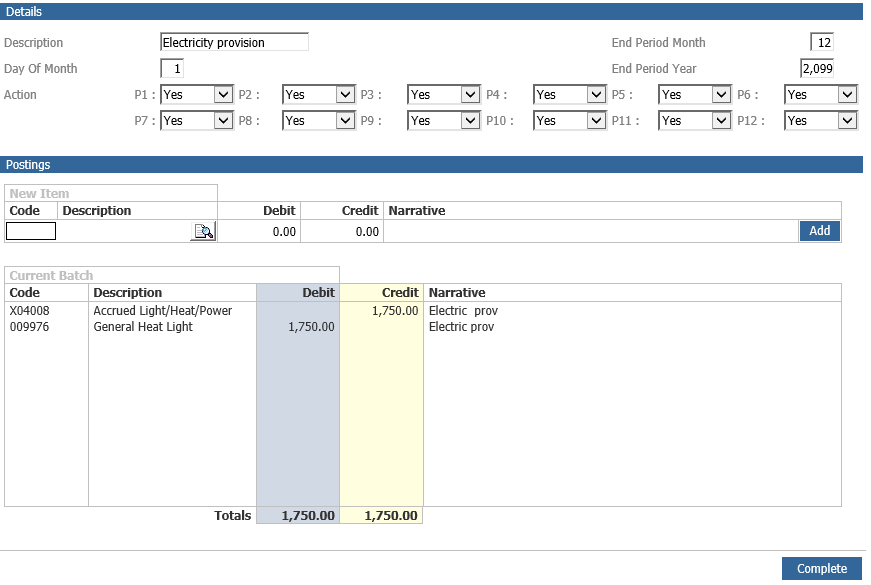
Where the same journal is to be posted each month, an Automatic Journal may be created. Select the ‘Automatic Journal’ option from the main menu.
Any Automatic Journals that have already been created and saved will be listed on the left-hand side of the screen.
Enter the description of the new journal to be created and the day of the month that the journal should be processed. Each period within the financial year requires an entry of Y, N, or R. Y = post the journal into the period as entered, N = do not post the journal for the period and R = post the journal with the debits and credits reversed for the period.
Enter the End Period Month and Year to identify when the processing of the automatic journal is to stop.
Enter the nominal code or click to use the search option to find the nominal code. Enter the amount to be debited or credited to the code. A narrative may also be entered which appears against the posting to the nominal code. Select ‘Add’ and repeat the process until all codes have been selected. Once the journal is balanced, click on ‘Complete’ to save the detail.
Automatic journals are posted when the nominal ledger is updated after the day of the month specified within the automatic journal details.
Where an existing automatic journal is to be amended or deleted, double-click on the description and select either ‘Amend’ or ‘Delete’ as appropriate.
Balance Re-Allocation
The system will now allow you to create and amend reallocation journals through a csv file, this gives you the opportunity to upload a file with all the data of your reallocation journals.
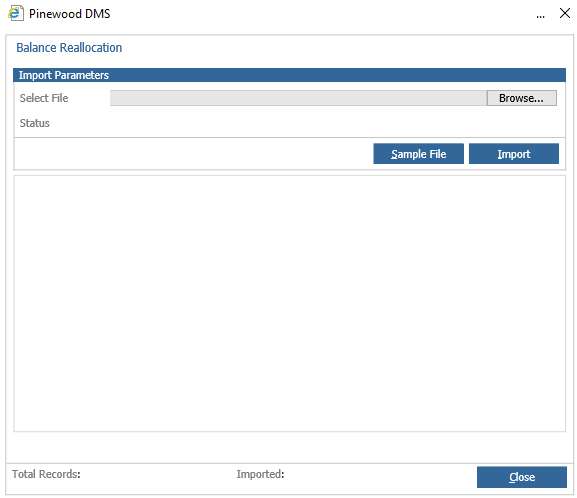
Upon clicking the button, you will be faced with the below setup. Here you can browse the file you wish to upload with your data in
Looking at a sample file below, this can be downloaded to provide a basis for the format of the file you need to upload
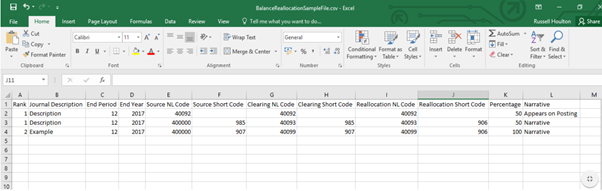
Rank - This dictates the order that the journals will be run. Rows within the spreadsheet can have the same rank if they relate to the same Journal. Or this column can be left blank and the order will be dictated by the order in which the journals appear in this file.
Journal Description - This will name the journal and dictate which rows are grouped together by the names that match through the file. In the example above, you can see the first two rows are part of the same journal.
End Period - The last period in which the journal will be run as part of the nominal ledger update routine.
End Year - Set with the End Period to determine when this journal will no longer run as part of the nominal ledger update routine.
Source NL Code - This will dictate the source nominal code to reallocate from. If this is not entered as a 6-figure format, it will populate 0s at the beginning of the code.
Source Short Code - Here you can enter a short code for this nominal if this function is turned on within your system.
Clearing NL Code - This will dictate the clearing nominal code. If this is not entered as a 6-figure format, it will populate 0s at the beginning of the code.
Clearing Short Code - Here you can enter a short code for this nominal if this function is turned on within your system.
Reallocation NL Code - This will dictate the source nominal code to reallocate to. If this is not entered as a 6-figure format, it will populate 0s at the beginning of the code. This could be reallocated to more than one nominal, so multiple rows can be added to include different nominal codes to split the reallocation across.
Reallocation Short Code - Here you can enter a short code for these nominal codes if this function is turned on within your system.
Percentage - This can be used to split reallocation across multiple nominal codes. The overall total for each journal must add up to 100% or else it will not import.
Narrative - Here you can enter any text required to post with this nominal.
Once you have created your file, you will simply need to browse and select it to be imported.
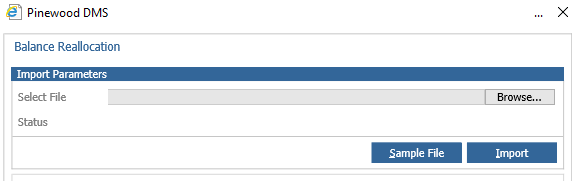
This screen will display the total number of rows in the file you have selected, rather than the total number of reallocation journals within this file.
Any errors with your upload will also be detailed in this screen when you upload it. However, if one row does have an issue, the process will continue to upload the rest of the data, meaning you will only have to go back and amend the single entry that gave you feedback on why it was unsuccessful. It will not fail the entire file.
Upon closing this window, the system will refresh and display all the successfully loaded files on the left-hand side under ‘Existing Journals’. Here these can be individually selected and details looked at.
Existing files can be updated if any detail of a journal ever needs amending. As long as the name of the file being uploaded, and the Journal Description remain the same, the system will update and overwrite existing details with your new data, rather than duplicate entries.