Question
How Do I Amend a Part's Product Group?
Answer
You must make sure the Stock holding of the Part is Zero in order to change the Product Group. You can wait for all stock to empty out first, or amend the stock holding to zero.
This will have to be manually changed through Parts Stock Adjustment via Parts > Maintenance > Adjustments
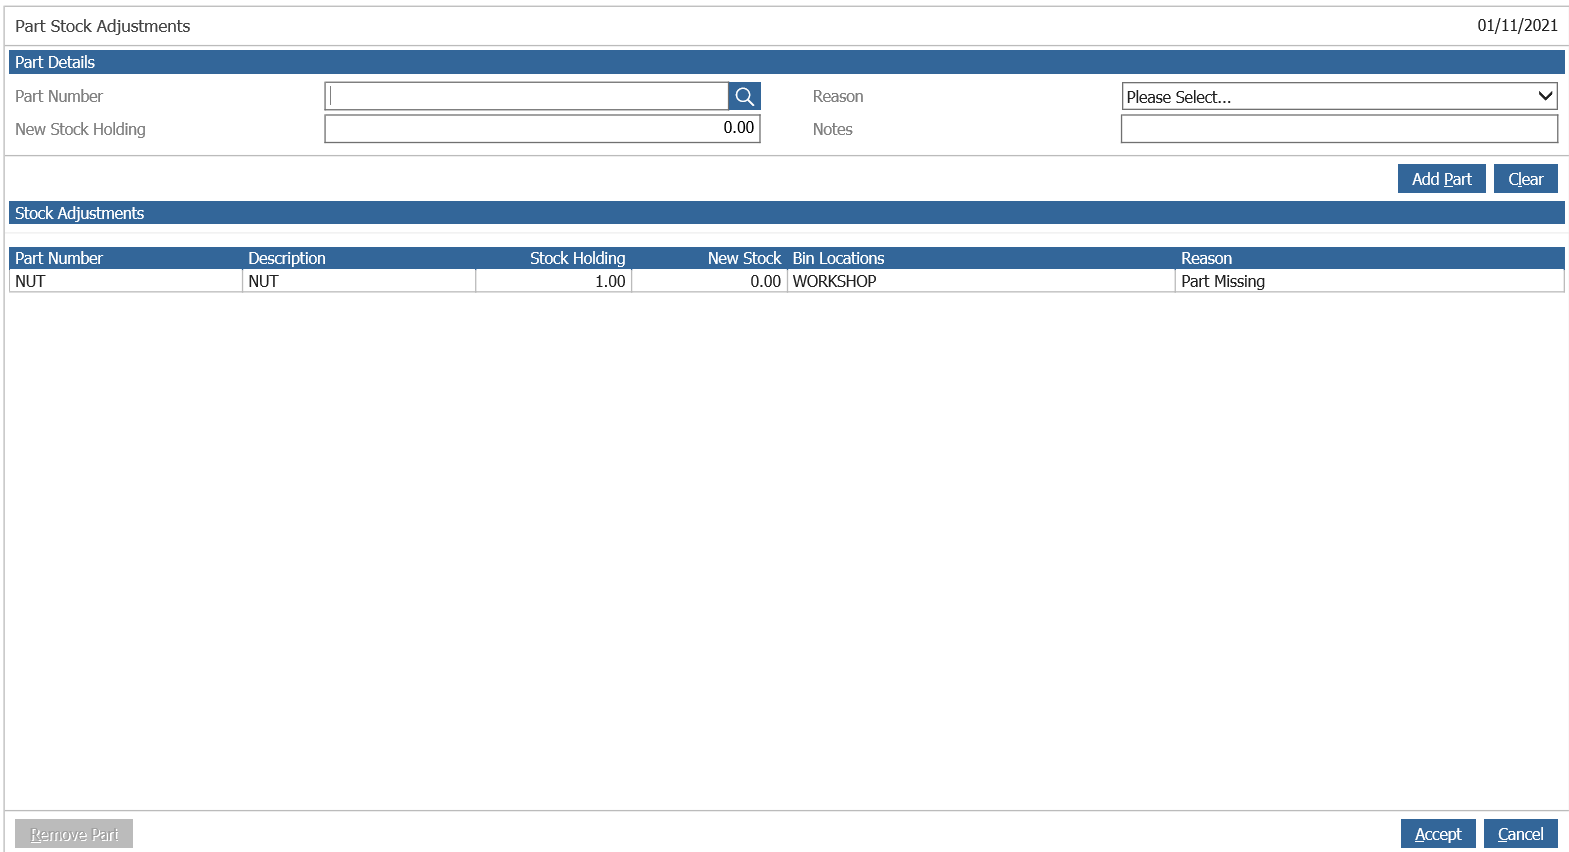
The below Part 'NUT-NUT' contains a stock holding of 1.
To change the product group associated with the part, you must first adjust the stock level to 0 within this screen. The New Stock Holding will need to equal '0' and a reason for the stock adjustment must be added.

Now you must select the Add Part button to finalise the stock adjustment and click Accept to save the changes.
Since the Part has zero stock holding you are now able to amend the Product group linked to the part. This will be carried out through; Parts > Maintenance > Create/Amend - Search Part number.
Click on Amend located at the lower section of the screen, and now you should be able to scroll through the drop-down menu and designate the group you require the part to be associated with. Finalise your selection by clicking on save.
After finalising the changes make sure to go back on Parts Stock Adjustment via Parts > Maintenance > Adjustments and revert the original stock holding before it was set to zero.
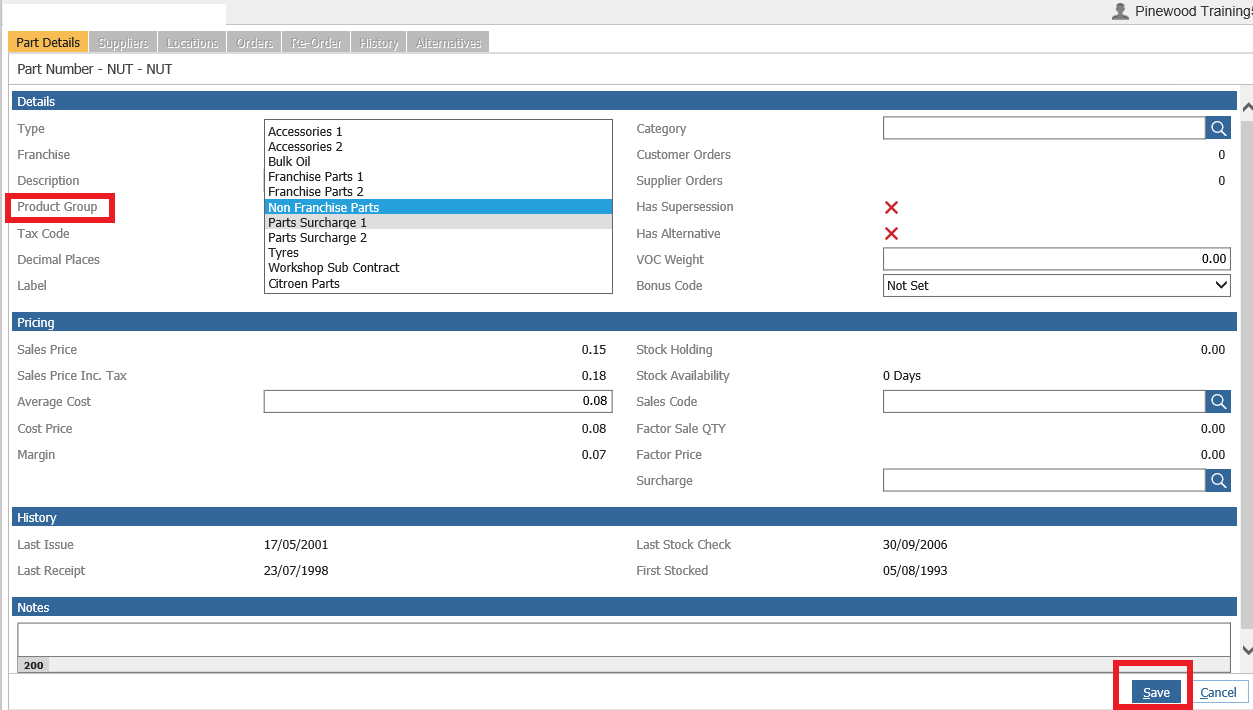
Note: As you can see clearly below the Stock Holding is zero therefore you will be able to create changes to the product group. The option to amend the product group would be greyed out if there is a stockholding present.