
Within this screen you’ll be able to see any deposits that have been taken from a customer in order to purchase a vehicle, here users can assign a deposit to vehicles, reprint the deposit receipt and take new deposits.
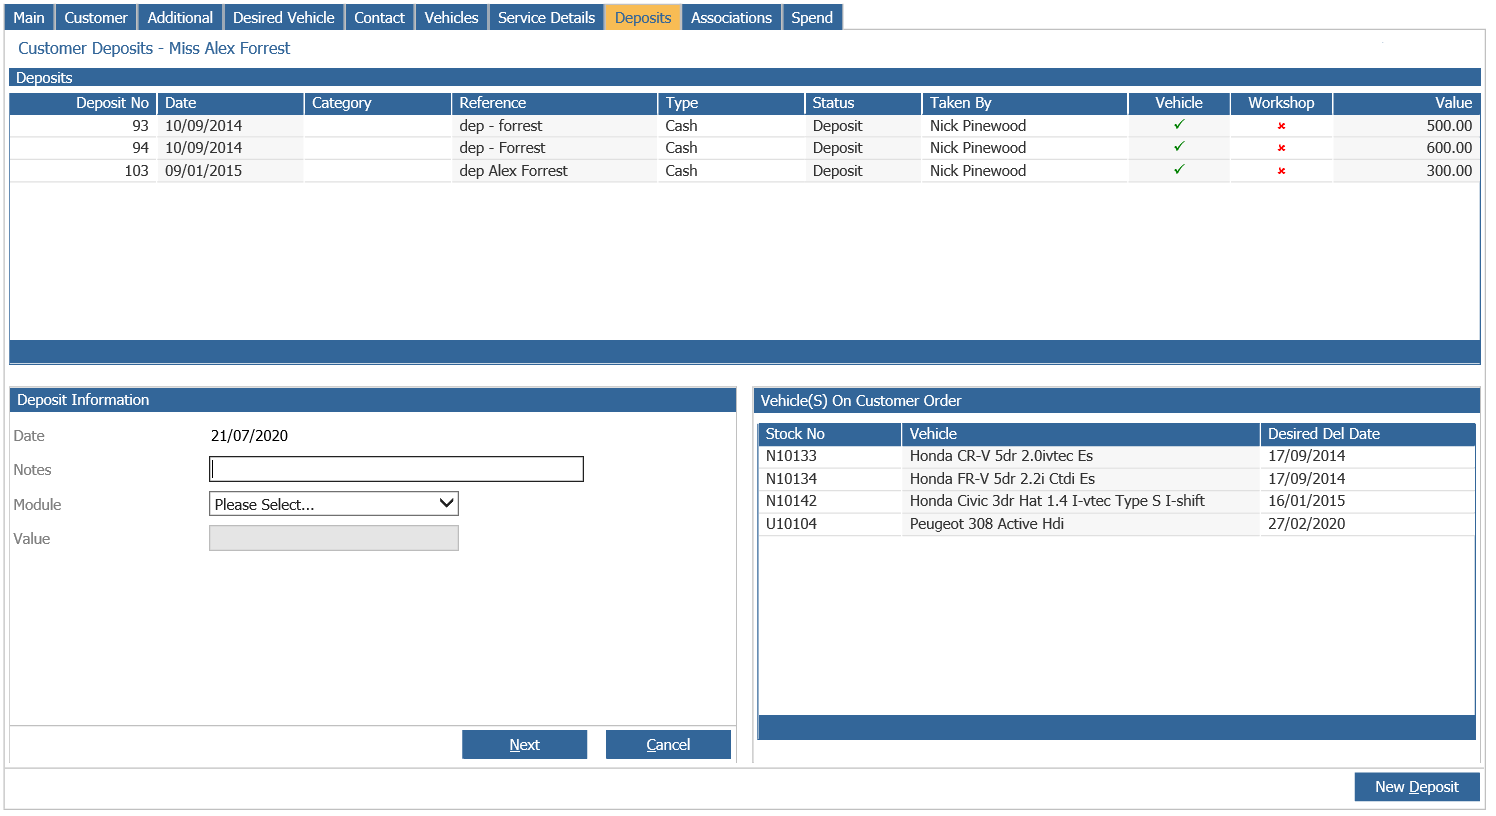
Within the top half of this screen we can see any deposits that have been taken from the customer, here we can see the system allocated deposit number, date the deposit was taken, the reference given, the type of deposit whether it be cash or card etc, the status, the sales person who taken the deposit, whether it is assigned to a vehicle and the value of the deposits.
In the bottom right hand corner we can see all the vehicles of which the customer currently has on order, these are the vehicle(s) in which we can assign a deposit to.
Double clicking an existing deposit that has been taken will display all the details of the deposit, show the vehicle it is assigned (if it hasn’t been assigned to a vehicle then the user has the option to assign the deposit to a vehicle at this point), the customer will also have the ability to reprint the deposit.
To begin the process of recording a new deposit against a CRM record, complete the Deposit Information section. This is visible on the bottom left hand side of the screen.
Date: The date field defaults automatically to todays date and cannot be changed.
Notes: Enter notes as applicable – Usually in a format agreed with the accounts department on site.
Payment Method: Select a payment type from the dropdown menu.
Value: Enter the value of the receipt.
VM Branch: Should default automatically but can be changed if required.
Once all of these fields have been completed with the information required, select the “Next” option to record the deposit on the system. The system automatically prompts the user to print two copies of a receipt – one to be retained by the customer and the other to be retained by the site.