
The Contact Diary is a way that any users who have it enabled within User Admin, to manage their personal schedule of customer contacts. Users can create appointments from the Contact Diary for themselves or for one of their colleagues. Multiple future contacts can be set and the customers defined based on their purchasing cycle.
Each customer contact is recorded and all contacts can be viewed via the CRM Reporting functionality, which is discussed in detail in this guide. The Contact Diary also displays entries from the Vehicle Contact Plan. Diaries will operate across multiple sales departments, and will thereby allow business leaders to be passed contacts from all sales prospects.
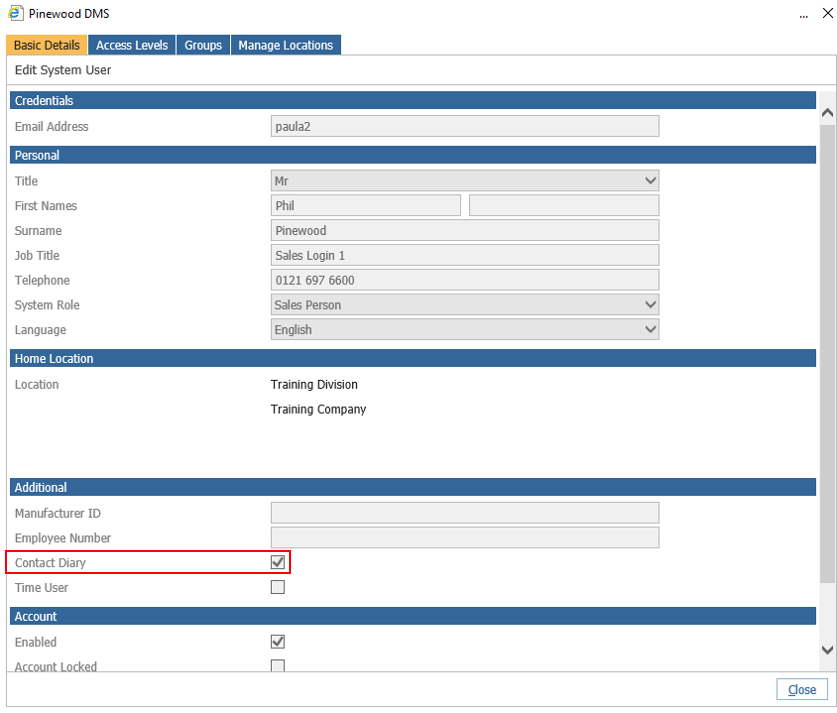
A diary may be enabled for a user within the individual user admin screen. Ticking the Contact Diary option will allow future contacts to be created for a customer record for that user. When creating users, the Contact Diary flag is ticked by default. For the user to able to view their own contact diary they should be set at branch level in the company structure.
To access the Contact Diary, make the following selections from the left hand menu.
CRM > Contact Diary
Selecting this option from the menu then displays the diary for the logged in user. The screen displays as below and is split into three main sections.
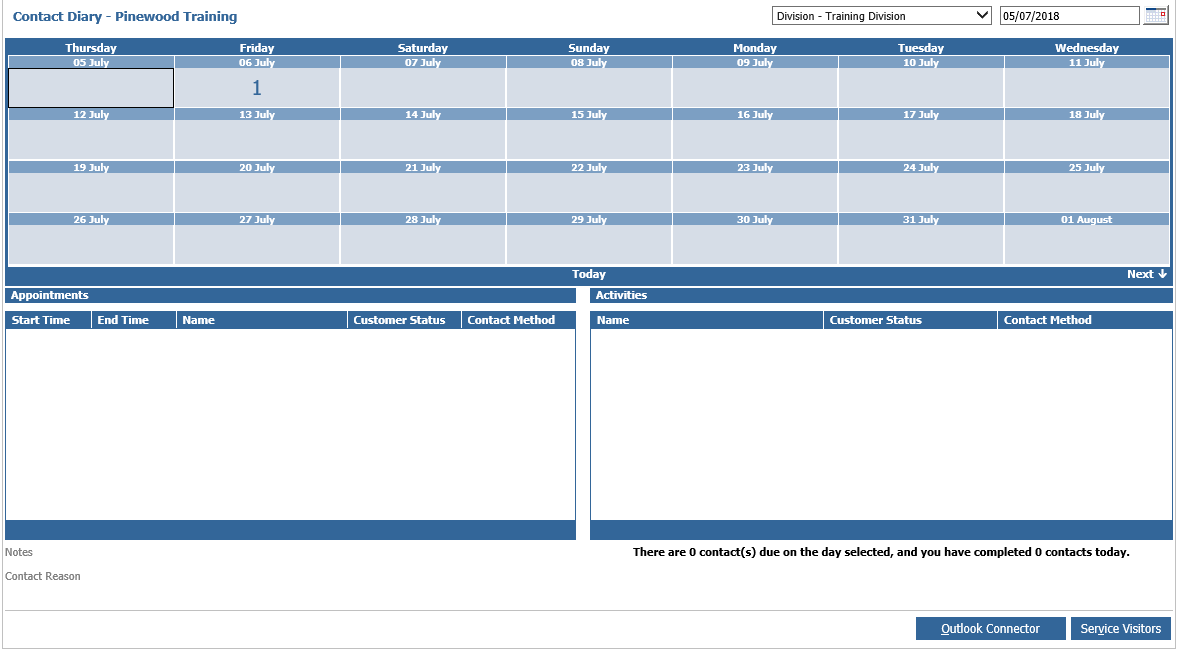
The section at the top of the screen displays a four week summary of contacts for the user. Each day is represented by a square within the grid – the numbers within each square display the number of contacts due on the selected date. The system automatically defaults to display the contents of today’s date, highlighted in black as shown below.

The bottom of the screen is split into two sections, displaying Appointments and Activities for the day selected from the grid at the top of the screen. The user can view appointments or activities for an alternative date by selecting it from the grid with a single click.
The date appearing in a darker colour is the date for which the appointments and activities are displayed as below.
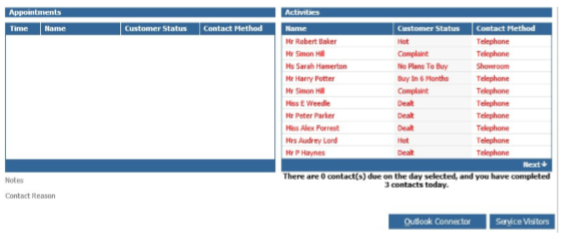
Appointments are displayed on the left hand side of the screen and are defined by the system as a contact against which a time has been specified. These usually include activities such as Handovers and Demos. Activities are defined as contacts which are not time specific, and are displayed on the right hand side of the screen. In the example above, the activities displayed in red are all overdue – activities due for the first time on the date specified appear in black. In all cases, the Customer Name is displayed along with the Customer Status and the Contact Type required for the scheduled contact. In the case of appointments, the agreed time for the appointment is also displayed. It is worth remembering that an Appointment that is not updated and thus moves to overdue will appear as an overdue Activity, as the time specified is no longer applicable.
Where an internet enquiry has been received from the XML feed, it will display as an Appointment in blue – the time shown on the screen will be the time requested when the Internet enquiry was made. These entries will only appear on the contact diary of the internet default salesperson – defined within the CRM parameters.
Hovering the mouse over the line for an activity or an appointment displays the notes and contact reason stored against the future contact in the ‘Notes’ section at the bottom left hand side of the screen.
The “Service Visitors” option can be selected to allow the user to view CRM records for customers that are due to visit the service department on the date selected. Only customers that are attached to the user for a future contact will be displayed. When this option is selected, a new window is opened as shown below.
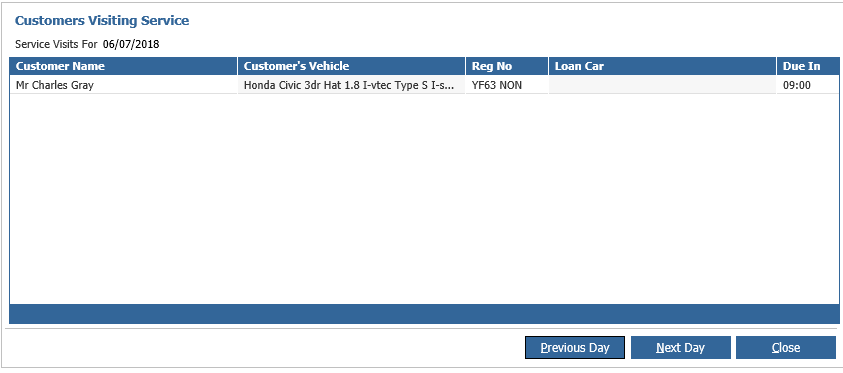
The Customer Name, their vehicle detail and Registration Number is displayed, along with the detail of any loan car supplied by the Workshop department. The time of the booking is also displayed. The options for ‘Previous Day’ or ‘Next Day’ can be used to move the display backwards or forwards in time. CRM Records for the customers displayed on this screen can also be accessed via a double click on the appropriate line. This is intended to offer the sales team further opportunities for contact with Aftersales customers and can be reviewed as part of the daily contact process. Customers with bookings involving a collection and delivery are automatically excluded from this list. The ‘Close Window’ option is used to exit this window.