
The Allocate Cash option is used to match off entries. Due to the receipting processes from within the Cashbook, this option is most commonly used to tidy outstanding invoices and credit notes that match off. The Cashbook process can be found in the Cashbook Processing section of this guide.
Enter the required sales ledger account and select ‘Search’. The account is displayed. The account code, name, current balance and account status are displayed. Select ‘Accept’ to proceed to the allocate cash routine, if incorrect select ‘Cancel’ to return to the search page.
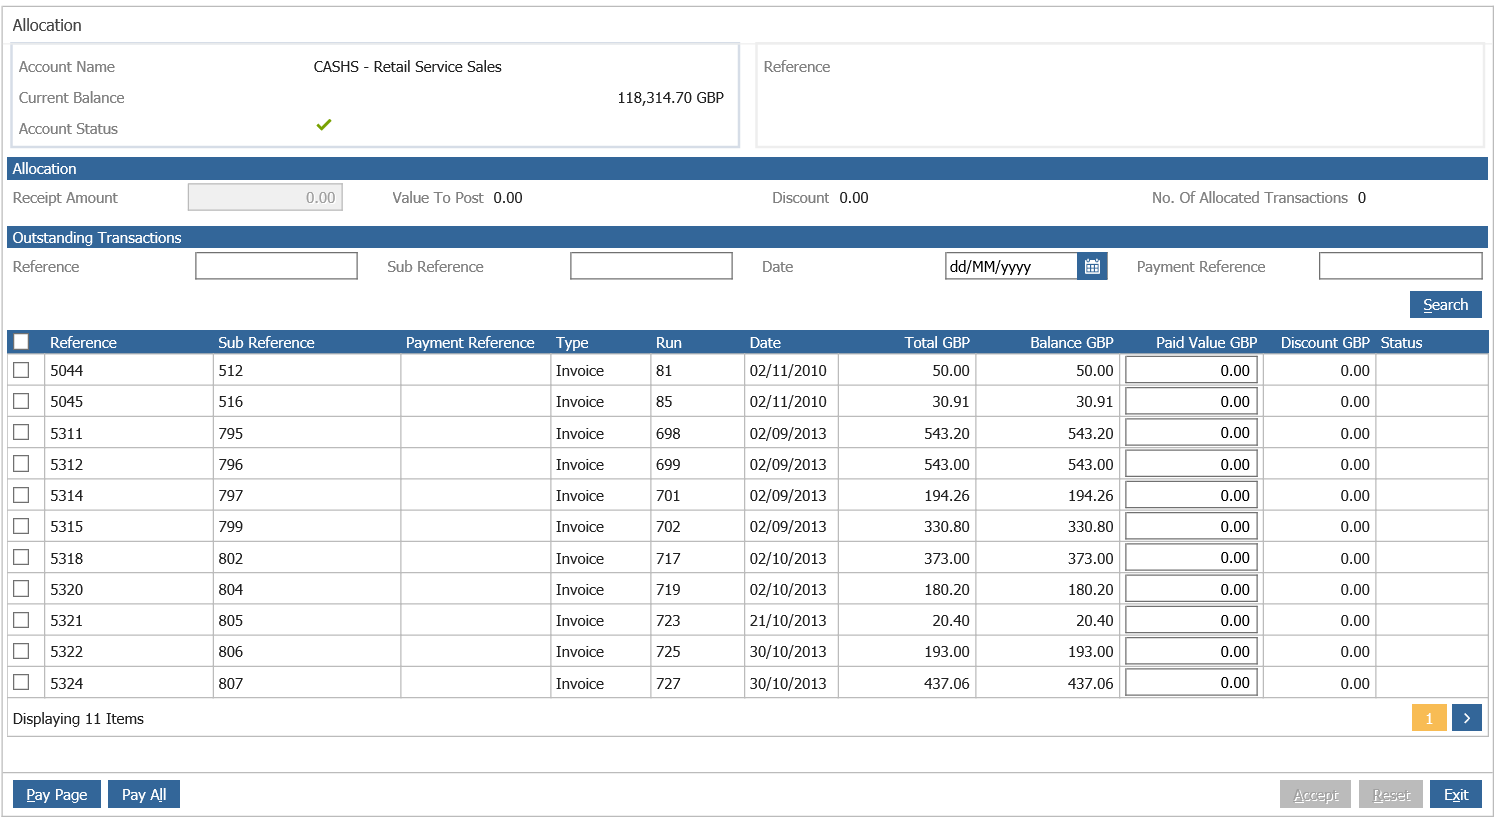
The transactions posted to the account are all displayed in the lower section of the screen. The search fields ‘Date’, ‘Reference’ and Sub Reference’ available on the right hand side of the screen that can be used to narrow down the transactions displayed in the lower section.
To begin allocating the transactions, hover the mouse over the transaction to be allocated. In the scenario shown above, there is an invoice and a credit entry to be allocated against each other.
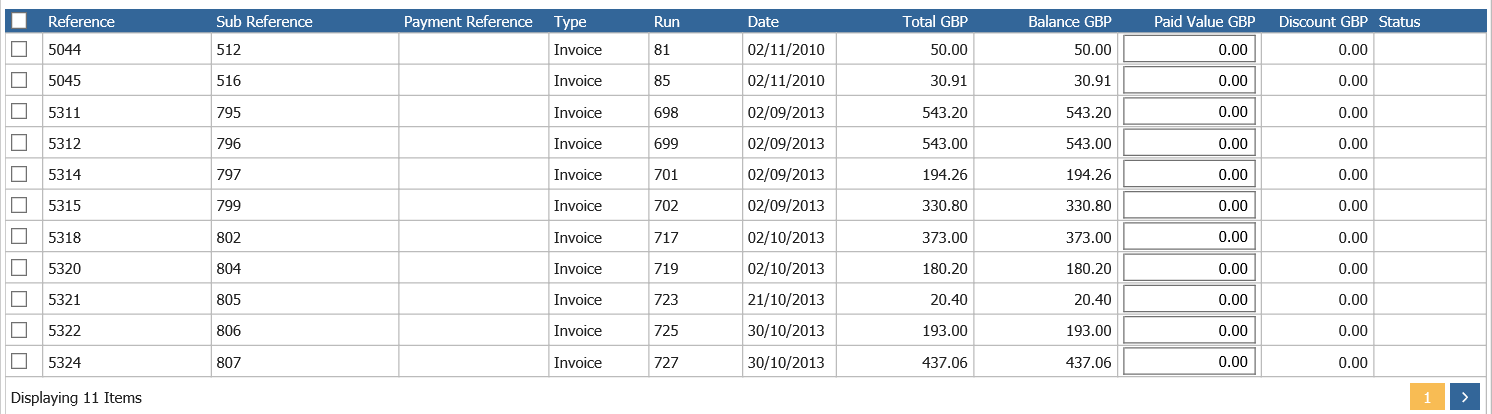
Click on the tick box to allocate the invoice. The ‘Paid Value’ column is populated and the word ‘Complete’ is displayed on the right hand side of the transaction line.
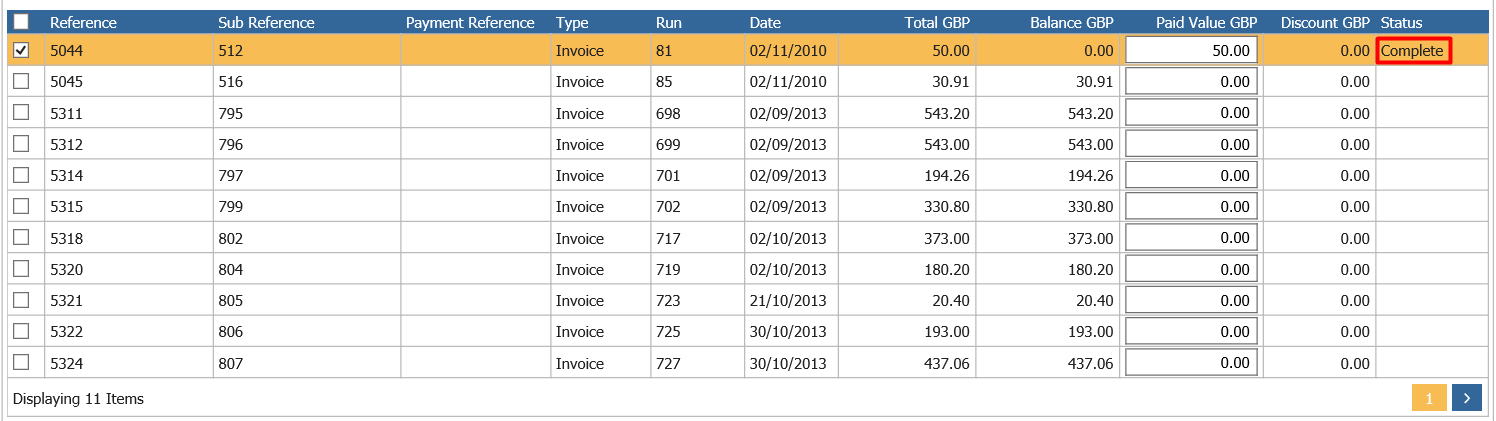
Select the transaction line for the credit note in exactly the same way.
The ‘Paid Value’ field is populated with the value of the credit note and the word ‘Alloc’ is displayed on the right hand side of the screen.
If an invoice or credit note is selected in error, click on the blue triangle on the right hand side of the line and click ‘Yes’ in the pop up box to cancel the allocation.
If a number of transactions have been incorrectly allocated, select the ‘Reset’ option to effectively undo the entire allocation exercise completed so far. In the event that an entire page or the entire account require allocation, the options at the bottom of the screen labelled ‘Pay Page’ and ‘Pay All’ can be used – although these options are more commonly selected during the Sales Ledger Receipt routine from the Cashbook.
Once the two lines have been successfully allocated, the ‘Value to Post’ field within the Receipt Details section of the screen should display a 0.00 balance. If this is not the case, the difference will need to be written off to the write off code specified in the Accounting Group – subject to its value being lower than the value specified in the Sales Ledger Parameters (discussed earlier in the guide):
Select ‘Accept’ to complete the process.
Whilst allocating items it is possible to exit out of the screen and not lose the allocations already done so far. Click on the Exit option and this will go back to the Allocate Cash enquiry screen. When this account is accessed again via the Allocate Cash option, the transactions previously flagged as Paid/Allocated will still be flagged to enable continuation of the allocations.