Click on ‘New’, the tabs at the top will move to the ‘Master Account’ tab. Input the master account number to be used.
Account numbers can be constructed using the following format – the first three letters of the account name followed by two digits that can increase sequentially with each new account created. Following this logic, a sales ledger account created for Pinewood would be ‘PIN01’. An additional sales ledger account for a company named ‘Pinewood' would be ‘PIN02’ and so on. Use of this format allows for accounts to be easily sorted into alphabetical order by the various reporting options and allows them to be easily located within the system.
Each sales ledger account number acts as a unique identifier and as a result the system will not allow multiple accounts with the same account number.
Complete the Account Name and Address fields as shown below – a postcode lookup facility is available from this screen to allow for increased speed of input and accuracy.
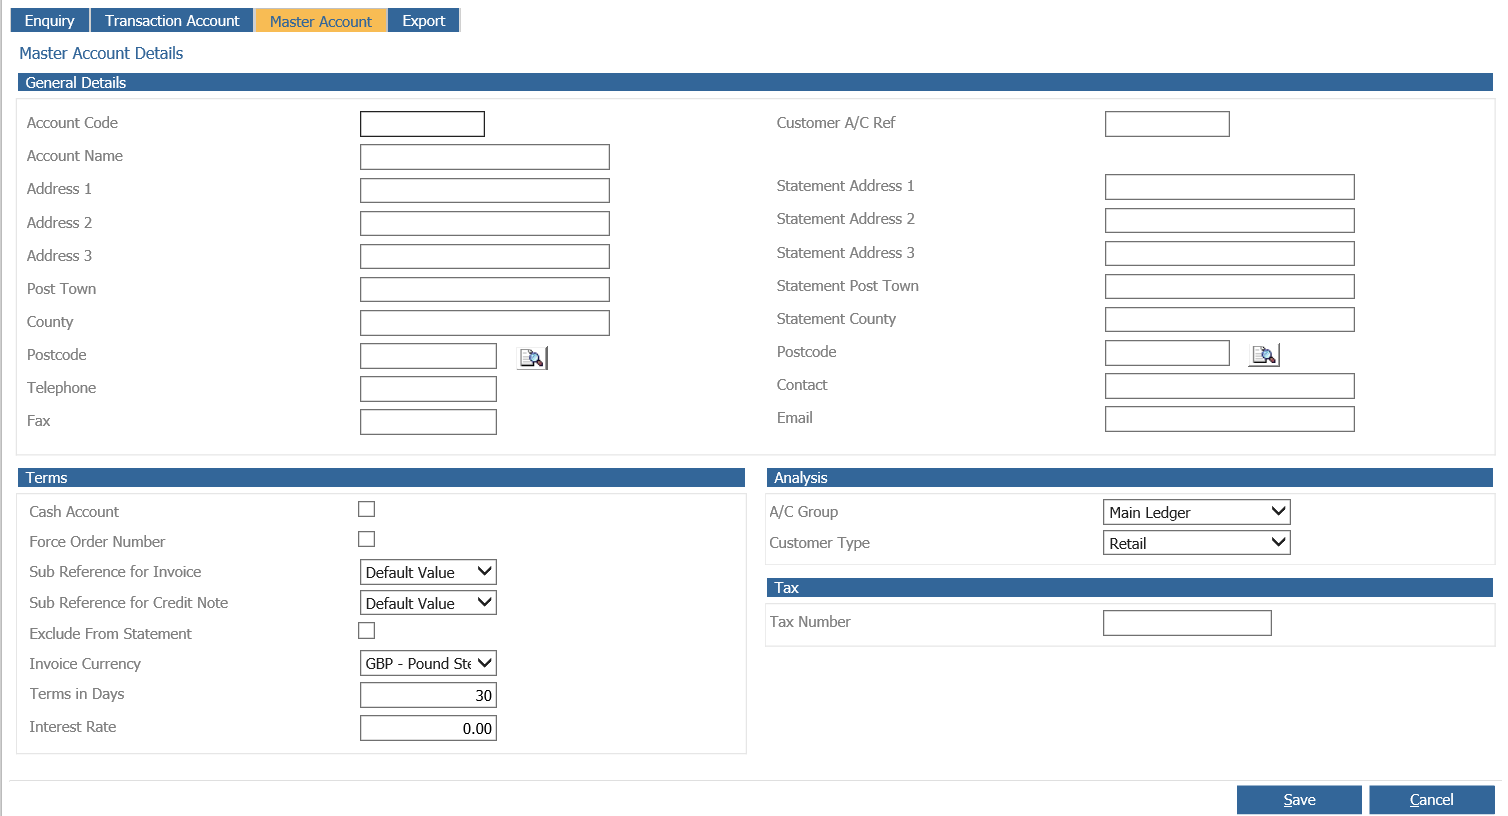
Complete the ‘Terms’ section on the bottom left hand side of the screen:
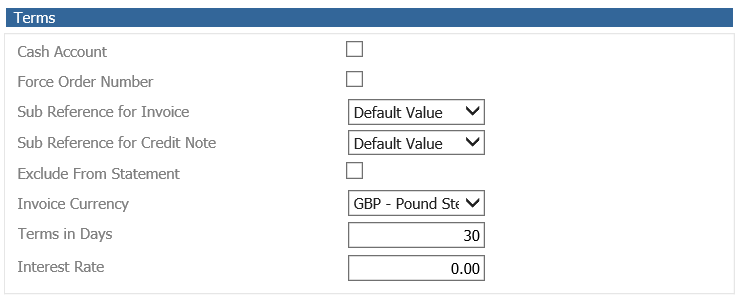
Cash Account - If the account is a cash account, click the box to place a tick in it. This forces the payment to be taken at the point of raising the invoice.
Force Order Number - If the ‘Force Order Number’ option is applied, you will be prompted to enter an order number prior to being able to raise an invoice onto the account. This is often used for insurance or leasing companies, or customers who stipulate that no payment will be made unless an order number is quoted.
Order Number as Sub Reference – If an order number has been entered during the parts invoice screen or on the workshop job/invoice screen and this field is ticked on the sales ledger master account details, the order number will appear as a sub reference on the sales ledger enquiry/statement.
Exclude From Statement - Used to automatically suppress the account from a statement run. This option can be selected for cash accounts and any other accounts where a statement is not required.
Invoice Currency – Select from the drop down menu, usually sterling.
Terms In Days - the default value entered in Sales Ledger Parameters will automatically appear here, but can be overwritten if required.
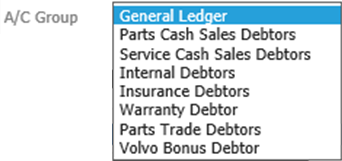
The ‘Analysis’ section controls the Accounting Group and Customer Type applied to the sales ledger account:

The default accounting group (specified within the sales ledger parameters) will automatically populate this field or change this by selecting an alternative Accounting Group as required.
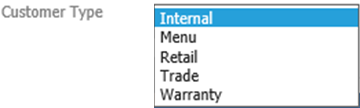
Select the Customer Type from the drop down menu. This selection dictates the nominal codes that are used by the system when a workshop or parts invoice is raised against the sales ledger account.
The ‘Tax’ section on the bottom right hand side of the screen can be completed:

Enter the VAT number of the customer if required. Click on ‘Save’ to confirm the entries.
The system automatically opens the following window:-
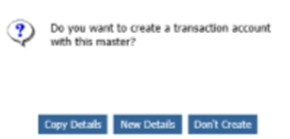
Click on ‘Copy Details’ to automatically populate the address details and account code on the Transaction Account screen with the same details as those entered on the Master Account.
Alternatively, the ‘New Details’ option can be selected to allow a different name and address to be entered against the transaction account.
If the ‘Don’t Create’ option is selected, the master account is stored but with no transaction account created. Because all processing takes place at Transaction level, this option should only be selected with this fact in mind.