This option is used to raise Sundry (or Miscellaneous) invoices. These are invoices produced directly from the Sales ledger and therefore not produced via any of the other system modules. These invoices will ignore the credit limit set against the account. To begin the process of raising a sundry invoice or credit note, select Sundry Posting from within Processing.
Select the sales ledger account against which the sundry invoice or credit note is to be raised.
When the sales ledger account has been identified, it is displayed in the lower section of the screen and can be accessed via a double click. If a recognised account code is entered on this screen, the system automatically proceeds to the next screen:
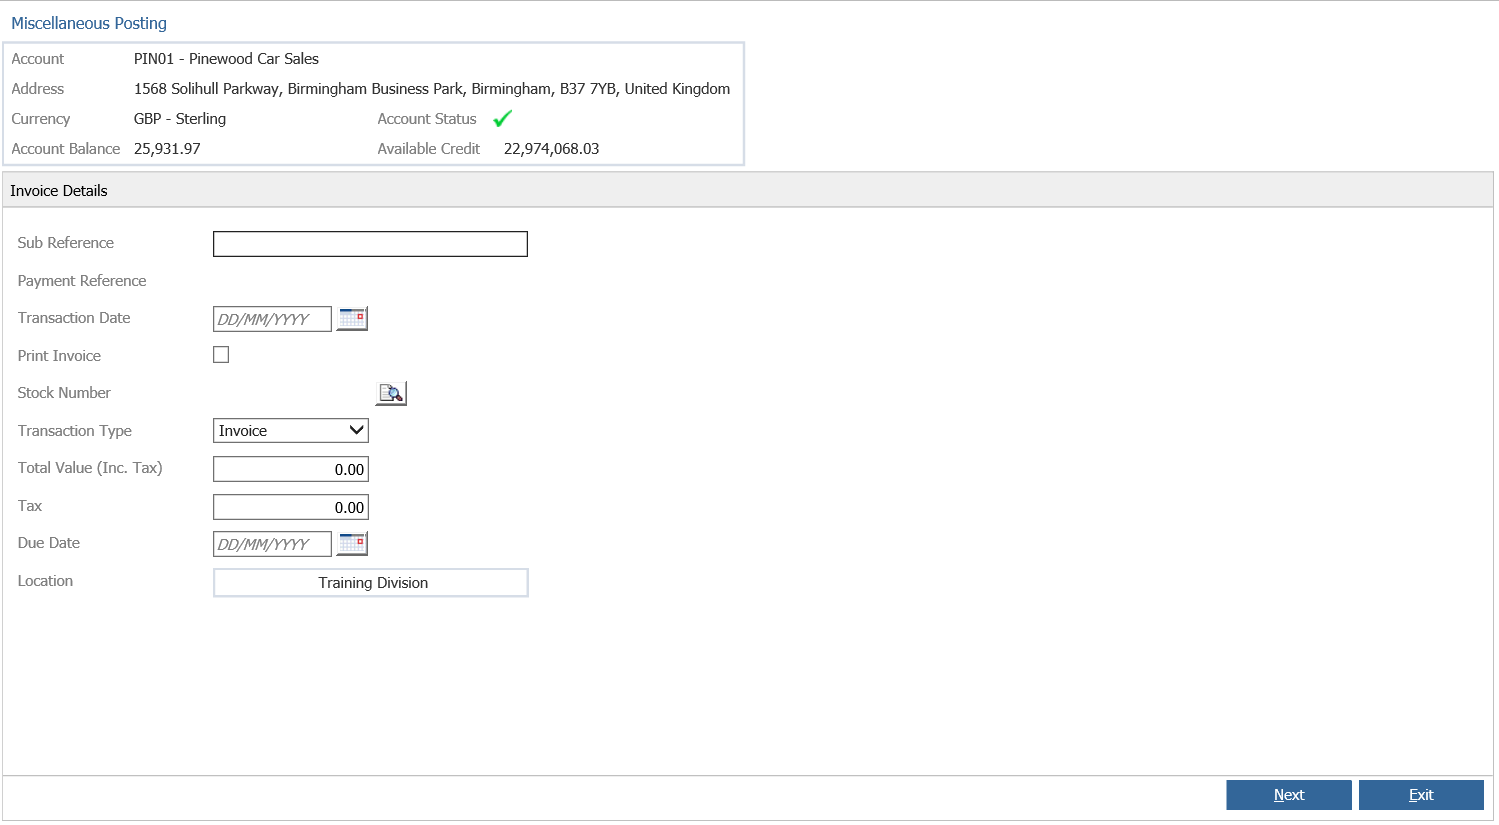
The detail of the sales ledger account is displayed on the top left hand side of the screen, along with the current account balance and the available credit. The fields on the right hand side of the screen are completed as follows:-
Sub Reference – Key in a sub reference to be displayed against the transaction. The system will automatically allocate an invoice number from the sales ledger parameters.
Date – Enter the transaction date.
Print Invoice – If the invoice is to be printed out tick this field.
Stock Number – Enter a vehicle stock number to link the postings to the stock card nominal postings tab.
Transaction – Select the transaction type from the drop down menu as required – either Invoice or Credit Note.
Total Value (Inc Tax) – Enter the total value for the transaction including the VAT.
Tax – This will be populated if the Automatic Tax Calculation option has been selected in the Sales Ledger Parameters. If the Tax amount is blank or incorrect it can be overkeyed here. The value is automatically posted to the Output VAT nominal code.
Narrative – Any text entered here will be displayed against the transaction on the sales ledger enquiry screen.
Select ‘Accept’ to proceed to the next step of the process. The bottom section of the screen is updated to display the detail below:
The Pre-VAT (goods) value of the invoice must be coded, either into a nominal ledger code, or into a Product Group. This can be selected using the drop down menu that appears below the ‘Posting Type’ header.
The next step is to specify the nominal code to post the value to. It is possible to code the remaining value to multiple nominal codes if required. Click under the ‘Nominal’ field and key in the nominal code required. If the code is not required it can be searched for by double clicking in the field and entering the nominal codes description (or partial description) and clicking on the search icon. Double click on the required nominal code to select it.
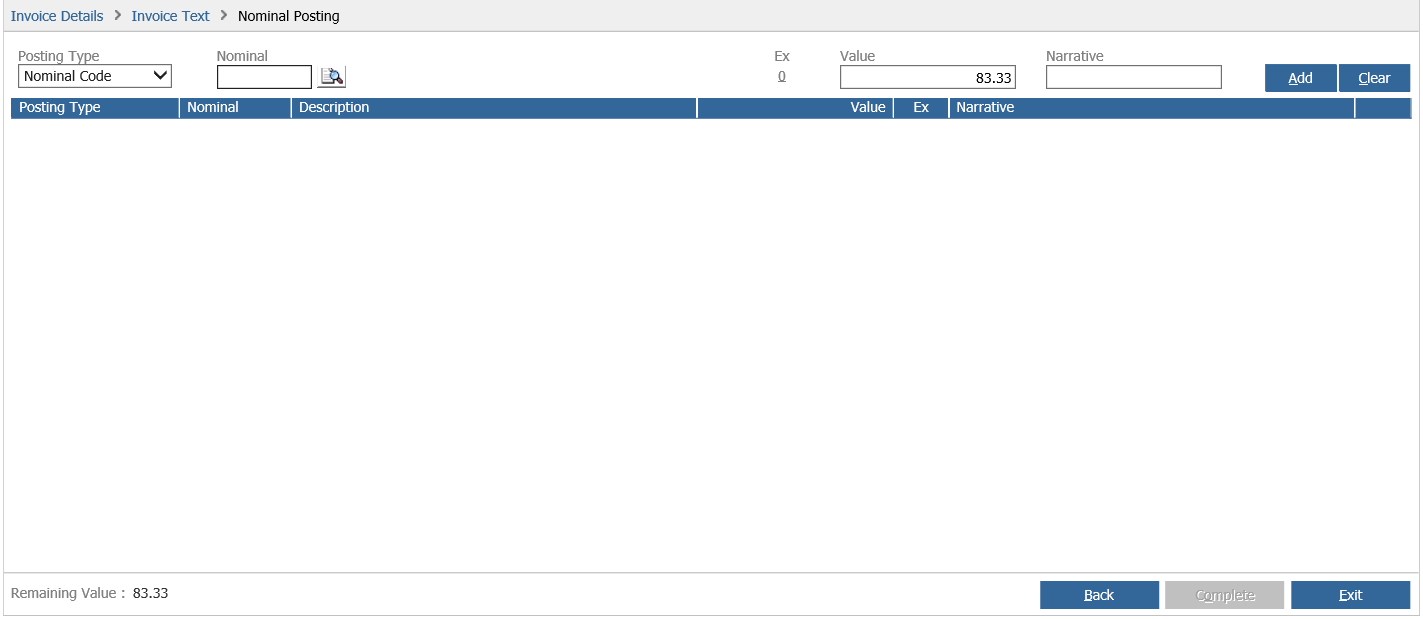
The ‘Description’ section of the posting is automatically populated with the name of the nominal code. Enter the value that is to be posted to this code.

If the value entered into this field is less than the value displayed in the ‘Remaining Value’ field at the bottom of the screen, pressing the Tab key or the Enter key on the keyboard will create a second line, allowing for another nominal code and value to be specified. If the value entered is equal to the ‘Remaining Value’ field, this field will revert to display 0.00 and the process will be allowed to continue. This process cannot be completed until the ‘Remaining Value’ field is displaying 0.00 – meaning that the total goods value of the invoice has been accounted for within the nominal ledger.
Select the ‘Accept’ option to complete this section of the process. The ‘Remove Posting’ option can be used to remove nominal postings if incorrect codes have been selected – the ‘Start Again’ option can be used to return to the very beginning of this process if required.
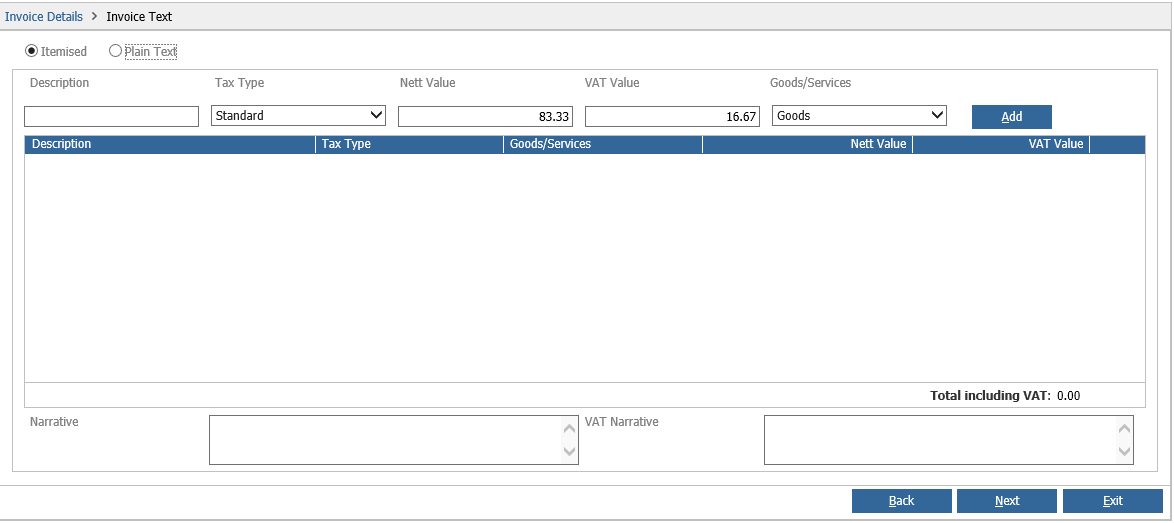
If the ‘Print Invoice’ option is ticked when the Posting Details section is completed, a screen appears for completion that dictates the appearance of the physical invoice to be produced by the system.


The text of the invoice is entered into the ‘Description’ field, followed by the Value into the ‘Value’ field. Invoices can be set to be printed in either an itemised style as shown above or in a Plain Text format by selecting the relevant radio button at the bottom of the window. Select the ‘Accept’ option. The prompt to print the invoice will then appear.
If the ‘Print Invoice’ option within the ‘Posting Details’ section is not ticked, this section of the process is skipped.
A final screen appears, displaying the Run Number of the transaction.
Further sundry postings can be raised by searching for additional Sales Ledger accounts. If no further invoices are to be raised, select the ‘Complete Posting’ option to finish the process. The option to print a daybook then appears. The daybook can be printed if required.