Once the process of creating letters through the Aftersales Diary, Sales contact plans or
mailshot process has been completed, the letters are available for printing via the ‘Letters for
Printing’ tab at the top of the Letters section.
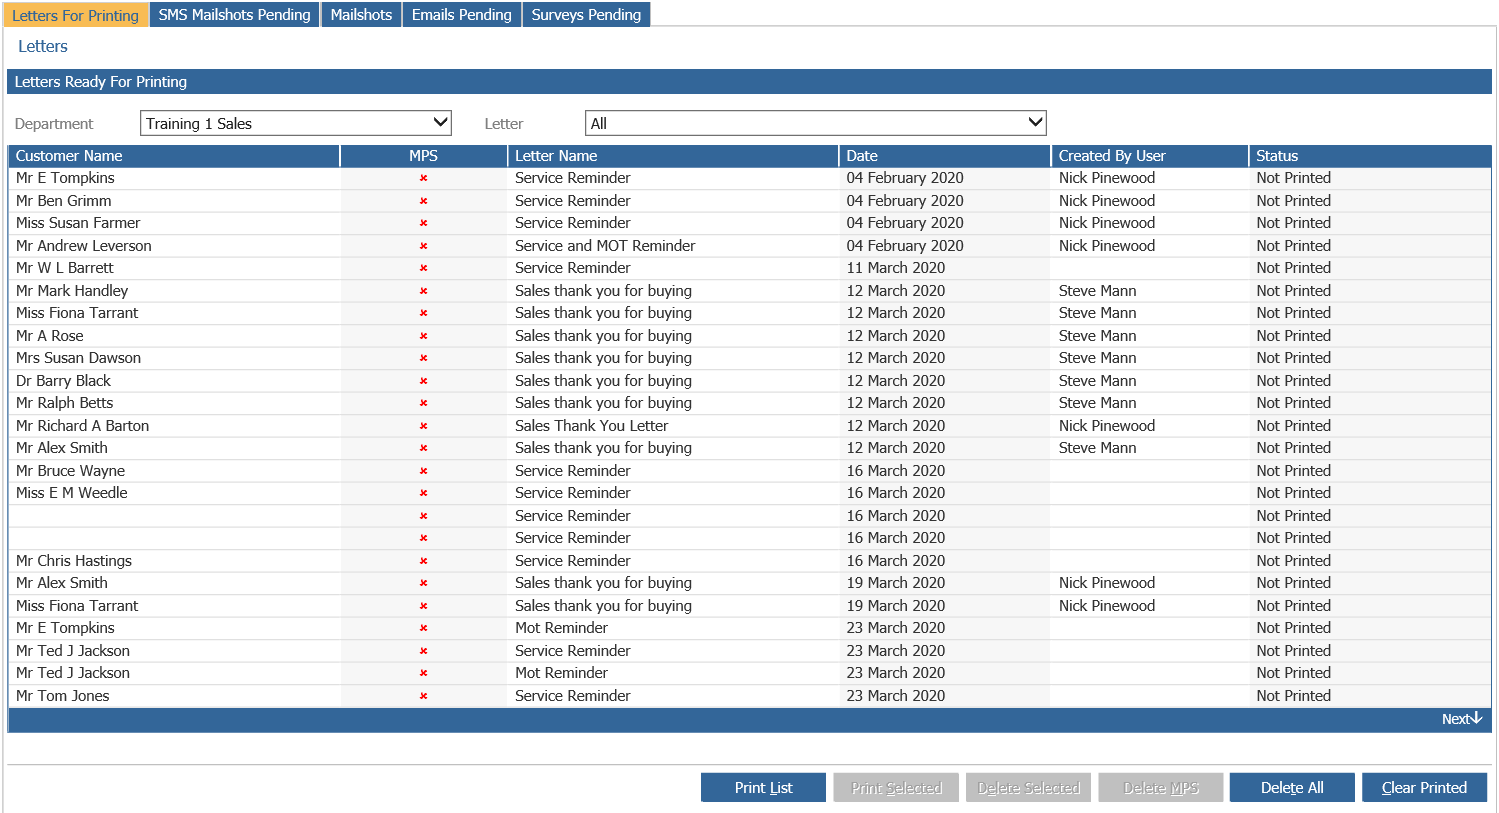
When this screen is accessed (via CRM > Processing > Letters), the default settings within the system cause all outstanding unprinted letters to be displayed. The filters at the top of the screen can be used to narrow the letters displayed for printing to a particular department or a particular letter – thus allowing different users to be responsible for printing different letters on the library.
When the filters are applied, the letters displayed are automatically filtered to display only the
combinations selected.
Relevant information for each record that the Mailshot applies to is displayed on the screen –
the customer name, whether or not the record is flagged as MPS, the name of the letter to be
sent and the date, along with the name of the system user who flagged the letter and the letter
status (Printed or Not Printed).
The various options across the bottom of the screen can be used to print or cleanse data as
required.
To print all of the letters displayed, select the “Print List” option from the bottom of the screen.
If an individual letter requires printing or deleting, single click on the line for the "Print Selected" or "Delete Selected" buttons.
The “Delete MPS” option can be used to delete any records flagged as MPS, whilst the “Delete
All” option is used to delete all letters on the Letters for printing list.
The final option, “Clear Printed” is used to delete all printed letters from the list, thereby leaving only unprinted letters visible. This option also automatically appears at the end of the process used for printing letters.
If “Print List” or “Print Selected” is selected, the following process is used to print the letters
out ready for posting to customers. As soon as either of these options is chosen, a system
prompt appears regarding the contact history of the CRM records to which letters are to be
sent:
Select ‘Yes’ to place an entry on the contact history of each CRM record, or ‘No’ to prevent the
entries from being made.
Pinewood DMS next prompts the user to download an Excel .csv file and a Word document in the
same manner as when the letter was first created on the system.
Save both of the files to the desktop and then minimise Pinewood DMS and then open the Word
document. The process remains the same as the one described in the ‘Creating a New Letter’
section.
Once the word document has opened, select the icon below from the mail merge toolbar:
When this option is selected, a window opens allowing the user to specify which merge letters
to create – if ‘OK’ is selected, all merge letters will be created in one go. Alternatively, records
can be created in more manageable batches by using the ‘From’ and ‘to’ fields to select the
records to be merged.
Once ‘OK’ is selected, the mail merge process is completed within Word. The letters are
completed with fields from Pinewood DMS in the place where merge fields were specified when the
letter was first created and saved to the system.
Once the letters have been printed as required, close Word and return to Pinewood DMS. The system will then prompt the user to clear the printed letters.
Select ‘Yes’ to clear the printed letters from the ‘Letters for Printing’ list.