
The Contact Report is used to provide team managers with an overview of the diaries of their
team members. To access the report, select the option for ‘Contact Report’ from the left hand
menu. Once this option has been selected, the screen displays as shown below.
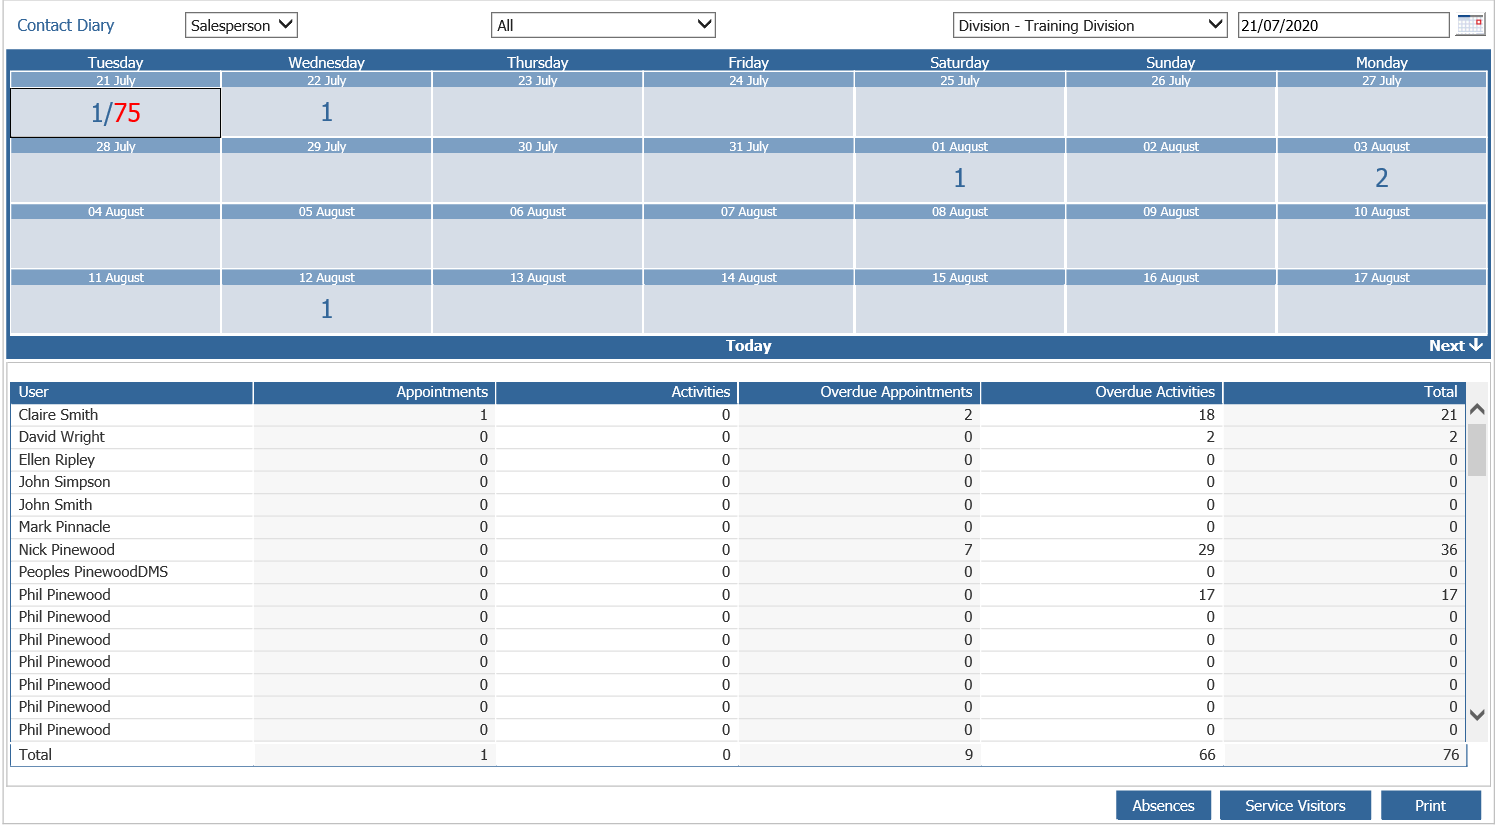
The screen automatically defaults to display an overview of all members of the sales team, and
all contacts due or overdue on today’s date. The grid at the top of the screen displays contacts
scheduled for the next four calendar weeks.
The section at the bottom of the screen presents the user with a summary of the total number
of activities and appointments relating to each sales team member on the date specified.
The ‘Salesperson’ drop down menu at the top of the screen can be used to narrow the
information displayed on the report to the contacts for a single salesperson. To select a
salesperson, click on the menu and select the salesperson required.
Once an individual salesperson has been selected, the screen displays their contact diary – the
appearance of the screen is similar to the screen that the salesperson would see when they
access their own Contact Diary with the exception of three buttons at the bottom of the screen.
These are “Add Absences, Absences, Service Visitors and Transfer contacts”.

In this way, sales team managers can view and amend the salespersons scheduled contacts and holidays. These screens can be used to update contacts due or schedule future customer contacts for a particular sales team member if required – these processes are described in detail in the CRM Processing section of this guide.
The second drop down menu at the top of the screen allows the contact report to display the
consolidated diaries for either an individual branch or across divisions to show diary contacts
of sales team members who work across multiple branches within the business.
It is possible to view the contacts scheduled for a future date by selecting the date required from
the grid at the top of the screen. The date selected should display with a black border around
the outside of the box – the information breaking down the contacts due at the bottom of the
screen will reflect the date specified:
The final options on this report are located at the bottom of the screen.
The “Absences” option can be selected to display any recorded absences from the business by
any member of the sales team on any highlighted day in the diary. Absences can be recorded
as three main types; Holidays, Training or Sickness.
By selecting “Absences” whilst viewing the default Contact Report displaying all Salespeople,
the option to view the team’s absence across a date range specified is available as below.
By selecting an individual Salesperson from the Contact Report, any absence from the business
can be recorded as Holiday, Training or Sickness.
The default Contact Report will also highlight any absences due to be taken from the business
on any selected day in a different font colour as shown on the next page.
A salesperson highlighted in Red indicates that they are due to be absent on the day and have
customer contacts scheduled within their diary that day.
A salesperson highlighted in Green indicates that they are due to be absent on the selected
day but do not have any planned customer contacts in their diary for that day.
To record any absence from the business into the Contact Report, select the Salesperson from
the drop down menu at the top of the report.
Select “Add Absences” from the bottom of the Contact Report. A pop up box displays allowing
absence to be recorded in the form of Holidays, Sickness or Training.
Click “Add” at the bottom of the pop up box to display a further box allowing the duration of the
absence to be recorded as shown on the next page. Half day absences can also be recorded
by checking the relevant boxes for either AM or PM holidays.
Clicking the “Absences” button will display a popup that by changing the date ranges will display
any holiday or absences recorded for the salesperson.
The Service Visitors option can be selected at the bottom of the Contact Report. This allows
the sales team leaders to view workshop bookings for the selected day for any customers who
have a planned future contact with a member of the sales team. Select the “Service Visitors”
option from the bottom of the screen to open a new window.
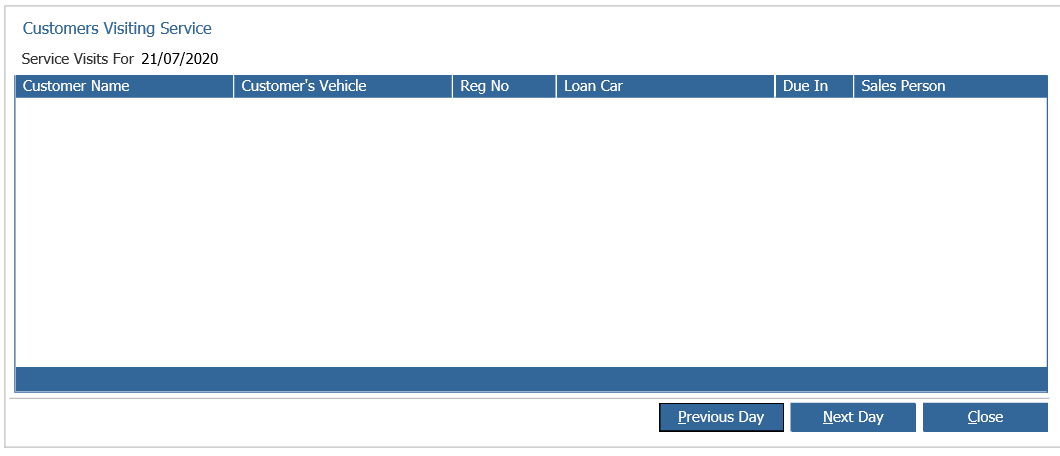
The customer and vehicle are displayed, along with the registration number of the vehicle, any
loan car assigned to the customer by the workshop, the time the customer is due in and the
name of the Sales Person with whom a next contact is planned. The previous day’s booking
and the bookings scheduled for the next day can both be viewed using the options at the bottom
of the window. The CRM record for the customer can be accessed via a double click on the
appropriate line. This functionality is designed to enable sales team members to easily view
workshop bookings for prospecting purposes.
The “Transfer Contacts” enables the team leader to transfer contacts from one team member
to either individual sales team members or multiple sales team members. Selecting the transfer
contacts button displays the below screen.
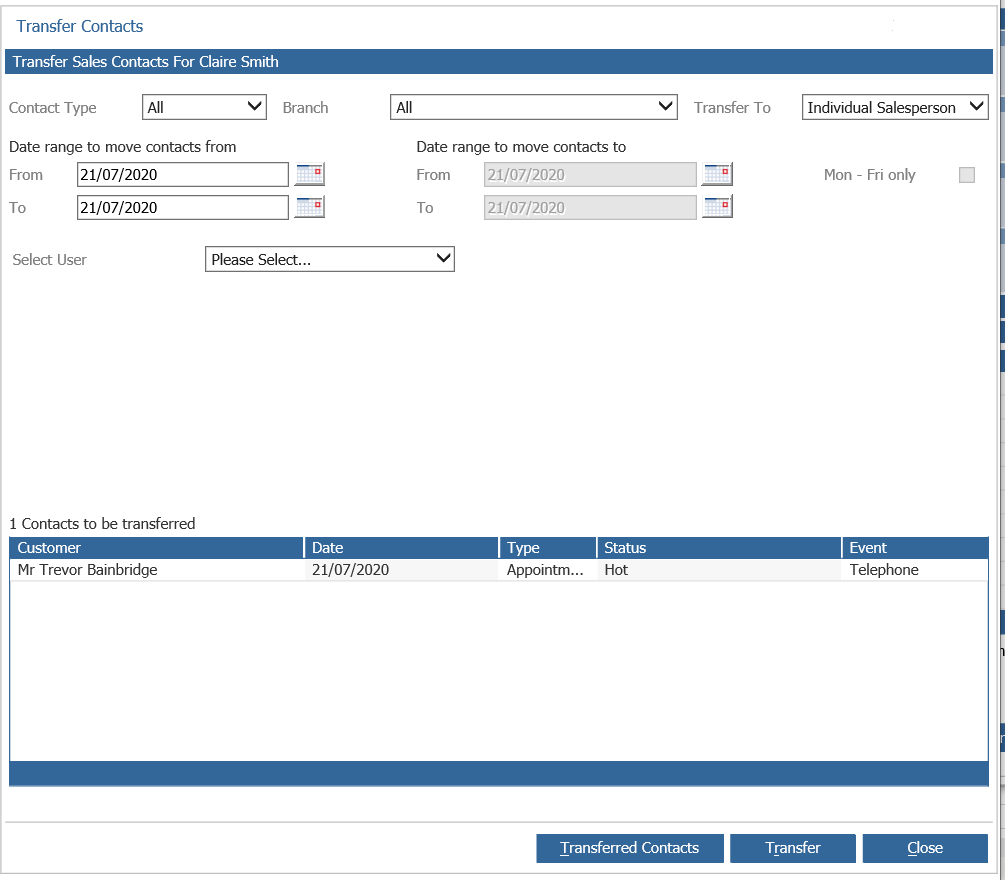
Select the way in which the contacts are transferred by using the filters at the top of the screen.
Contact Type All, Appointments or Activity
Branch Which branch are the contacts related to
Transfer to Individual Salesperson, Multiple salesperson or Any User
Select the date from which you wish to transfer the selected contacts from and then enter the
date you wish to transfer these to. It is worth noting that transferring overdue contacts the
original date of the contact is required to be able to transfer the contact.
When the details have been entered a list of contacts will appear at the bottom of the screen
click the “Transfer Contacts” button. When the contacts have been transferred these can be
viewed by clicking the “Transferred Contacts button.
When a user is disabled through ‘User Administration’, a warning is displayed that identifies
any active future contacts that exist for that user. The warning will let you continue;
however provide you with the opportunity to transfer the contact ahead of disabling the
user. The warning message will display all active future contacts, and separate those that
are Overdue.