
The Contacts tab is the area of the CRM module parameters that controls all of the contact
reasons and contact methods available for selection by a contact diary user when customer
contact is being recorded on the system. Prior to system use, this section of the system must
be completed to enable this functionality.
Contact Reasons
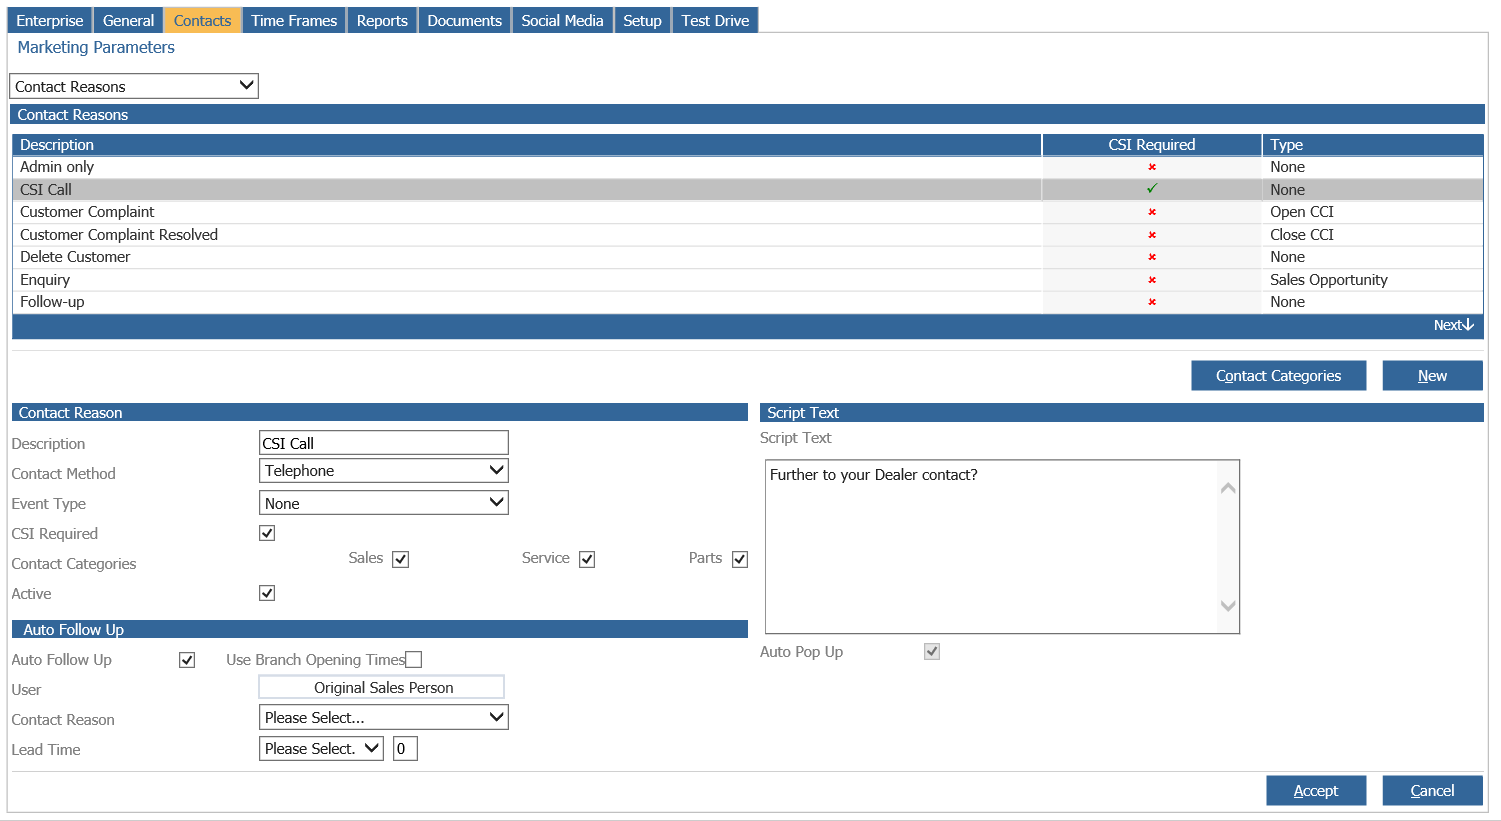
To begin creating contact reasons, select the “New” option on the right hand side of the screen.
When this option is selected, the lower section of the screen opens to display two main
sections. The first section relates to the detail of the Contact Reason to be created.
Enter a description for the contact reason – this will display in a drop down menu on the contact
page of any CRM record. Once this has been completed, select a Contact Method from the
drop down menu, the contact can also be flagged as an Event Type for example a sales
opportunity.
The contact methods available for selection are hard coded into the system and cannot be changed by users. Place a tick in the Opportunity field to enable the contact type to generate a sales opportunity. This will then produce entries into the Sales Opportunities report.
The Sales Opportunities report is discussed in more detail within the CRM Reporting section
of the guide. Selecting this option also impacts upon the process of recording the contact via
the Contact History tab within the CRM record – extra pages are displayed asking the user to
record any sales activities that have been completed and an introduction source leading to the
specific contact.
If the contact being created is a CSI contact, select the CSI required tick box.
The Script Text field is currently not in use as a parameter, and can be left blank.
Contact Reasons can be linked into department Contact Categories which are hard coded into
the system as Sales, Service or Parts. Each Contact Reason can be linked into one or more
categories.
Contact Categories can also be linked via the “Contact categories” button. When selected, a
pop up window displays the list of Contact Reasons in the Options Available for Selection list.
Selecting a Contact category from the drop down list in the title bar, pops up a list of the contact
reasons that have already been associated to the category within the selected options.
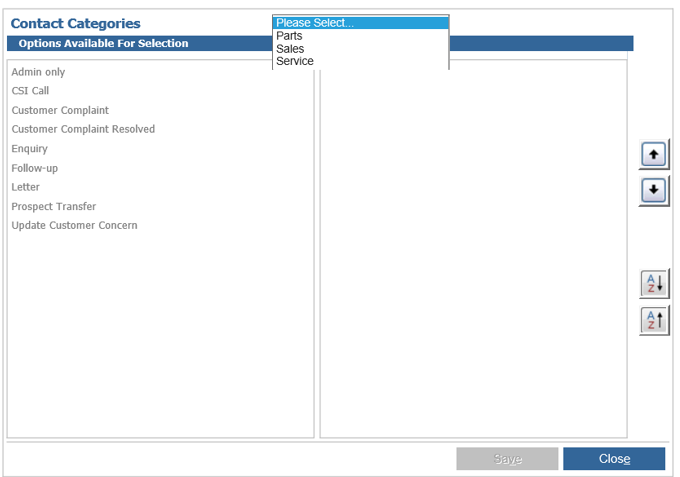
Double click on items in the ‘Available’ list to add them to the ‘Selected’ list, and vice versa to
remove them.
The buttons to the right of the ‘Selected’ list can be used to determine the order in which
contact reasons will be presented in the contact history dropdown. The A to Z buttons will
alphabetically sort the contact reasons in ascending/descending order.
The up/down arrow buttons can be used to create a custom list. Highlight contact reasons in the
‘Selected’ list and use the arrow buttons to position them as required.
Contact Reasons, once created, cannot be deleted. However, the Active field can be used to
deactivate contact reasons that are no longer required:

Activation of the ‘Auto Follow Up’ flag can be used to ensure the creation of follow up contacts
for certain contact methods. Once the field has been checked as below, the drop down menus underneath it become mandatory:
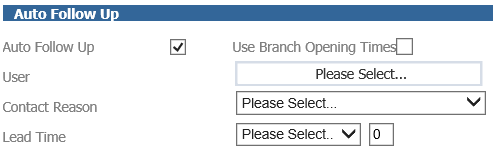
Select a Sales Person to whom the follow up contact should be allocated – this enables for one
particular member of dealership staff to oversee all occurrences of one particular type of
contact if required. The contact reason should also be completed – this defaults onto the
contact diary. The lead time is used to inform the system of how long after the contact update
to activate the follow up. Select the time frame from the drop down menu and complete the
value in the field.
Depending what is added to this field, the follow up contact will flag into the contact diary a number of days, weeks or months after the original contact has been updated.
The Use Branch Opening Times field prevents appointments from being booked when the
branch is closed. In the event of follow up appointments falling at a time when the branch is
closed, the next available time will be used.
Once amendments have been made or new contact reasons created as required, select the
“Accept” option to confirm the changes made. Contact reasons created display in the top
section of the screen as displayed below:
Double click on any of the descriptions to make amendments if required. A green tick in the
CSI required column or the Opportunity column indicates that the contact reason is enabled as
a CSI contact or an opportunity.
It is important during the setup of the CRM module to consider the contact reasons to be set
as Opportunities, CCI or CSI required – the reports that these entries drive will not be populated
with relevant information unless these parameters are set meaningfully in the first instance.