
To create a survey to be emailed to customers go to CRM > Parameters > Communications > Surveys where you will see the following screen:
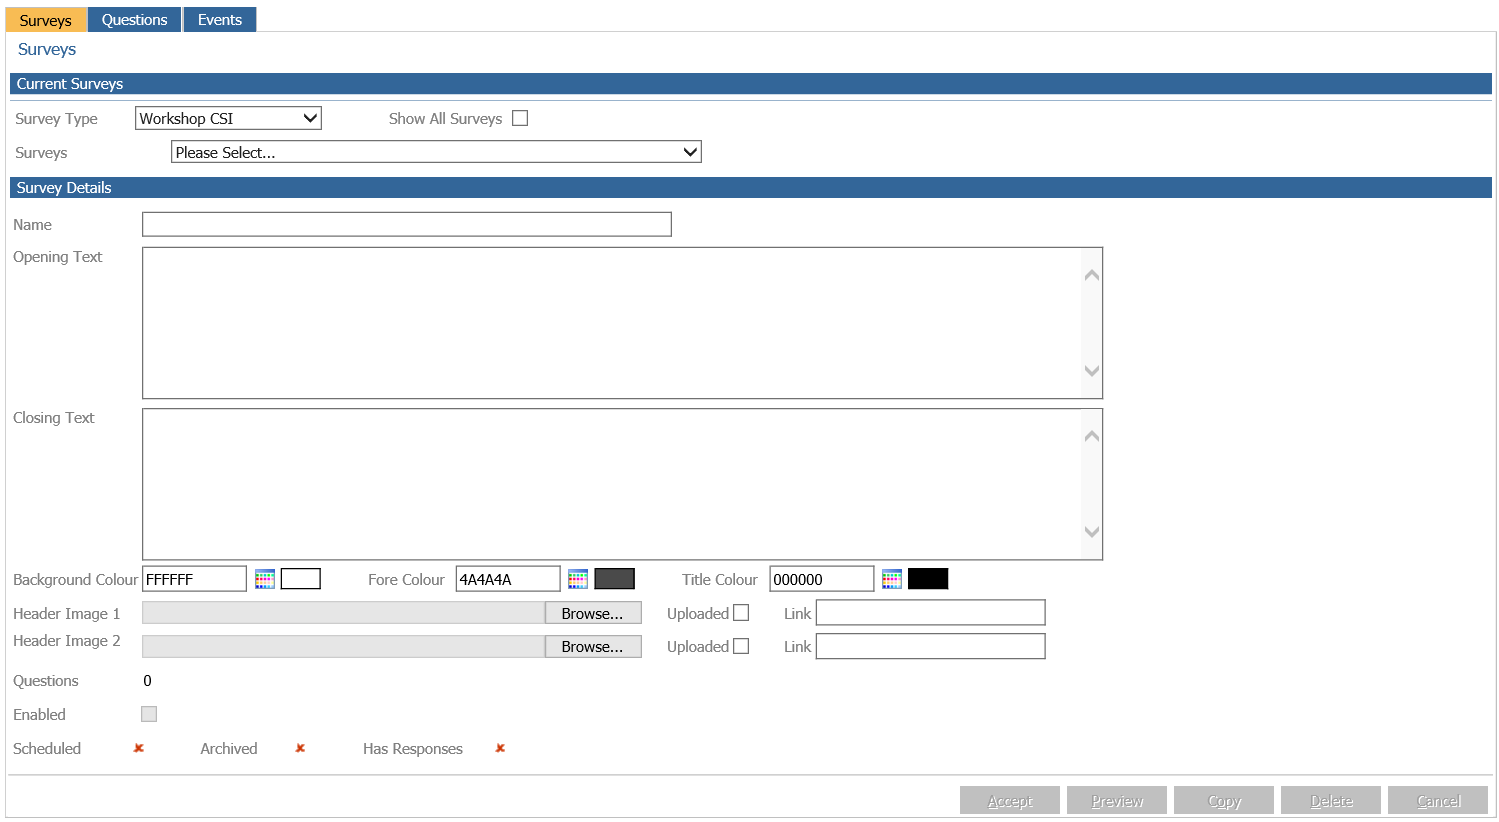
Within the Current Surveys sections you have the option to select a survey type:
- Contact Plan Survey: These are surveys that are sent to customers who have purchased a vehicle
- Customer Concern: These are surveys that are sent to customers who have raised a complaint for whatever reason
- Workshop CSI: These are surveys that are sent out to customers that after a workshop invoice has been completed
Once you have selected a survey type you can select a survey from the drop down box labelled 'Surveys'. From here you have the option to either review a previously created survey or create a new survey.
The 'Show All Surveys' tick box, if flagged will include all surveys within the survey type that might be hidden.
Within the Survey Details section enter in a name for the survey which will be used to identify the survey within the system. The 'Opening Text' is the first text that is seen by the customer whilst the 'Closing Text' is the concluding text as well as the last text that will be seen by the customer. You also have the option to select three colours to be used within the survey:
- Background Colour: This will be the colour of the header and footer of the survey
- Fore Colour: This will be the colour of the buttons within the survey
- Title Colour: This will be the colour of the title as well as the text within the buttons of the survey
Once you have selected your colours, you also have the option to insert 2 images by using the 'Header Image 1' and 'Header Image 2' fields. To upload an image select 'Browse' which will direct you to the files on your PC allowing you to select the relevant images. These images will be displayed at the top of the survey with 'Header Image 1' being on the left hand side and 'Header Image 2' being on the right hand side. Once you have specified the images you can tick to say they have been uploaded.
The 'Questions' field will display the number of questions that are included within the survey. If you are creating a new survey, then this number will initially be set to 0. It is also worth noting that if you are creating a new survey then there will not be any scheduled or archived surveys nor will it have any responses hence, the red crosses shown at the bottom of the screen.
Once you are happy the details you have included click 'Accept' to create the survey. You also have the option to preview the survey and copy the survey. Having used the 'Copy' function this will archive the current version of our survey and create a new version of it to edit.
Questions
Having selected the 'Questions' tab you will see the following screen:
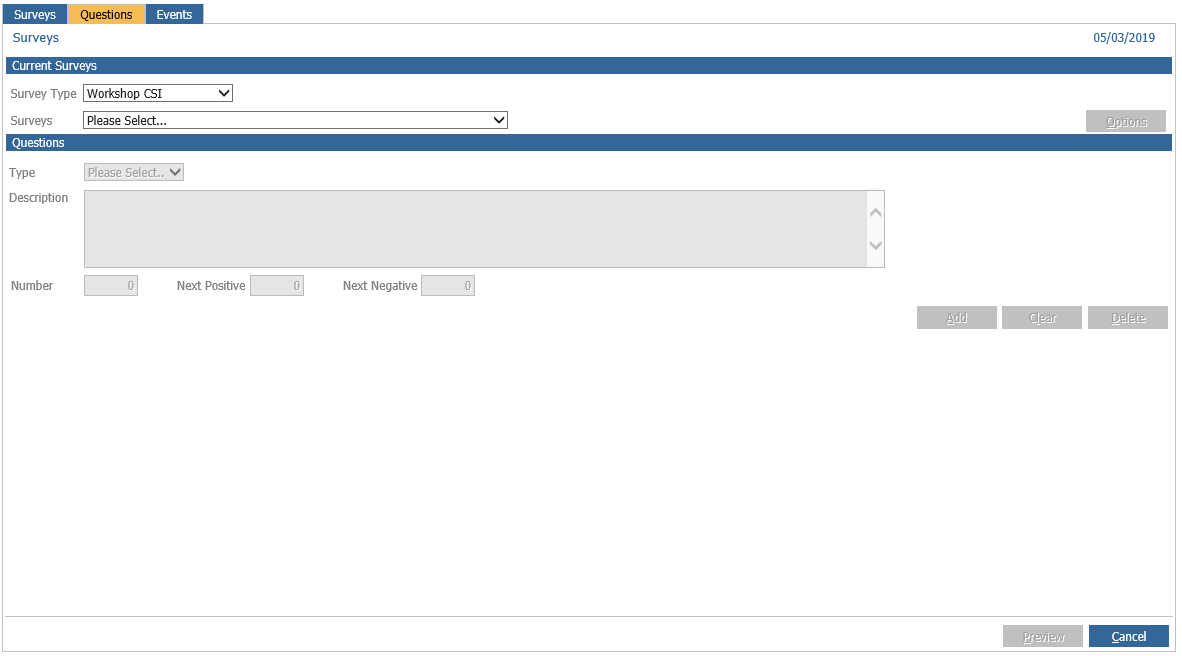
Within this tab you have the option to select the survey type and the survey within that type that you wish to view. Once you have selected the survey the options button will become available:
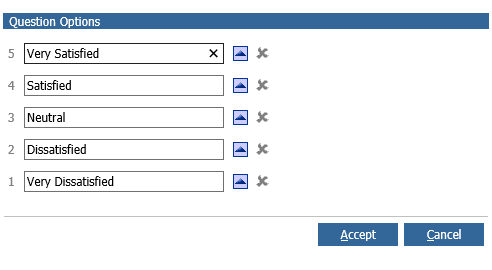
In here you will be able to view the different question options that you can change as well as the images that go against these options. By default, these images will be stars.
It is worth noting at this point, that if a survey already has responses or it has been scheduled within the system then you will not be able to change or add in any questions to the survey. This will cause everything below the 'Questions' heading to be greyed out and unamendable.
If you are creating a new survey then the screen will be displayed as below:
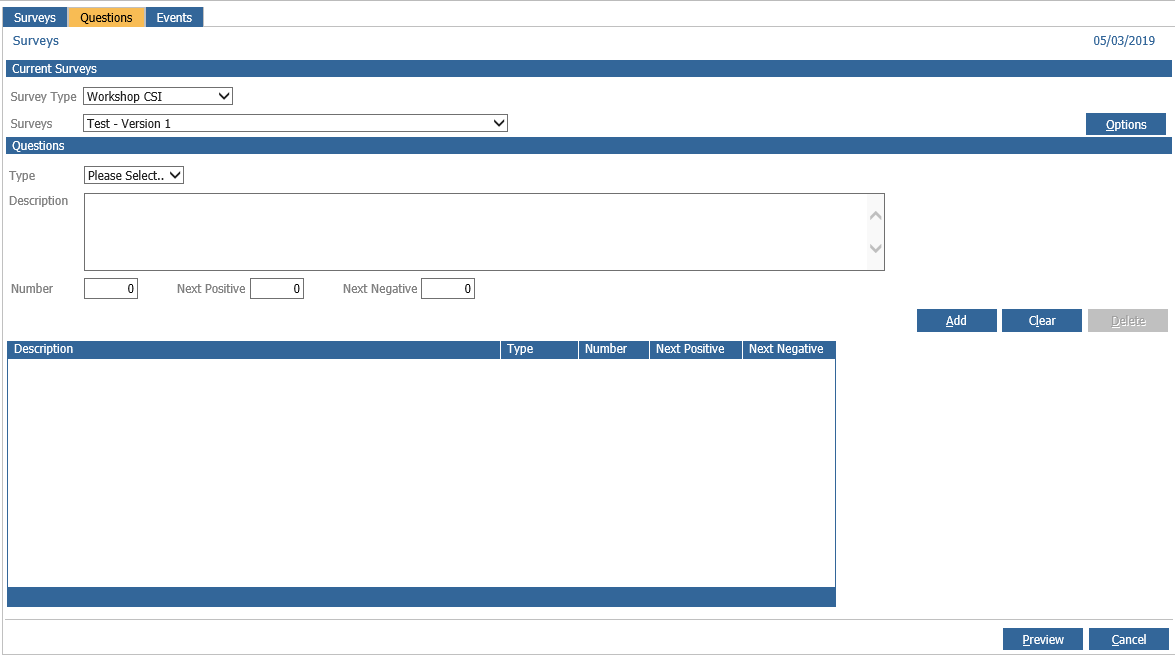
Within the 'Type' field you will have the option to choose between two different types of questions that can be asked. These include: YesNo and Rating.
The 'Description' field is where you add in the questions that the customer will be asked.
The 'Number' field is how you specify what order you want the questions to be presented in the survey starting from the lowest number upwards.
The 'Next Positive' and 'Next Negative' if used will decide which question number will follow up to the current questions depending on how the customer answers. The 'Next Positive' and 'Next Negative' values would be used to jump to what question the customer will be asked next. For example, if the customer replied with a negative answer then the survey will jump to the next negative question, if it was responded with a positive it will go to the next positive question.
Once you have added a question it will be displayed under the 'Description' heading as shown below:
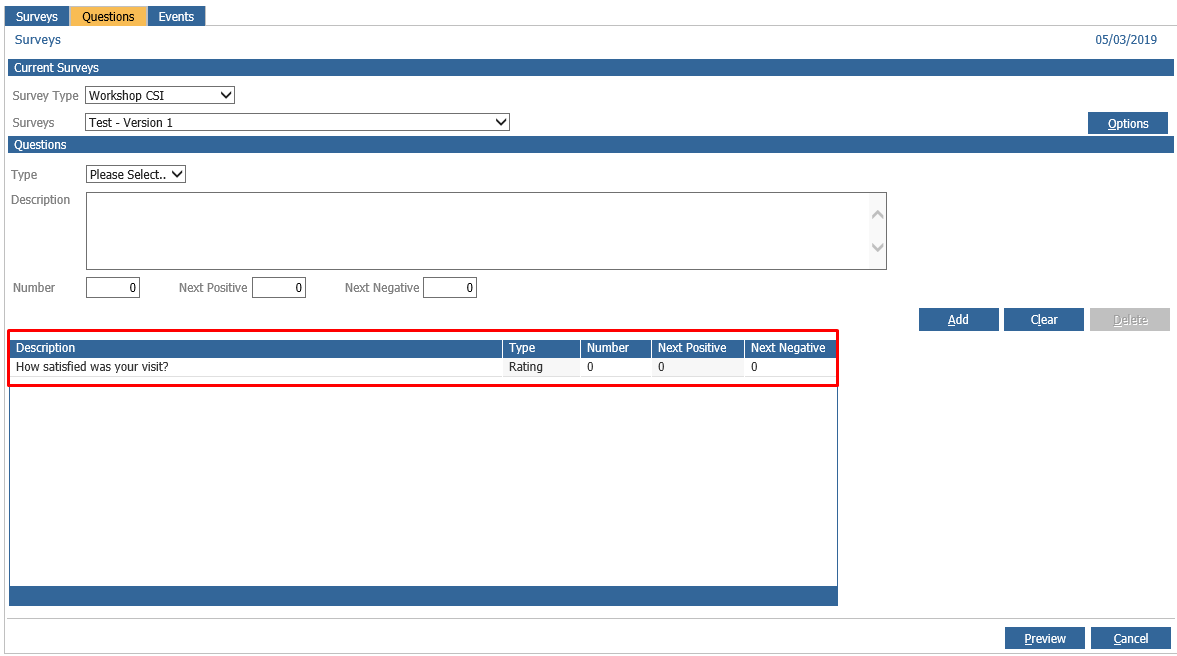
This is where you would review all your questions and their details within the survey. To delete a question, double click on the line and then click 'Delete'. Again, you have the option to preview the survey with the questions included.
Events
Once you have selected the 'Events' tab the following screen will be displayed:
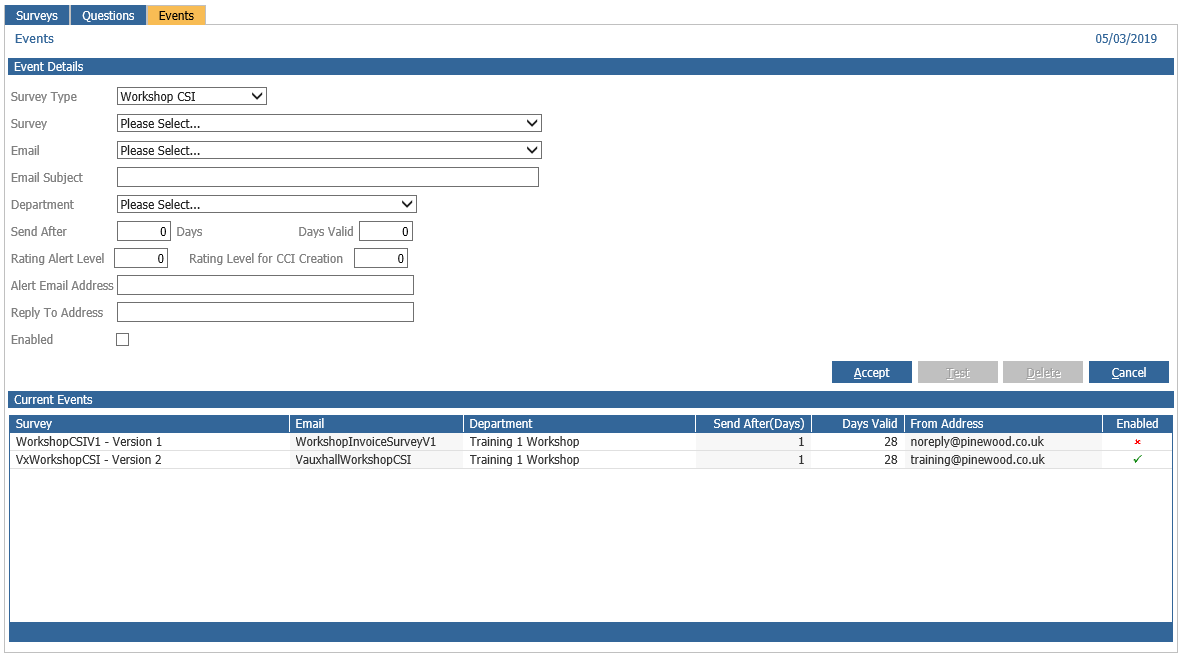
Within this tab, select the survey type and the survey that you wish to create an event for. The following fields are to be completed to create the event:
- Email: This dropdown would be used to select a previously created email where you would be able to send the survey in
- Email Subject: This is to be populated with the title of the survey
- Department: This is the department you wish to create the event for
- Send After: This is how many days after the event you wish to send the survey
- Days Valid: This is the number of days the survey is valid for
- Rating Alert Level: This is the level of rating you wish to receive an email for
- Rating Level for CCI Creation: This is the level of rating of which a customer concern will be created for
- Alert Email Address: Within here, you can specify the email address you wish to receive alerts to
- Reply To Address: In here you can enter in the email address you wish to receive the survey replies
- Enabled: Once all the relevant details are completed, you can tick to enable the event and its survey
Once you have accepted the event you will be able to double click on the event and use the 'Test' button to test the event where an email containing the survey will be sent to the destination email address.
Please Note: Other areas of the system may still require some form of set up to allow surveys to be sent out to customers such as Contact Plans within the Vehicle Parameters for those customers who have recently purchased a new or used vehicle.