Within Accounts > Purchase Ledger > Processing > Post Invoice, search the desired account;

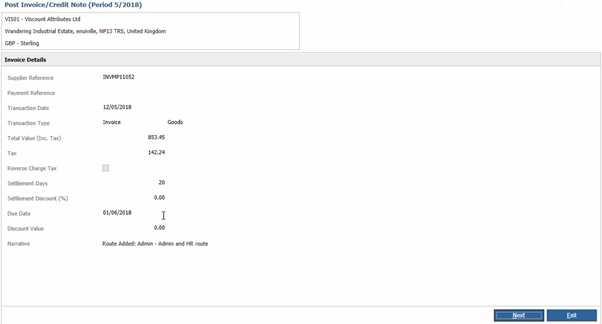
The top of the screen displays the account details to view so these can be checked if required.
Beneath you will now see the invoice details.
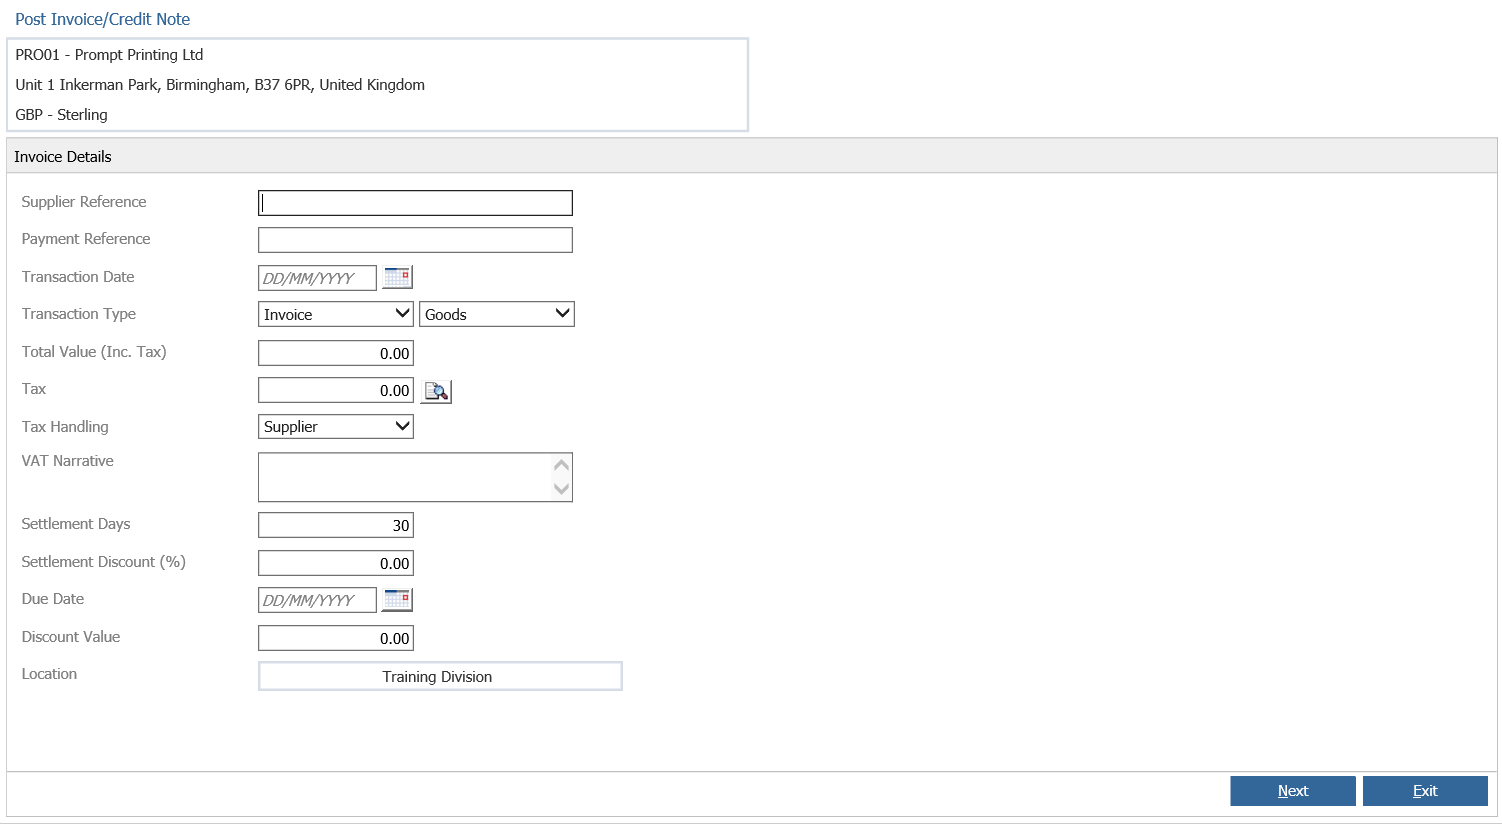
A new field has been added ‘Payment Reference’. Going forward this will be used for specific references that will be included in payment files for functions such as files being passed to banking systems to aid with automated reconciliation processes. This is currently not widely used as a field but will be a future development. The field can be filled; it is not mandatory but if populated it will then be viewable in the enquiry screens in certain places on the transaction.
If you are using the VAT reporting by tax type function, then there will be the additional fields available to view;
- Goods and Services drop down field will be available to view
- The Search icon will be visible on the Tax field
- There will be a Reverse Charge Tax tick box
If the VAT reporting by tax type function is not enabled, these fields will not be visible.
The other fields functionality remains the same as previous.
A change to be noted is that if a Supplier Reference is re-keyed and has been used previously, the below pop up will appear;
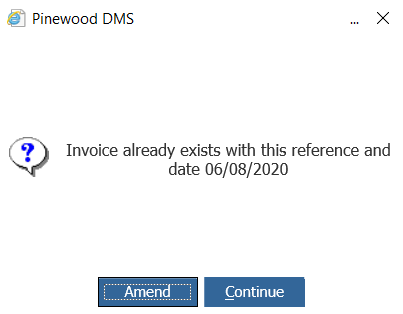
The warning will advise the Invoice already exists with the reference and the Transaction Date for this.
You are given the option to Amend the transaction or you can Continue if the reference is valid.
If an invoice has been previously logged and the same Supplier Reference is used, the pop up will prompt;
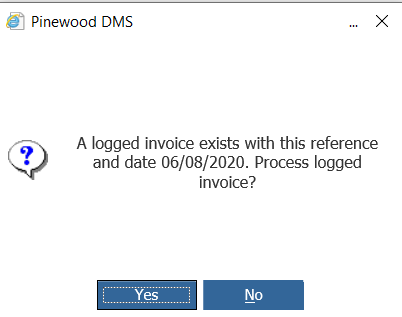
This message will state that a logged invoice exists with this reference and date. You will be given the option to process this logged invoice.
If you select Yes, the screen will populate the details previously logged. These can be checked before selecting Next to proceed.
If there are multiple invoices that are logged against any of the reference numbers, the below pop up will appear;
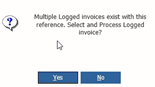
If you select yes, it will then give you the option to select the invoice you wish to process;
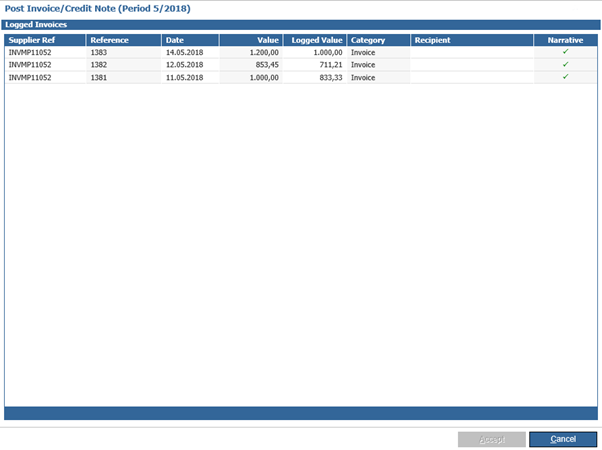
You can select any of the logged invoices where the reference that was entered was the same.
You are then able to select the required invoice and the details that were previously entered will be available on screen.
Once the on screen details are complete, you are able to select the Next button.
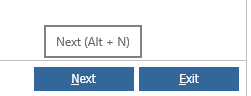
If you hover over the button, you can view the Keyboard Navigation code;
Or you are able to tab through the fields as they are filled in and then to the Next button.
Once selected you are then taken to the GRNI Selections screen.
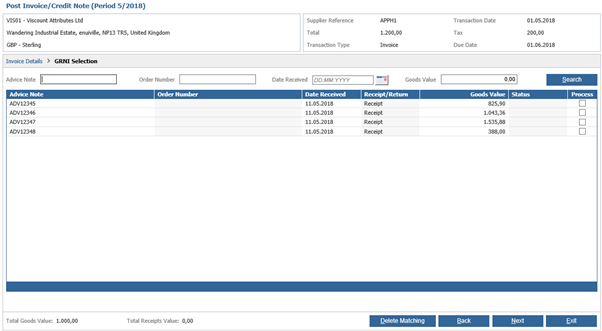
On the screen, the main details will now appear in the top right of the screen

The main body of the screen displays the GRNI selection.
You are now able to search multiple fields within this screen. You can also search using more than one fields to search which previously was not possible. A Goods Value filter has also been added, so if the value is known you can search using the value of the receipt required.

Select the required receipt to process by selecting the process tick box and select the Next button.
The same GRNI Processing screen appears as per previous processing.

This screen will work in the same way as previous.
Once Accept is selected, this will bring you back to the GRNI Selection screen.
You are able to search for another GRNI or select another GRNI to process or select Next to continue.
There is a Status column that will state when an advice note has been Processed. Initially this column will be empty. Once the Advice Note has been selected and processed, the column will update with a status of Processed.

If you were to navigate away from the GRNI Selection screen and then returns to the screen, processed GRNI entries will be visible in the list and removing entries processed in error is simply a case of unchecking that GRNI row, leaving any remaining entries in place.
If the user wishes to make amendments to a previously processed GRNI entry, then an additional GRNI entry will still need to be selected in order to trigger the GRNI processing window on navigating forward from the GRNI selections screen.
If GRNI was processed in an earlier session and that data was saved when exiting, this this is retained and reloaded on processing an invoice on the account as was the case previously.
There is also the option to see the steps taken within the screen;

These can be selected, so you are able to go back if required by selecting the previous step.
You can also navigate using the Back and Next Buttons to move between the screens.
Once you go back, you are able to amend the values if required i.e. there was a mistype. You can then select Next to proceed back to the next page, and the values will be updated.
It will however have taken into consideration the GRNI selected if one had been previously selected to process.
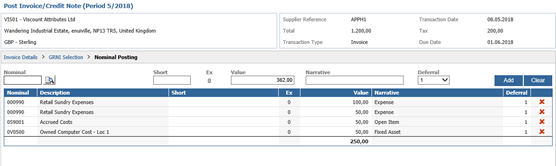
On the Nominal Posting screen;
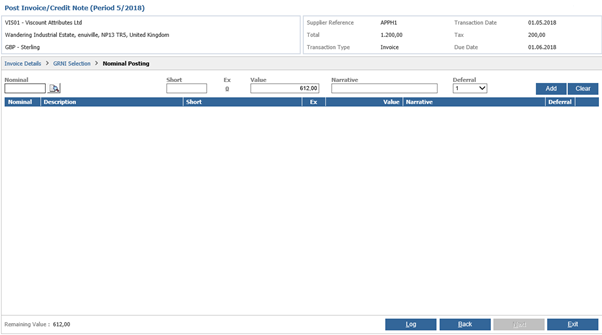
Search the required Nominal Code within the Nominal box, if you are using the Short code function please use the Short field to search. If short codes are not enabled, this box will not be visible.
The remaining value is then defaulted into the Value field. This can be amended if necessary.
A Narrative can be added to describe what the posting is applied to.
Please Note; The Deferral field will only be visible if the applicable set up is completed, this is detailed in the section Purchase Ledger – Deferred Expense Invoices of this document.

You will see that the Remaining Value at the bottom of the screen then updates.
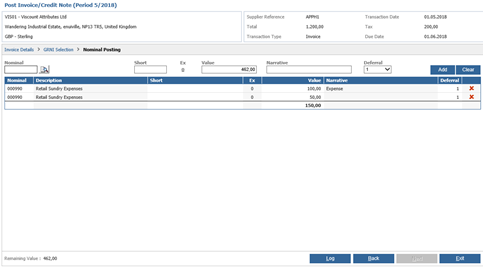
You are also able to remove the row if required by selecting the  icon.
icon.
Once selected, it will prompt to confirm that you are sure you wish to delete the row added.
If Yes is selected, the row will then be removed and the values will be updated.
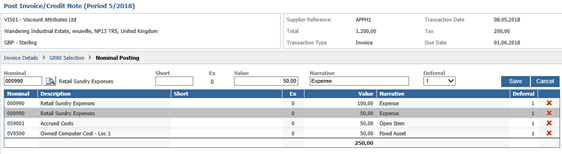
The = key function can still be used so if you would like to repeat the Nominal Code and Narrative information, then using the = key in the Nominal field will populate these.
On each next row to be posted, the remaining value will always be populated in the Value field. This can be amended and selecting the Add button will add an another row.
Open Items and Fixed Assets
A change has been made to the way Open Items and Fixed Assets are now entered.
If we were to key in an Open Item Nominal Code, add the required value and applicable Narrative select the Add button and the Allocate Posting To Open Item window will appear.
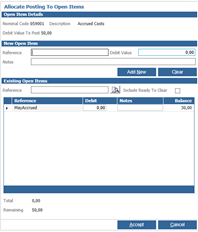
Previously this section of the process would not appear until the end of the posting. This will now prevent several different pop ups at the end of the process if several postings had been made to Open Item Codes. It can now be completed as you are coding each row.
Within this window, you are then able to create a new open item or use an existing open item reference.
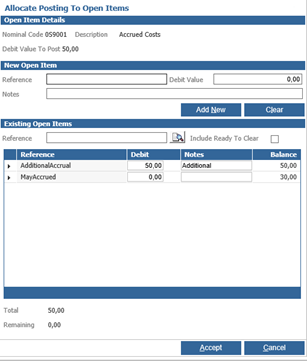
Once the required fields are complete, select the Accept button.
If we were to key in an Fixed Asset Nominal Code, add the required value and applicable Narrative select the Add button and a prompt will appear to select the Asset Type.
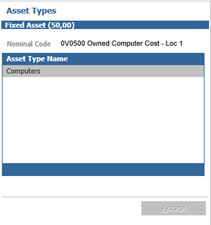
You can then select the Asset Type, select the required Depreciation Template and then complete the details of the Asset. Once the details have been Saved and the window closed, the row will then appear on the Nominal Posting screen.
The change in functionality is as with Open Items, you would be expected to post the details when creating the posting row as opposed to at the completion of process.
If any row needs to be removed, this can be done by selecting the  icon.
icon.
If any values have been keyed in incorrectly, you are able to select the row and amend these.
The button will change from showing Add to displaying as Save to save any changes made..
Once all information on screen is complete, select the Next button to continue.
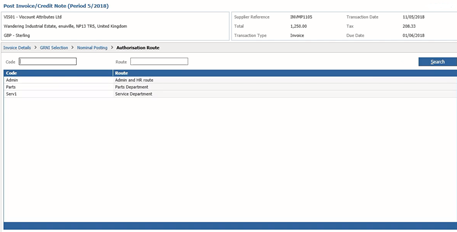
If you have Authorisation Routes enabled, then the next screen will prompt to select a route.
If you do not use Authorisation Routes, the invoice posted is within the tolerance value or the account has an authorisation route set, then you will not be presented with this screen.
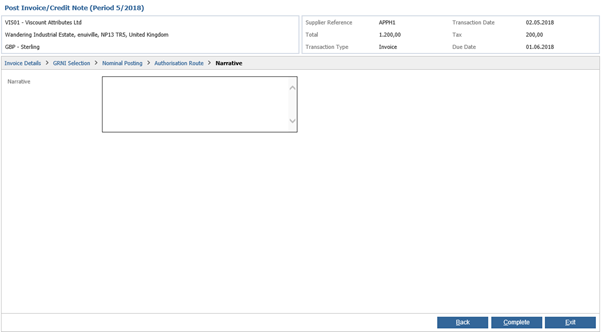
The final screen presented will be the Narrative screen. Here you can enter any required transaction Narrative. This is optional however any additional notes entered will then appear to view with the transaction.
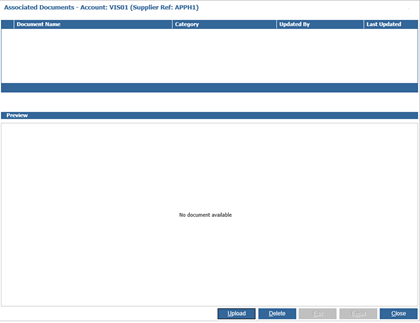
Once selecting the Complete button, this will post the invoice and if enabled the Associated Documents window will appear to add any associated documents.
Once complete this will go back to the Search screen where you have the option to use the Repeat button if you would like to post another invoice to the same account. Alternatively you can select the Complete button.
