Creation of a New Master Account
Once the ‘New’ button is selected, the tabs at the top of the screen will move to the ‘Master Account’ tab. Key in the master account number to be used.
Account numbers can be constructed using the following format – the first three letters of the account name followed by two digits that increase sequentially with each new account created. Using this convention, a purchase ledger account for Pinewood would be PIN01. A further purchase ledger account for a company named ‘Pinewood' would be PIN02 and so on. By using this format accounts can be easily sorted into alphabetical order by the various reporting options within the system and also allows them to be located easily within other departments.
Each purchase ledger account number acts as a unique identifier and as a result the system will not allow multiple accounts using the same account number to be created.
Complete the Account Name and Address fields as shown below – a postcode lookup facility is available from this screen to allow for increased speed of input and accuracy.
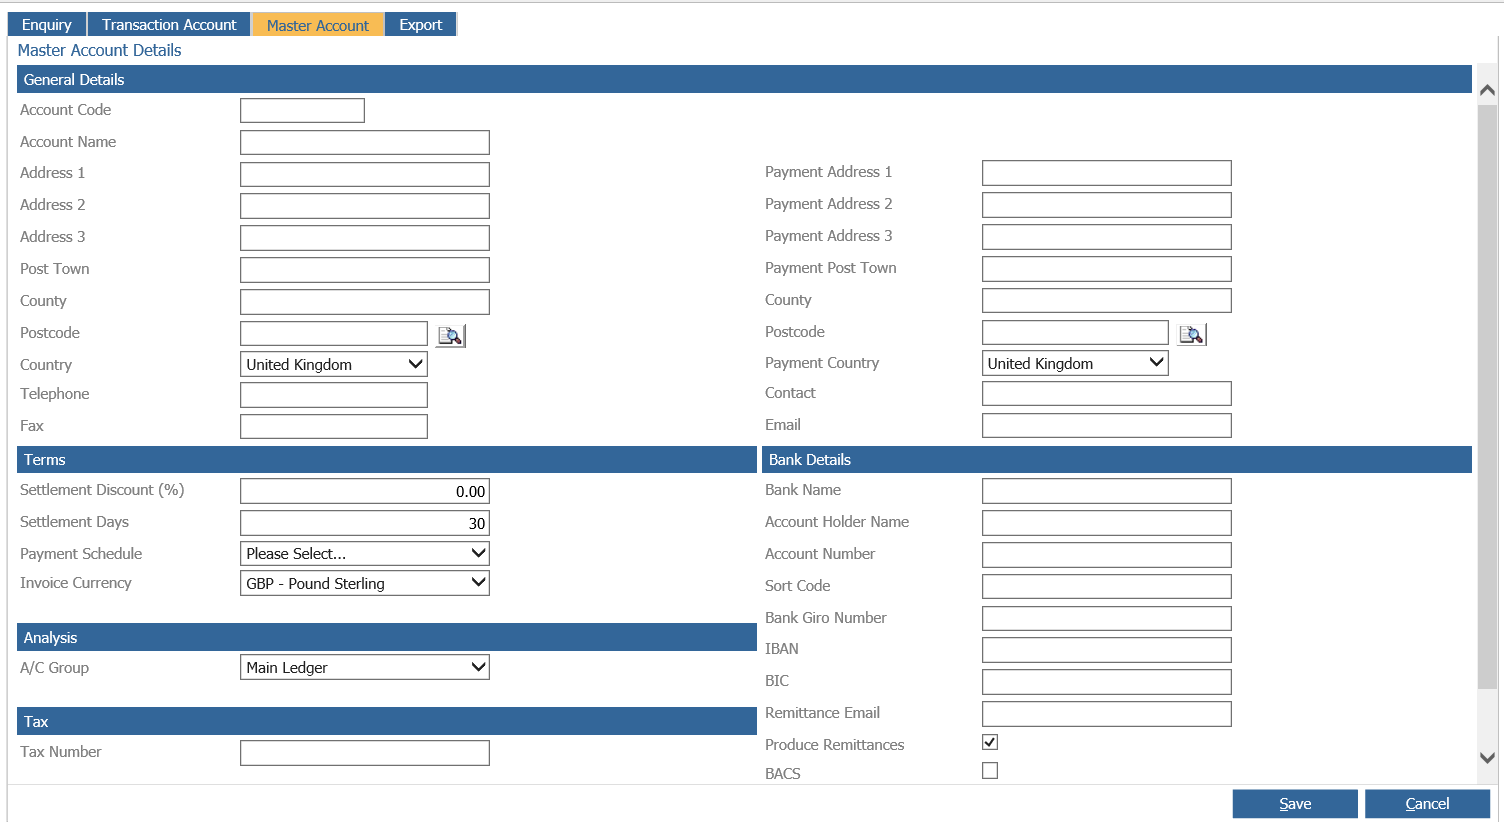
Once the account name and address details have been completed, complete the ‘Terms’ section on the bottom left hand side of the screen.
The ‘Settlement Discount (%)’ and ‘Settlement Days’ fields are automatically completed with the value set as defaults within the Purchase Ledger Parameters. However, these values can be adjusted as per the terms of supply from each individual supplier.
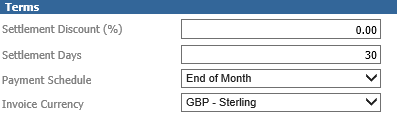
The ‘Payment Schedule’ is also automatically populated with the default value from the Purchase Ledger Parameters, but can be adjusted to accommodate the supplier’s terms. The payment schedule works in conjunction with the settlement days and the date of each purchase ledger transaction to calculate the payment due date automatically – this information populates the ‘Payments Due’ report (covered in detail later in this guide). The Invoice Currency defaults as ‘Sterling’.
The ‘Analysis’ section controls the Accounting Group to which the purchase ledger account is attached.

The accounting group is automatically populated with the default accounting group specified in the purchase ledger parameters, but can be changed if required by selecting the accounting group required from the drop down menu. The accounting group dictates the nominal codes used when goods are purchased.
The ‘Tax’ section of the screen can be completed with the VAT number of the supplier.

Select ‘Save’ from the bottom right hand side of the screen. The system prompts to create a transaction account:
Click on ‘Copy Details’ to automatically populate the address details and account code on the Transaction Account screen with the same details as entered on the Master Account. Alternatively the ‘New Details’ option can be selected to allow different details to be entered against the transaction account. If the ‘Don’t Create’ option is selected, the master account is stored to the system but with no transaction account created. Because all processing takes place at Transaction level, this option should be selected with this fact in mind.
Creation of a New Transaction Account
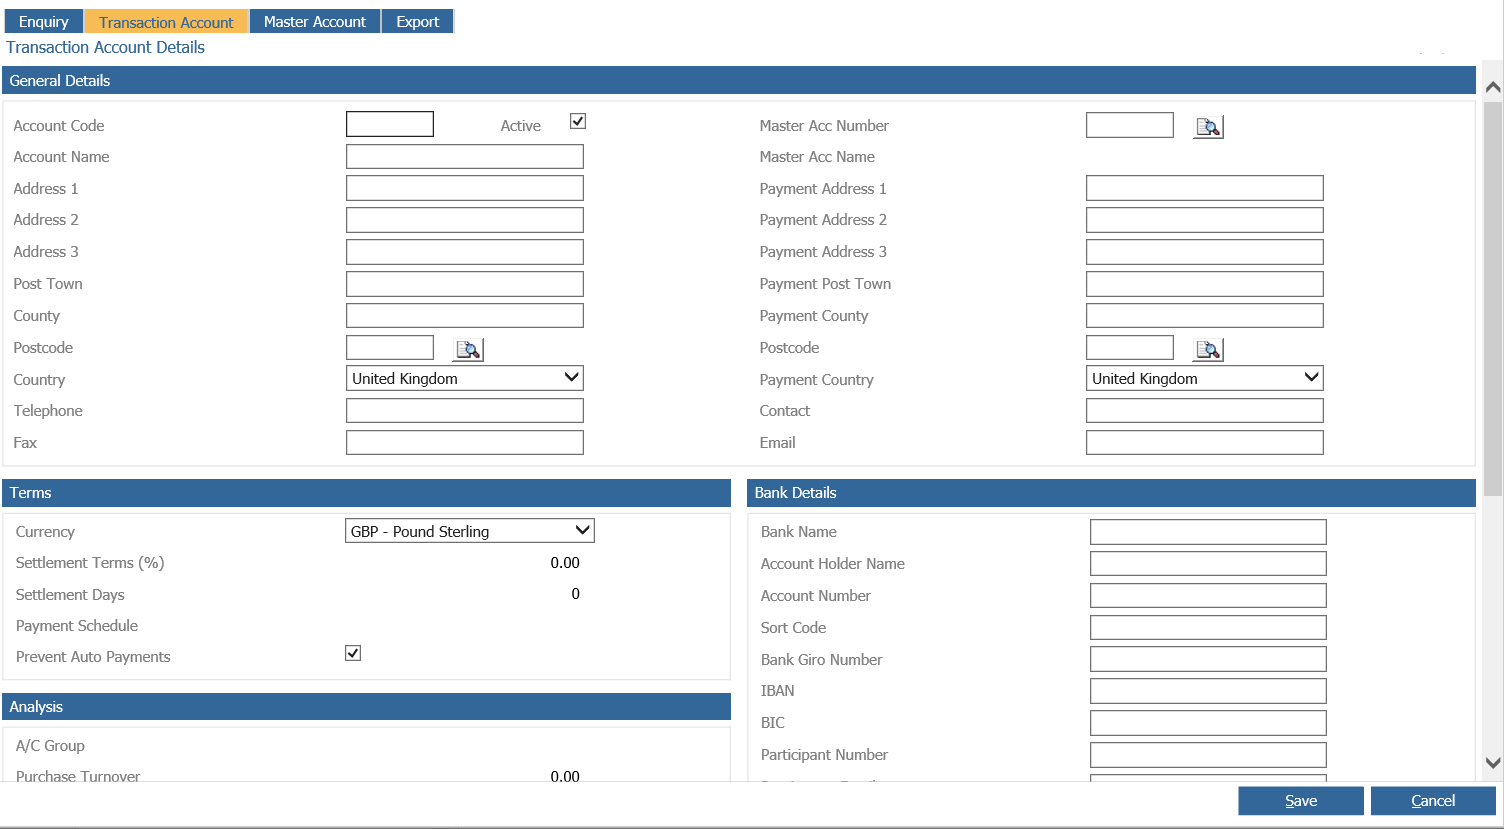
When the ‘Copy Details’ option is selected, the tabs at the top of the screen switch over to display the account details of the new Transaction Account. In this scenario, most of the information from the Master Account is copied across to the new screen automatically. The screen displays as shown below:

Address detail completed on the Master Account is automatically pulled through to populate the address fields on the Transaction Account as shown above. The fields on the right hand side of the screen labelled ‘Payment Address’ are completed if the remittance for the account is to be sent to an address other than that specified in the main Address fields. Any information entered here is defaulted onto the Remittances printed from the Purchase Ledger – if they are not completed the address information from the left hand side of the screen is used.
The ‘Active’ flag at the top of the screen is selected by default but by removing the tick from the ‘Active’ field, the Purchase Ledger account will no longer be available in the following processes:-
- Purchase Ordering
- Raise Expense Purchase Order
- Raise Subcontract Purchase Order
- Raise Vehicle Purchase Order
- Parts
- Supplier Order Creation
- Customer Order Allocation
- Recommended Order
This will allow for completion of any outstanding orders for the supplier and all reports will continue to include the account. Any amendment to the ‘Active’ flag will be reported in the Purchase Ledger Amendments Audit report.
The ‘Contact’ and ‘Email’ fields can be completed with the name of the main contact for the accounts department at the supplier’s business. If the ‘Email’ field is populated, remittances can be sent via email instead of via post – this process is described in detail in the Purchase Ledger Processing section of this guide.
The ‘Terms’ section of the screen is mainly completed with information entered when the Master Account is created. However, one additional field is available.
The ‘Prevent Auto-Payments’ field is used to suppress the purchase ledger account from the automatic payment run. Place a tick in the box if the account is not to be paid via the Automatic Payment Run
- The ‘Accounting Group’ is automatically populated by the entry against the Master Account, and cannot be changed at Transaction account level.
- Purchase Turnover field is not currently in use.
- Tax Category can be selected as either ‘Home’ or ‘Internal’. ‘EU’ and ‘Non EU’ are not currently in use and can be disabled in nominal ledger parameters if preferred.
- The ‘Exclude Tax’ option allows for the production of zero value tax invoices under any tax category.
- The suppliers ‘Tax Number’ can also be entered on this screen.
- The ‘Owner Division’ will default to the division the user is linked to.
- The ‘Invoice Print Count’ field is not currently in use.
- The ‘Company Type’ can be selected from the drop-down with a choice of ‘Limited Company’ or ‘Sole Trader’ and the company registration number can also be entered here.
The final section is used to record the bank details of the supplier:
The Bank Name, Account Number and Sort Code fields are completed if the system is to be used to make BACS payments directly to the supplier’s account, these can only be amended if the user has Purchase Ledger access greater than that set in the transaction parameters. The BACS field should also be ticked and the remittance email address must be completed.
The process of making payments via BACS is discussed in detail in the Cashbook section of the guide.
The Account Holder Name, IBAN & BAC fields are for future use (International Bank Transactions).
If Purchase Ledger Remittances are required, the ‘Print Remittances’ field must be ticked. If this is not selected, even if an email address is entered against the supplier account, a remittance will not be printed or emailed.
Select the 'Save’ option from the bottom of the screen to confirm the changes.
Allocation of ‘Default Codes’ can be set-up. For this functionality to be utilised, the ‘Default Codes’ parameter within the Purchase Ledger Parameters must be enabled.
If enabled, after initially saving the purchase ledger transaction account, select the ‘Amend’ option. Selecting this option opens the fields on the screen allowing for amendments to be made; the ‘Default Codes’ option also appears on the screen.
This option can be used to attach nominal codes to the purchase ledger account that will appear automatically when purchase ledger invoices are being coded into the nominal ledger. Adding default codes to purchase ledger accounts offers two distinct advantages – it decreases the length of time that may be spent searching for the correct nominal code to which an invoice must be posted and it also reduces the possibility of user error in selecting an incorrect nominal code. Even if default nominal codes have been specified, it is possible to override the defaults and use any code within the nominal ledger if required.
When the ‘Default Codes’ option is selected, a window appears allowing a search of the nominal ledger for the codes, to apply the defaults to this account.
Enter the nominal code that is to be applied to the purchase ledger account as a default. If the code is not known, the search icon can be used to search for the nominal ledger code using the code description. Once the nominal code has been found, select the ‘Add’ option to apply the default code. This process can be repeated adding as many default codes as are required against the purchase ledger account. The ‘Remove’ option can be used to remove a code that is incorrect or no longer required against the purchase ledger account. Once all the default codes have been added, select the ‘Close’ option to confirm the codes attached.
Select the ‘Save’ option to save the transaction account and the default nominal codes that are specified against it.
Creation of a new Transaction Account where the Master Account already exists
Make a note of the Master Account code to be used for the additional Transaction account, by searching as described above.
Select the Transaction Account option from the main menu and click on the Transaction tab at the top of the Purchase Ledger - Account Maintenance screen. Key in the Master Account Code into the ‘Master Account Number Field’ to display the details of the master account to which the transaction account is to be attached.
Complete the Account Code field with the code required and then complete the remainder of the transaction account as described previously
Export
A list of all Purchase Ledger Account details can be created through the ‘Export’ tab.
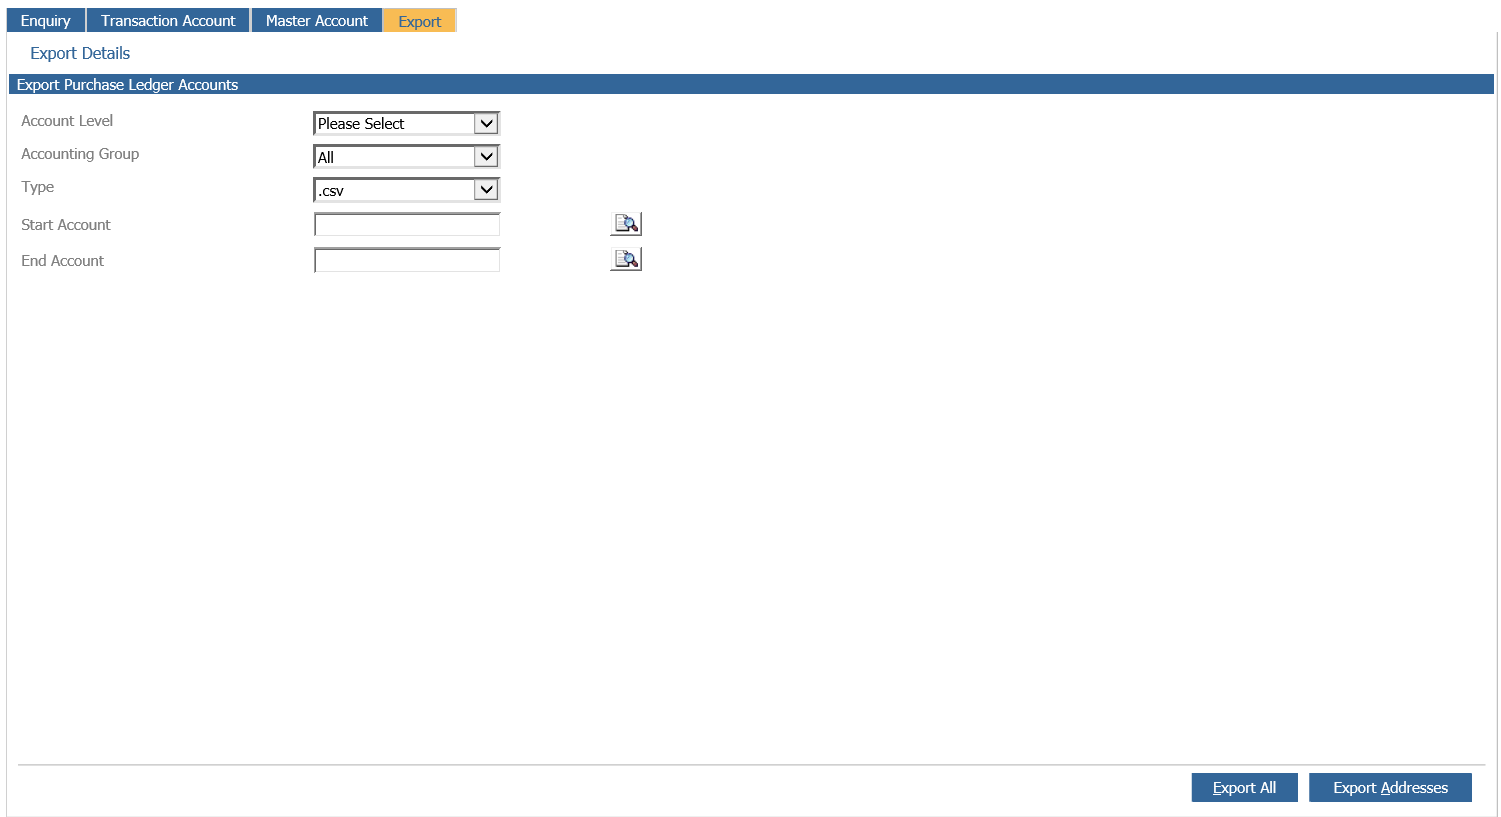
Select the Account Level required – either Master or Transaction. Select a specific Accounting Group or All Groups. Choose a sales ledger account range or leave blank to select all.
Click ‘Export All’ to download all account field details or ‘Export Addresses’ to view the Account number, account name and address details.
The download pop up appears.
Click on the word ‘Download’ and the file download screen appears.
Either click on ‘Open’ to display the details or ‘Save’ to choose the destination of the file.
This will create a csv format file which can be manipulated as required.