
The purchase ledger has an invoice logging system. Invoices may be posted against the relevant supplier before being passed to a recipient for authorisation. When invoices are logged, the name of the recipient is selected so that a report of who has these invoices for authorisation may be produced. The invoice will be shown on the account with the status of logged, but it cannot be selected for payment and the total goods value will be held against a balance sheet suspense account as per the suppliers accounting group. The VAT however will have posted to the VAT input account.
To begin posting/logging purchase ledger invoices select the post invoice option from the menu.
Select the purchase ledger account against which the invoice or credit note is to be entered.
When the purchase ledger account has been searched for, it is displayed in the lower section of the screen and can be accessed by double clicking. If a recognised account code is entered on this screen, the system automatically proceeds to the next screen:
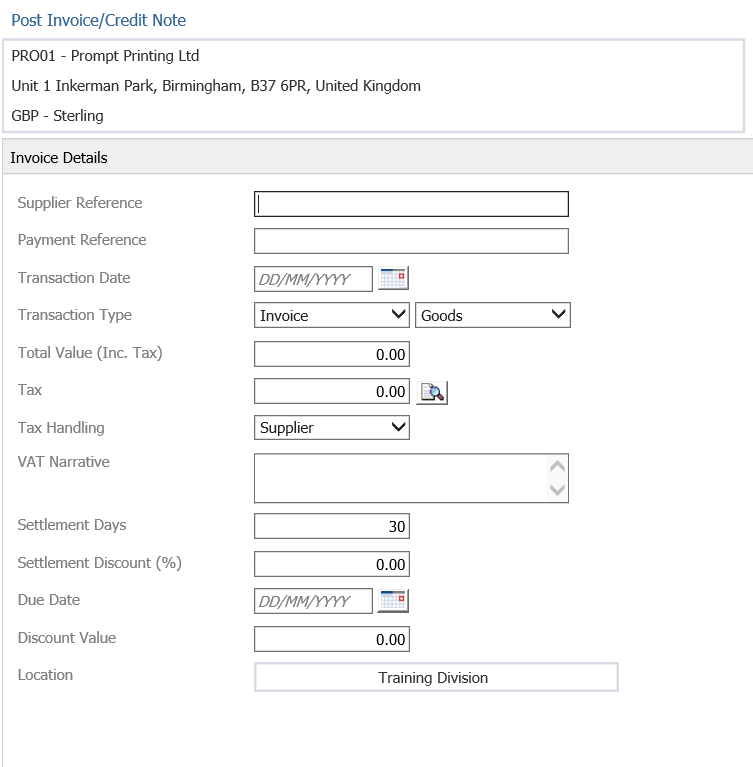
The detail of the purchase ledger account is displayed on the top left hand side of the screen, along with the current account balance. The fields on the right hand side of the screen should be completed with the information relating to the invoice posting.
- Supplier Reference – Enter the invoice number from the supplier’s invoice.
- Payment Reference - Going forward this will be used for specific references that will be included in payment files for functions such as filed being passed to banking systems to aid with automated reconciliation processes. This is currently not widely used as a field but will be a future development. The field can be filled; it is not mandatory but if populated it will then be view able in the enquiry screens in certain places on the transaction.
- Transaction Date – Enter the invoice date from the supplier’s invoice.
- Transaction Type – Select ‘Invoice’ or Credit Note’ from the dropdown list.
- Total Value (Inc. Tax) – Enter the invoice total amount including VAT.
- Tax – If the ‘Automatic Tax Calculation’ parameter has been activated the VAT amount will calculate and display in this field. If this is incorrect or does not display, it can be entered manually.
- Settlement Days/Settlement Discount (%) – These will appear here from the defaults set in the purchase ledger parameters but can be overwritten if required.
- Due Date – The invoice payment due date will be calculated from the invoice date.
- Discount Value – Any settlement discount value applicable subject to parameters will appear here.
Select the ‘Accept’ option from the bottom of the screen to proceed to the next step of the process. The bottom section of the screen is updated to display the detail below. Select the Advice Note(s) to process.
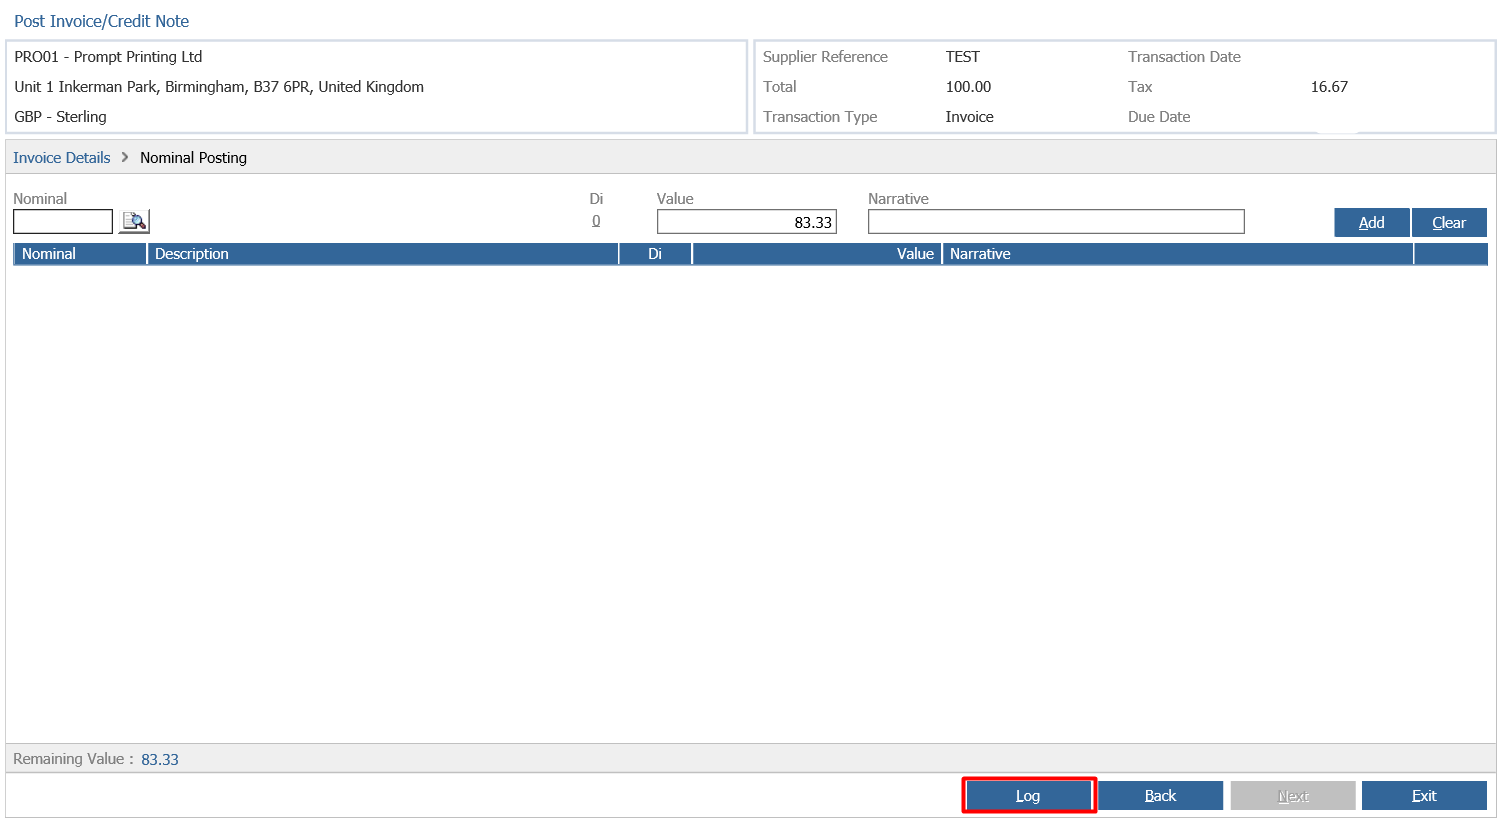
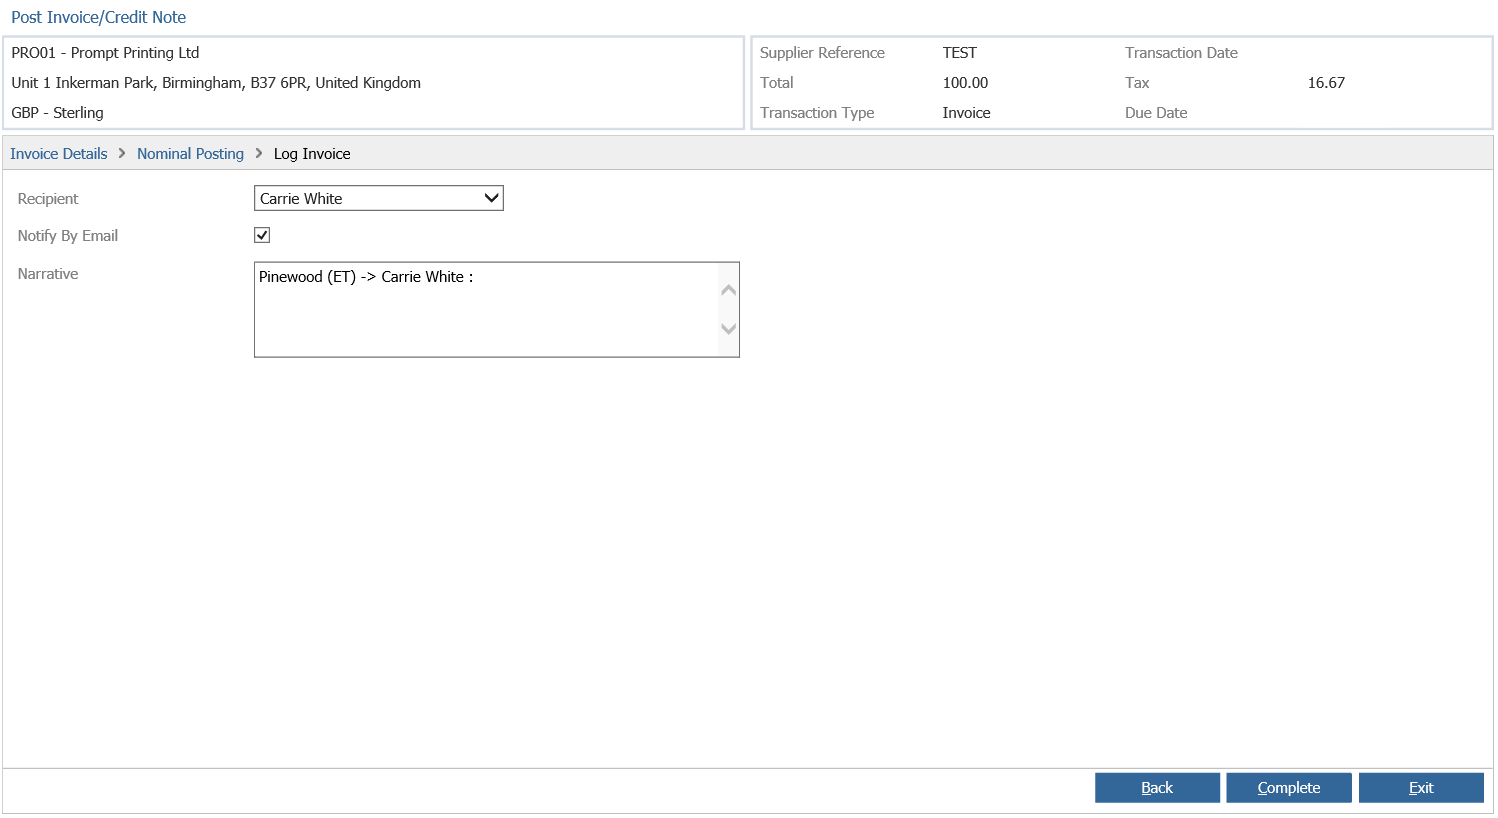
If the invoice is to be logged on the purchase ledger only, click the ‘Log’ button at the bottom of the screen. This will display a pop up screen to select the user who is to receive and authorise the invoice. A narrative must also be entered.
Click ‘Next’ and choose whether to send an email to the recipient to notify them that they have an invoice to authorise.
If the Document Scanning parameter has been activated, a document upload screen will appear.
Fields are available (though not mandatory) for the entry of a document name, a document category from the dropdown box, document description and additional notes.
Browse for the document using the icon alongside the ‘File Name’ field and click ‘Upload’.
The document screen will appear with the document details at the top of the screen. Single click on the document to preview.
If there is no document to be scanned, select ‘Cancel’ to allow normal continuation of invoice posting.
Click ‘Close’ and the purchase ledger account selection screen will appear.

The run number and internal reference number are displayed. If there is another invoice to post onto the same account as the previous invoice, clicking the ‘Repeat’ button will display the supplier details on the posting screen.