If the routine to log purchase ledger invoices is used, the person who has been sent an invoice to authorise can use this option to see all the invoices that have been sent to them for authorisation.
When this option is selected there is a choice to look at all invoices for authorisation or only the invoices for a specific user to authorise.
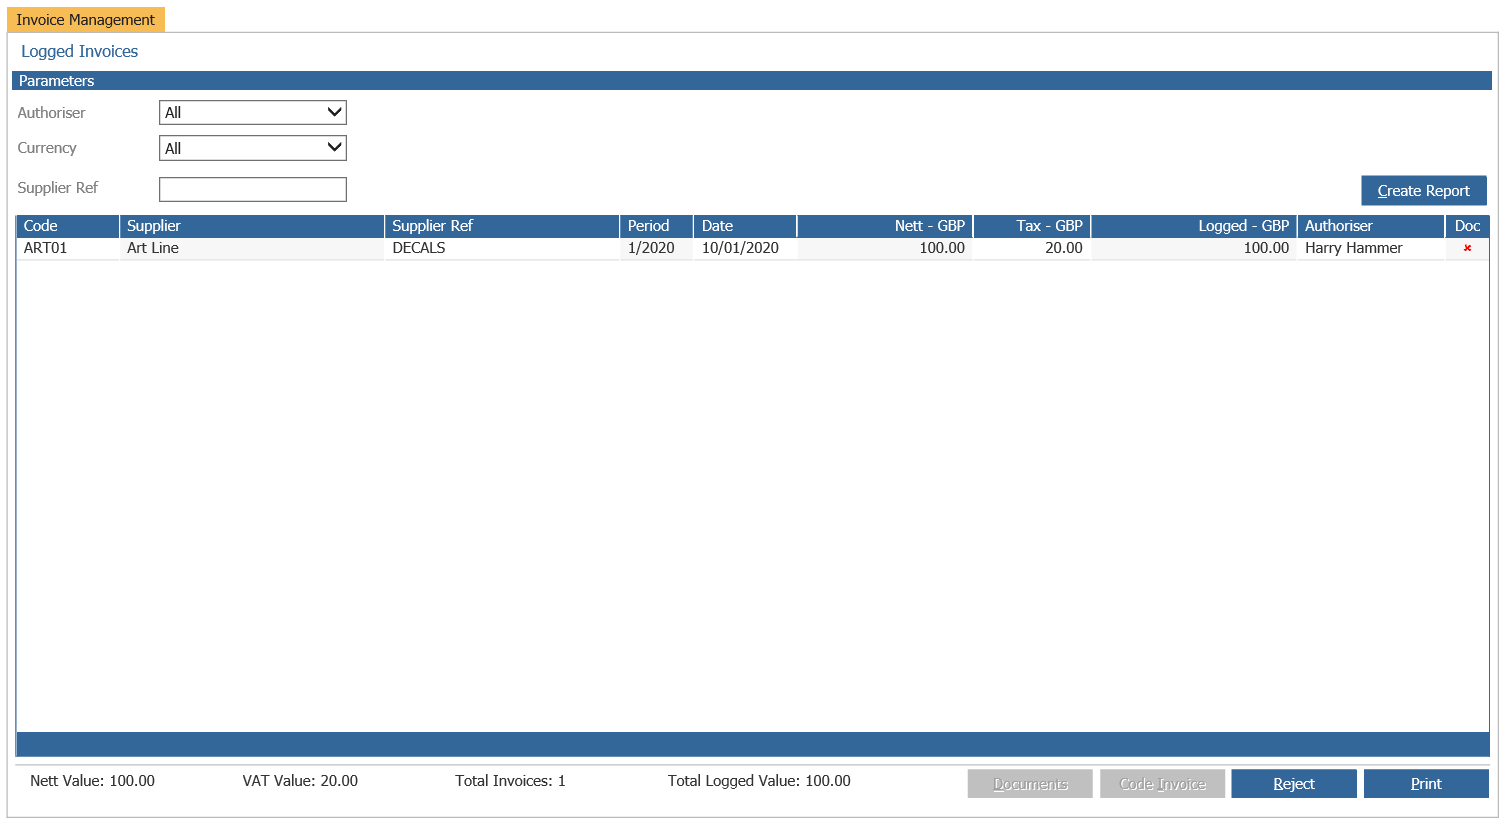
If document scanning has been used, there will be a tick in the doc column on the screen. Highlight the required invoice and click on the Documents button at the bottom of the screen to see a preview of the scanned document.
To authorise and post the invoice, highlight the required invoice and click the Code Invoice button at the bottom of the screen. The ‘Post Invoice/Credit Note’ screen will appear.
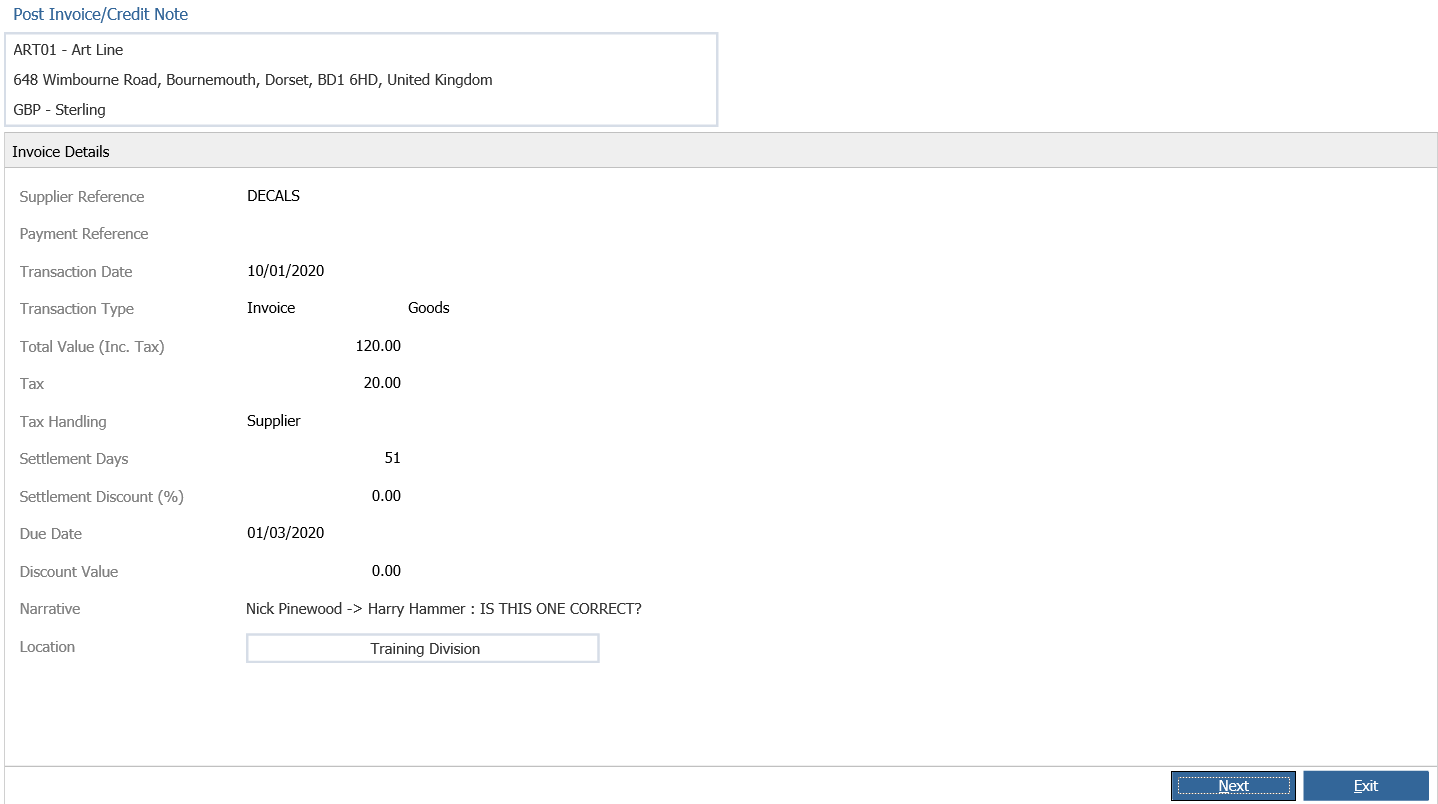
If this is the correct invoice to be authorised, enter the nominal code to post the invoice or credit note to, tab across to the value column and enter the net amount against the nominal code. Multiple codes can be used. To change the nominal code selected, click ‘Start Again’ or ‘Remove Posting’ to allow this. Once the invoice/credit note value is posted, click ‘Accept’.
A pop up box appears to allow the flagging of the invoice as authorised or in query.
If the invoice is queried, a narrative must be entered to explain the query. If the invoice is approved, click ‘Next’ to complete the posting.
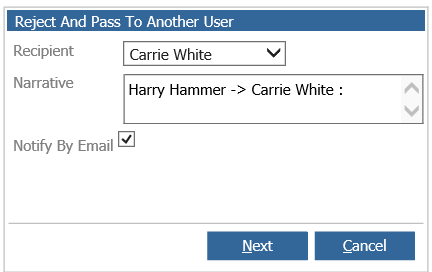
The ‘Reject’ button at the bottom of the ‘Authorise Invoice’ screen is used to pass the authorisation responsibility of an invoice or credit note onto another person.

Highlight the invoice and click the ‘Reject’ button and a pop up screen appears which allows the selection of a new recipient from the drop down box and a narrative will display showing who it is being transferred from and to automatically. Additional information explaining why this is being passed to another person for authorisation can be added at this point. Click ‘Next’ and choose whether to notify the new authoriser by email. If this option is selected, confirmation that this email has been sent will appear.
The ‘Print Report’ option, allows the printing of either a summary report or a full report which includes the narrative details.