Question
How can I add a Part Exchange to a vehicle quote?
Answer
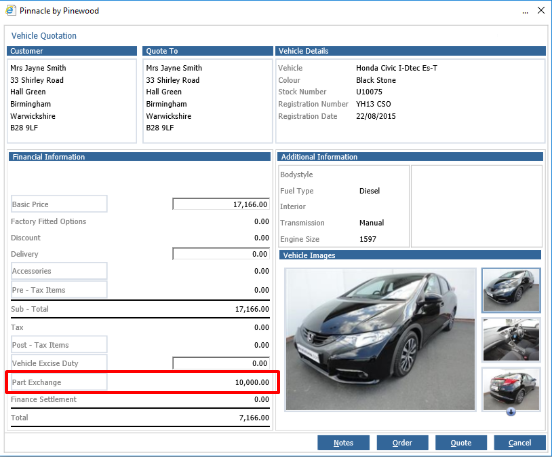
A part exchange may be added to a vehicle quote via the selection of the Part Exchange link field on the left hand side of the screen. The ability to attach a part exchange to a quote successfully is dependent upon the part exchange vehicle existing as a vehicle record attached to the CRM record of the customer for whom the quote is being raised.
In the scenario that the details of the customer’s current vehicle (i.e. part exchange) has not been captured and entered onto the system, it will not be possible to create a part exchange on the customer order until this process has been created. Fortunately, the system is designed to allow a user to easily access the CRM record required without leaving the quote process. This access is gained by clicking in the ‘Customer’ box that appears at the top of the Vehicle Quotation screen, then by selecting each successive link, the CRM record for the customer can be accessed, here you have full access to amend as you would accessing via CRM and Enquiry.
Once the part exchange vehicle has been created as a CRM record, the vehicle displays at the top of the screen under the ‘Current Vehicles’ tab when the ‘Part Exchange’ link field is selected from the Vehicle Quotation page.
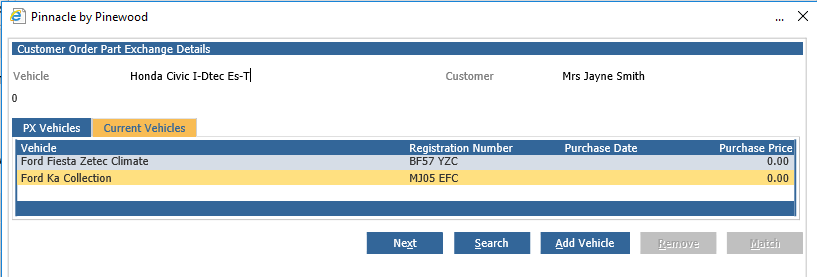
To begin the process of converting a current vehicle into a part exchange, double click on the vehicle required from the section of the screen shown above. Pinewood DMS then opens the lower half of the screen for completion with what will effectively become the purchase information for the part exchange vehicle.
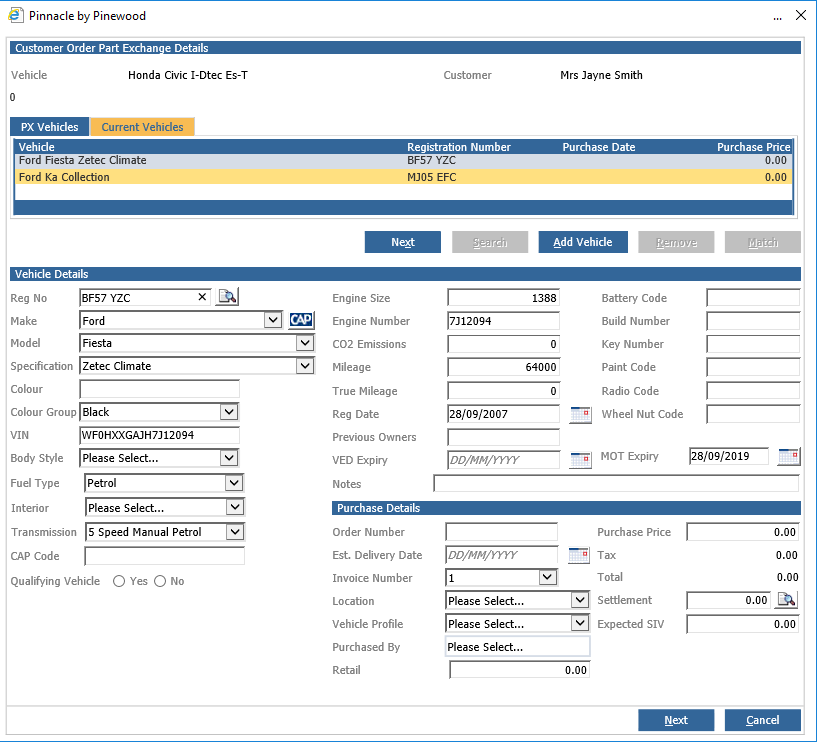
Complete the fields on this section of the screen with as much information as possible, including the VAT status of the part exchange vehicle and its mileage. Special attention should also be paid to the ‘Purchase Details’ section of the screen – visible on the bottom right hand side. An Order Number should be entered, along with an estimated delivery date for the prime vehicle, a Location and a Vehicle Profile, if known. Finally, complete the purchase information – including any Settlement and the expected SIV (if different to the purchase value of the vehicle). If details of the outstanding finance agreement are known, these can be entered by clicking on the search icon next to the Settlement field. A pop up will appear to enter the finance company, agreement number and the date the finance settlement is valid until.
Once all of these fields have been populated with accurate information, select the ‘Next’ option from the bottom of the screen.
Once the Next option is selected, the tabs at the top of the screen switch over – displaying the vehicle as a PX Vehicle.
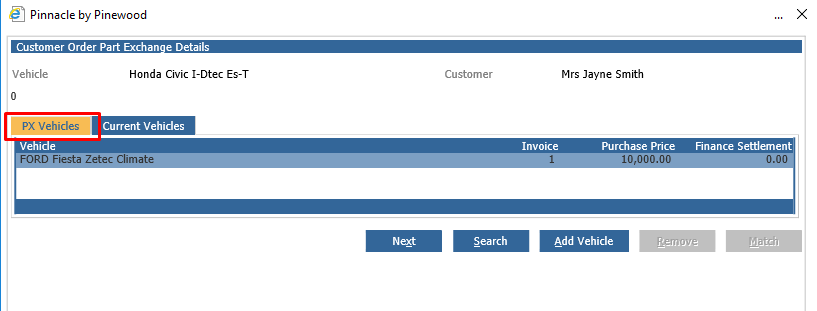
If there is more than one Part Exchange, click back on the Current Vehicles tab and repeat the process described above.
Now that the part exchange vehicle is displaying correctly, select the ‘Next’ option to close this window and return to the Vehicle Quotation page. The value field next to the Part Exchange link field is now populated with the Purchase Price of the Part Exchange, whilst the HP Settlement value is also displayed.