
Cash Sale Invoice
Parts > Sales > Invoice
Use the CRM search to select a customer.
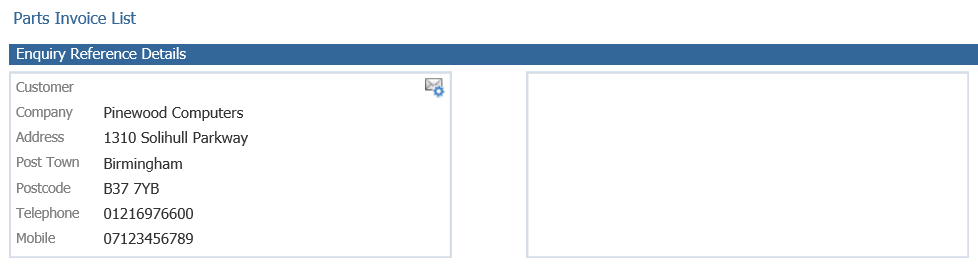
If the customer selected has an account linked to them within CRM, this will be automatically loaded into the invoice screen.
Enter a part number into the part number field and press enter, the part information is displayed.

For parts that need to be created please see Create/Amend.
Along with the part number the Description, Bin Location 1, Sales Discount, Availability, Retail Price, Discount % and issue price are displayed.
Discount values will automatically populate from the sales table in parameters, if the sales ledger code being used is within a table.
The Discount (%) and Issue Price fields can be amended at this stage. If a new percentage value is entered the issue price is automatically recalculated. Alternatively the issue price can be over keyed.
**This is subject to a users access levels and the parameter set-up for your system set within Parts > Parameters > Department Details > Parts Maintenance.**

Pressing ‘Accept’ will add the part to the parts list in the lower half of the screen where more parts can then be added.
To amend a part on the list, double clicking the part will move it back into the parts information area of the screen where amendments can be made.
After the quantity, discount value or issue price has been amended, the parts list needs to be updated by pressing ‘Accept’.
After all parts required have been added to the parts list the ‘Invoice’ button can be pressed, the invoice totals pop up will then be displayed.
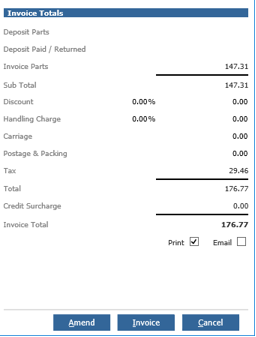
From within this window the Carriage and Postage & Packing charges can be applied to the Invoice Total.
Pressing ‘Amend’ will allow amounts to be entered.
With the values added, selecting ‘OK’ will recalculate the Invoice Total.
After adding the additional charges, the ‘Invoice’ button can be selected. The payments box will then be shown for accounts set as ‘Cash’ within the sales ledger.
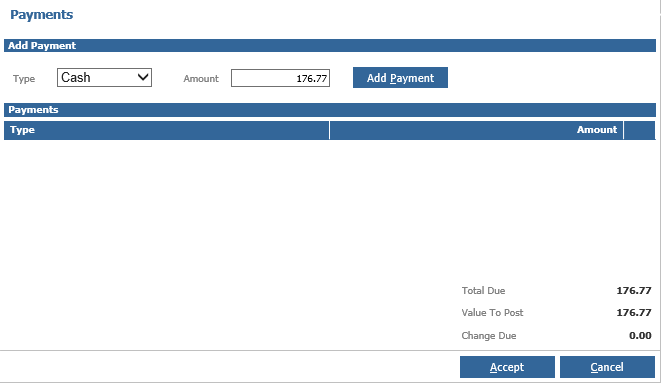
Part payments between card and another type cannot be made. Card payments will default to the full amount.
Once a payment type has been chosen and an amount entered ‘Add Payment’ will create a payment line in the window. To delete a line the  icon can be pressed removing the payment.
A greater value can be added, the required change will be calculated.
The full invoice value must be allocated in this way before ‘Accept’ can be pressed.
If the default printer parameter is on, the invoice will automatically be sent to the default printer on the PC being used, if not the printer must then be selected.