
Creating a Parts selection would be beneficial as you could see what parts you’ve sold more of and within specific time frame. To begin the process of creating a selection within the Pinewood DMS, select the following options from the left hand menu.
Parts > Selections > Search
Once this option has been selected the system will display a screen in which you need to build your parts report. The screen will show 2 tabs, one of which is ‘New Selection and the other is ‘Saved selection’ the saved selection tab is to view reports that have previously been made.
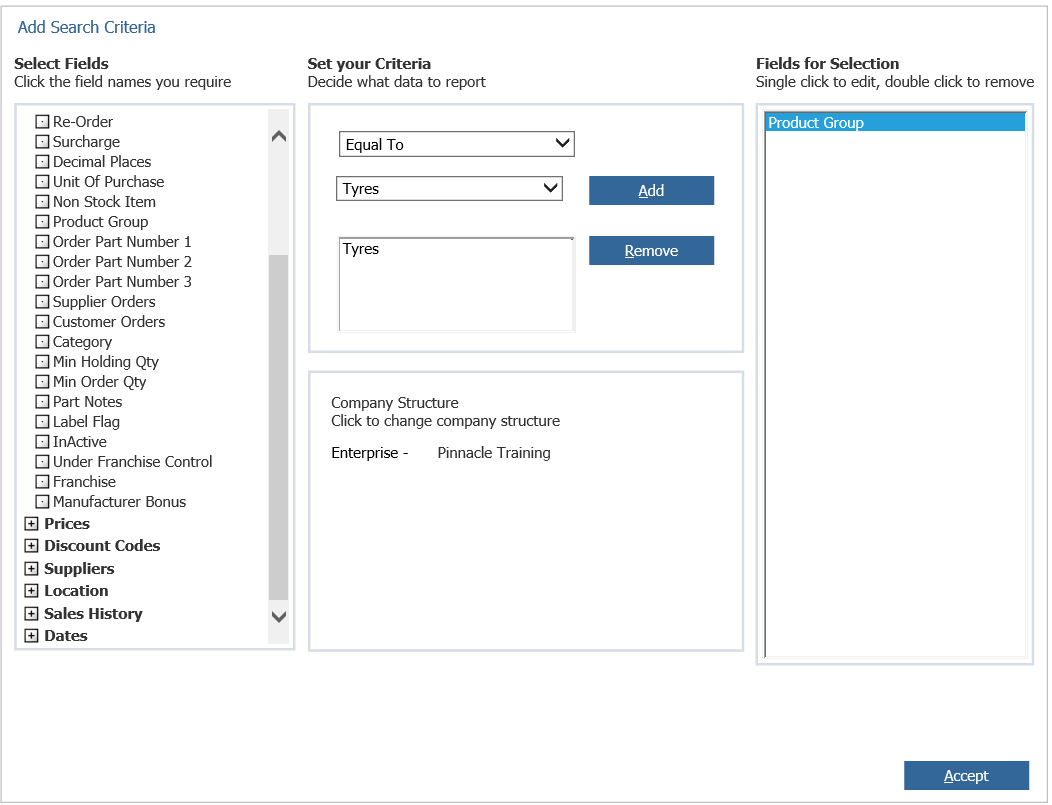
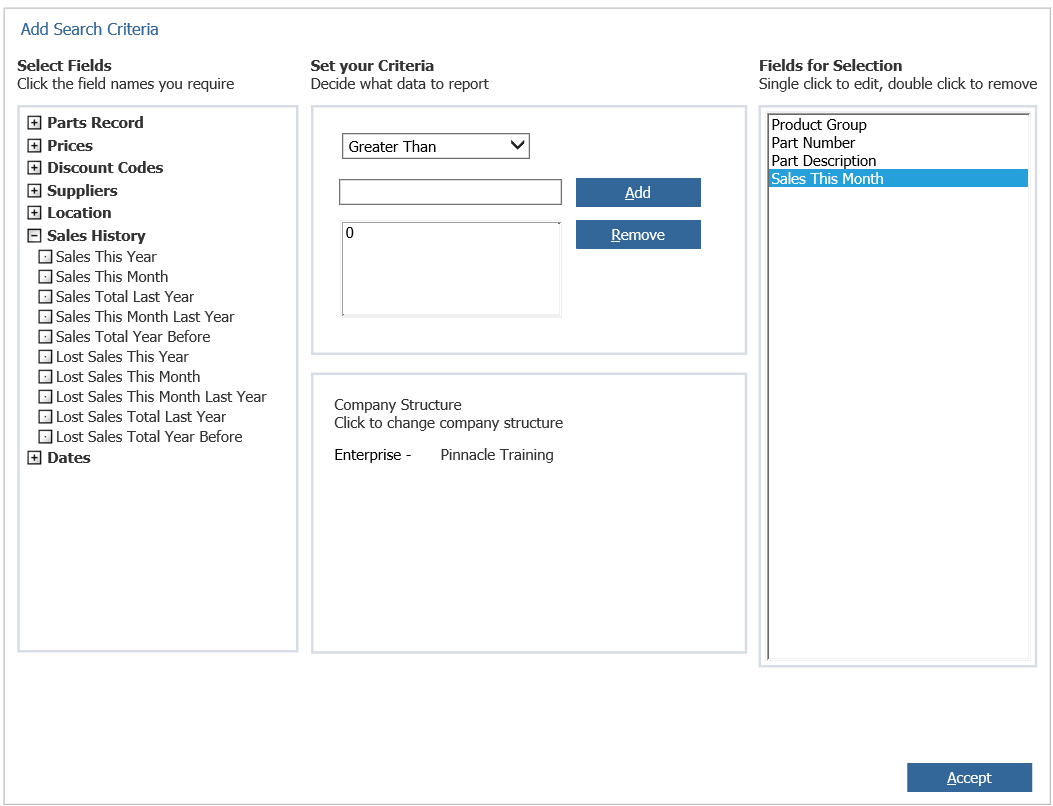
Click the ‘Choose Fields To Search Box’ within here you will need to go to Parts Record > Product Group within the first drop down select ‘Equals To’ and in the second drop down select which product group you would like to base your report on, for example ‘Tyres’ have been selected therefore the report will now be based on Tyre Sales. Once this has been done click ‘Add’ This will then be added to the list on the right hand side.
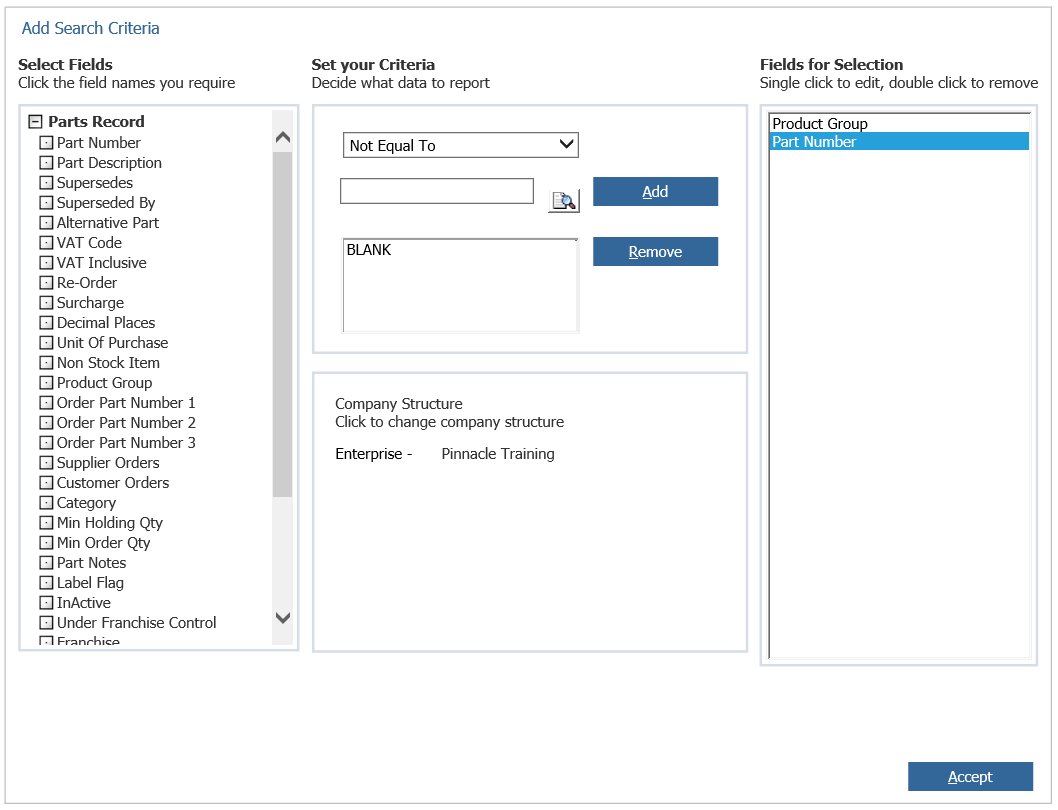
Then to go Parts Records > Part Number in the first drop down select ‘Not Equal To’ and within the box bellow type ‘BLANK’, then click ‘Add’. this will then only show tyres with a part number attached in the report.
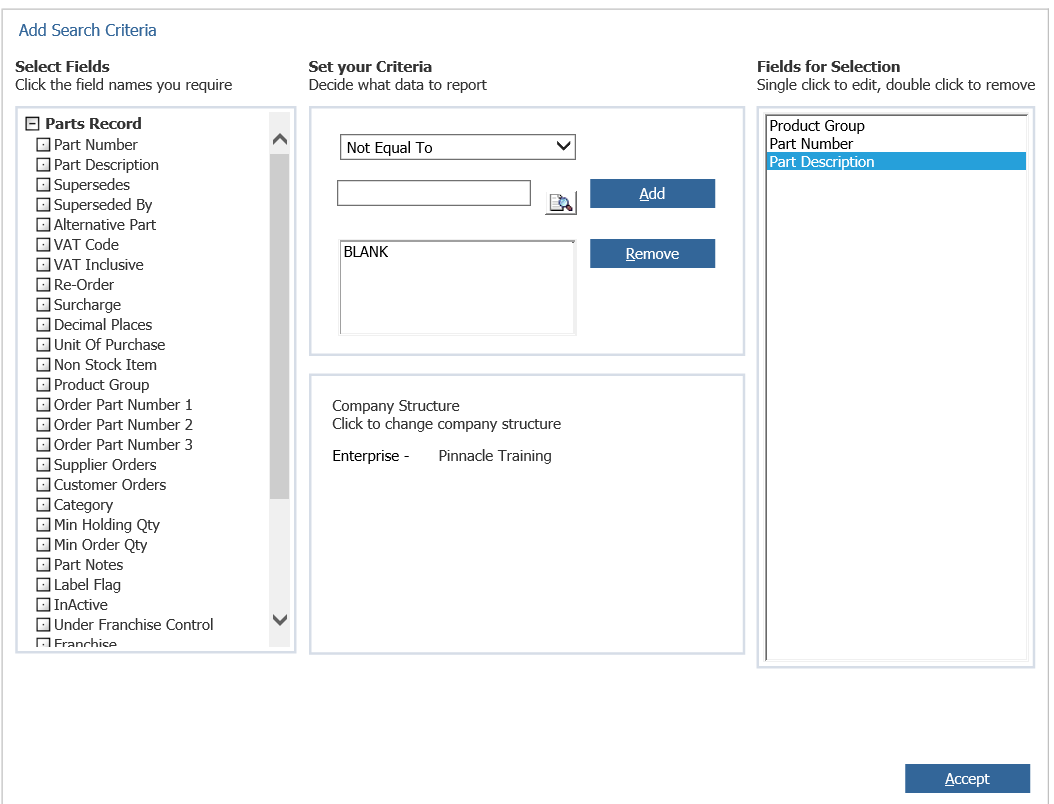
Go to Parts Record > Part Description select ‘Not Equal To’ within the drop down and type ‘Blank’ within the box bellow the drop down. Click ‘Add’, this will again only display tyres that have a product description set against the part card.
Go to Sales History and here you can select various categories to base your report on.
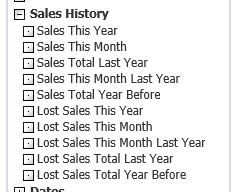
For this example, ‘Sales This month’ has been selected. Within the drop down select ‘Is Greater Than’ and within the box bellow type ‘0’. This will then show all Tyres Sales this month with a quantity sold greater than 0.
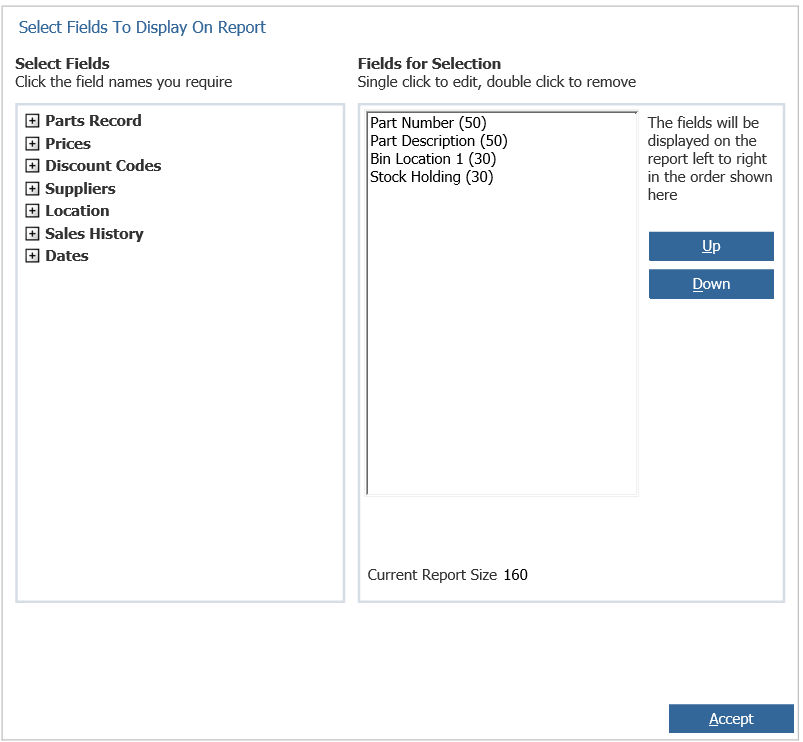
Within the ‘Choose Fields To Display’ box you will be able to add what fields you would like to show on the report. For example, Tyre Sales report you could select Part Number, Part Description, the Bin Location of the Part, the Stock holding etc… the screen will look as below.
Once this has been done you can choose how you would like your report to look by either selecting Landscape or Portrait, which category you would like the report to be sorted by and whether this is ascending or descending.
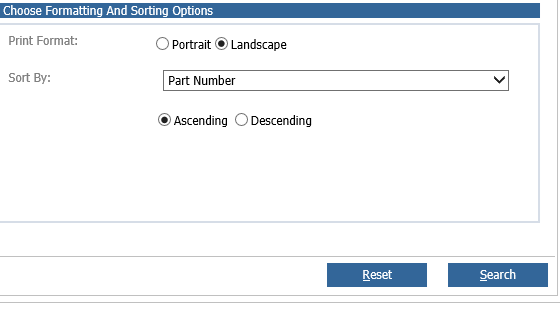
Click search and your report will be made. You can also save your selection by clicking ‘Save’ this will then appear in the Saved Selections tab or you can print the report by clicking ‘Print’.