
Overview
This feature will give the ability for averaging the additional costs against part records on a part receipt, rather than posting direct to a nominal code at point of posting the purchase ledger invoice.
Summary
Set up Requirements
Within Parts > Parameters > Purchase Costs select 'Add' to add a new Purchase Cost or Amend to any already created.
The option for Uplift Average Cost previously had no functionality. You are now able to select the option when you create a Purchase Cost where you would uplift the average cost.
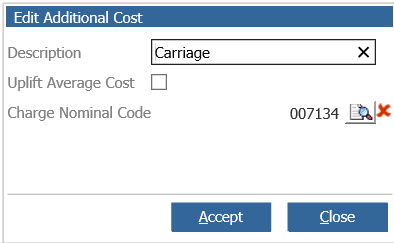
A Nominal Code will need to be entered and it is suggested this would be a GRNI nominal for the Purchase Cost. The Nominal entered does need to be selected with care as when parts are receipted in, any of the additional costs that are marked to uplift the average cost will appear on the GRNI report and will then be processed in the standard process.
The function can still have a Profit and Loss nominal code added with the posting taking place at the point of post invoice within the Purchase Ledger, so it will not uplift the average cost of the parts. To do so, leave the Uplift Average Cost option unticked the function will continue to work as it did previously.
Within Parts > Maintenance > Supplier Maintenance > Suppliers, the additional costs will need to be set up against the Parts Supplier.
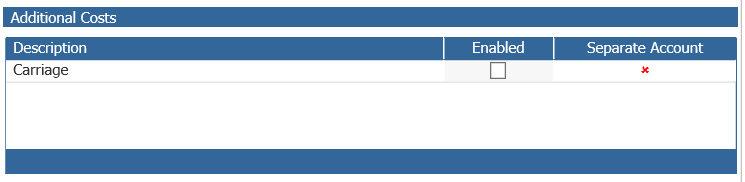
Once a cost has been enabled against the supplier required, you will have the ability to then double click on the cost and add a separate purchase ledger account if the cost is charged by a different purchase ledger account number. Select the Add option to search for the Purchase Ledger account required, select the account required and this will then be added to the list. Currently, only one account can be added within this field.
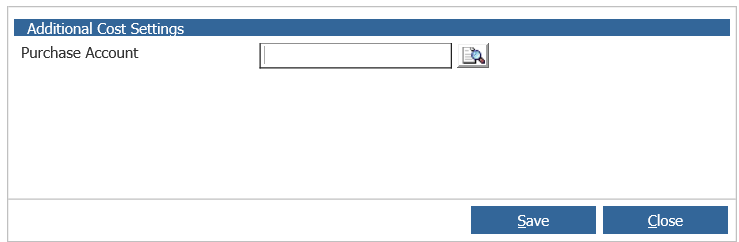
The Purchase Ledger accounts used within this field, do not also have to be set up as suppliers within the supplier’s screen.
If the charge is associated to the same account, then no other account needs to be added within this parameter.
Parts Receipt Process
Overview
The Parts Capitalisation process is used in order to average the additional costs of an order across the parts associated to the receipt being brought into the dealership. This can be done one of two ways within the system.
Summary
Process When Receipting with Same Supplier
This can be done by adding these additional charges to the supplier cost when receiving in the parts,
The setup against the supplier within;
Parts > Maintenance > Supplier Maintenance > Suppliers
Drill into the relevant Supplier Account
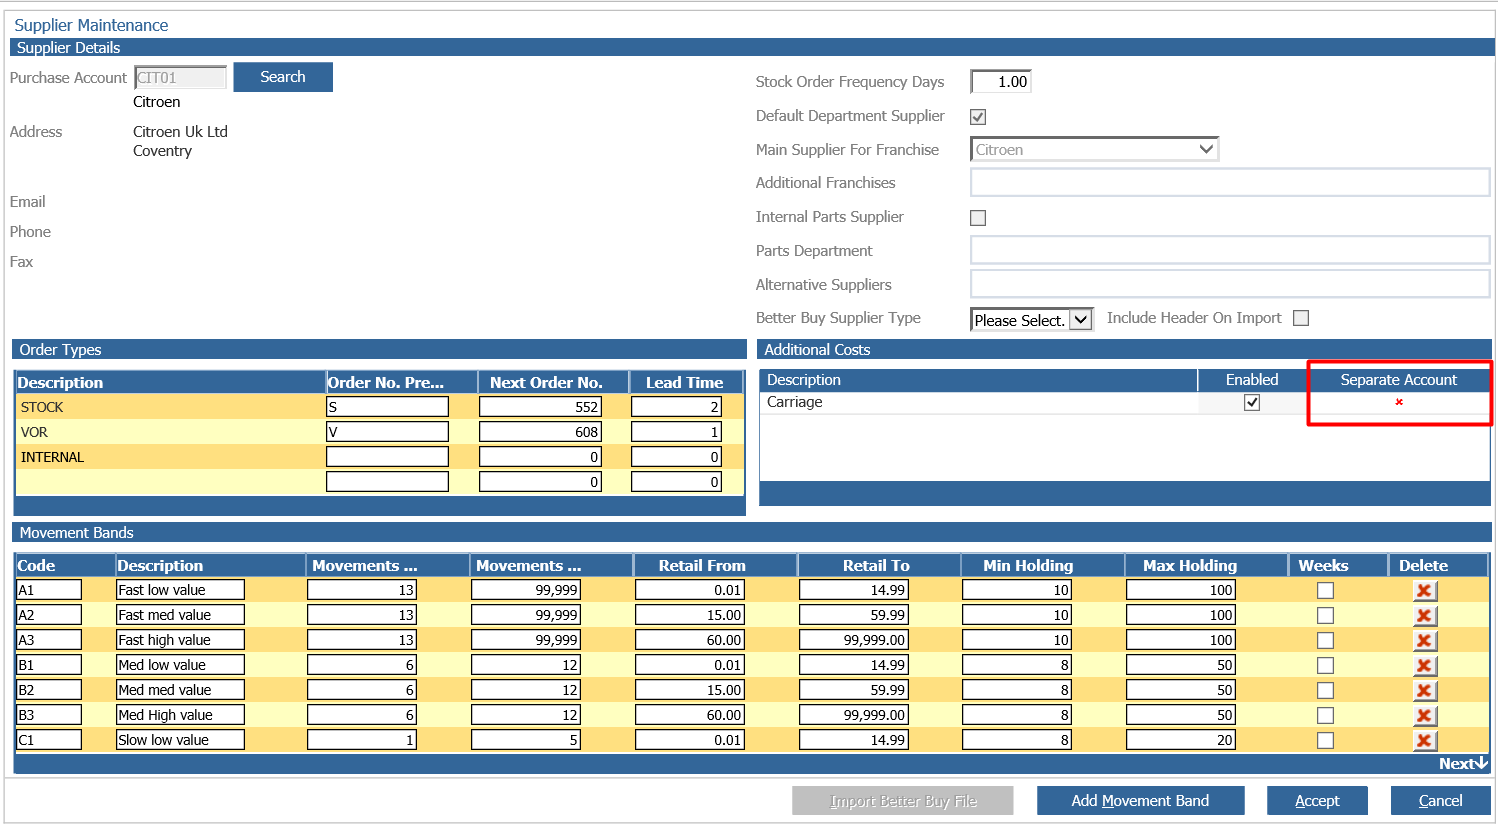
This would involve the user setting these costs as enabled against the parts supplier, but not defining these as a separate account.
When adding additional costs, the first thing the system will do is work out what the ‘factor’ is based on the part records entered into the order being received. This will then allow the system to accurately determine the new average cost of the parts associate to this order.
Once additional costs have been set up there will be an extra screen when receiving ordered parts. After confirming the parts received and clicking 'next' the 'Additional Cost Totals' screen will appear where they can be added in.
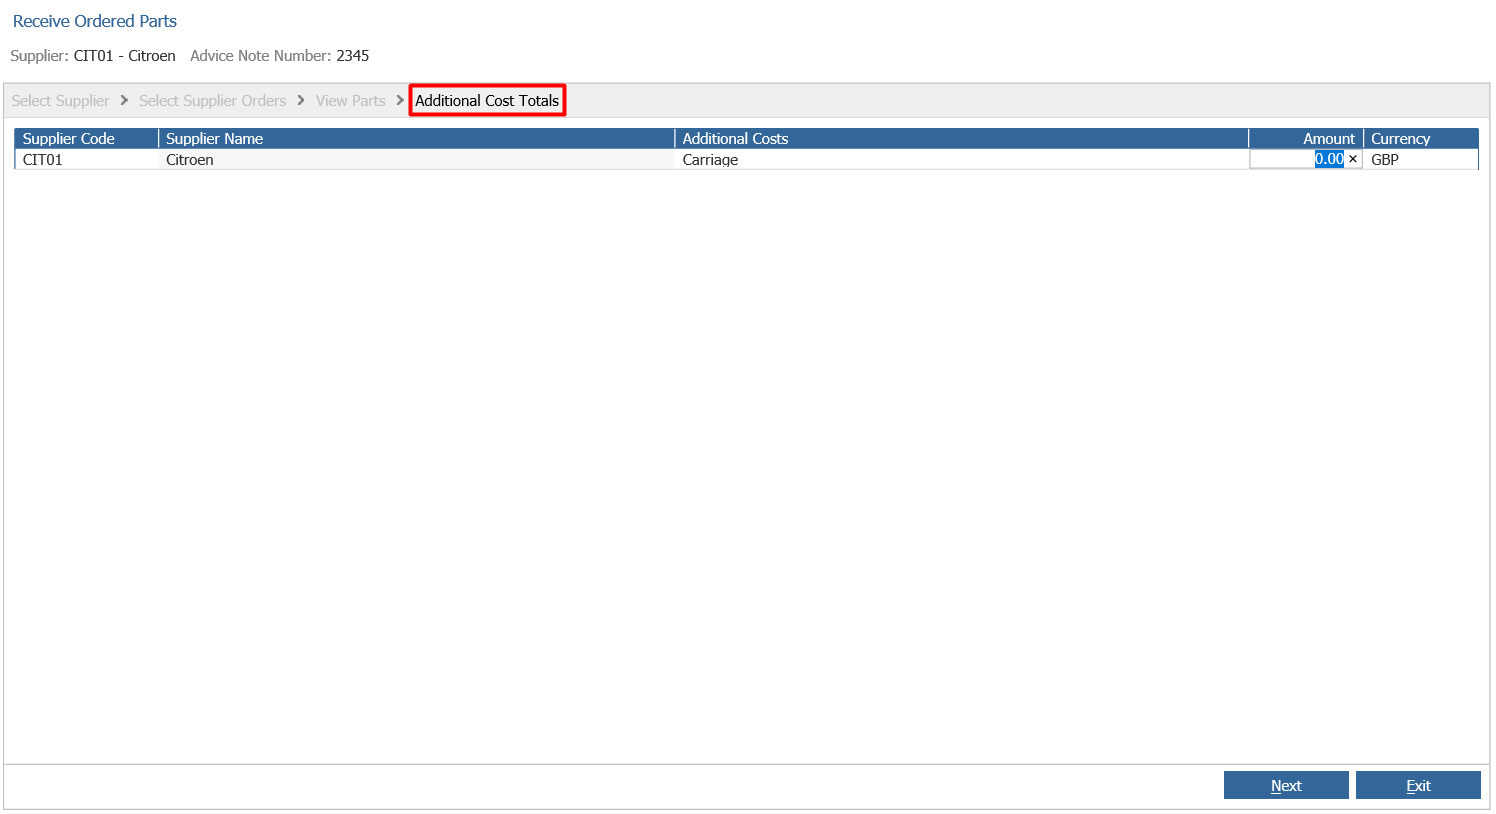
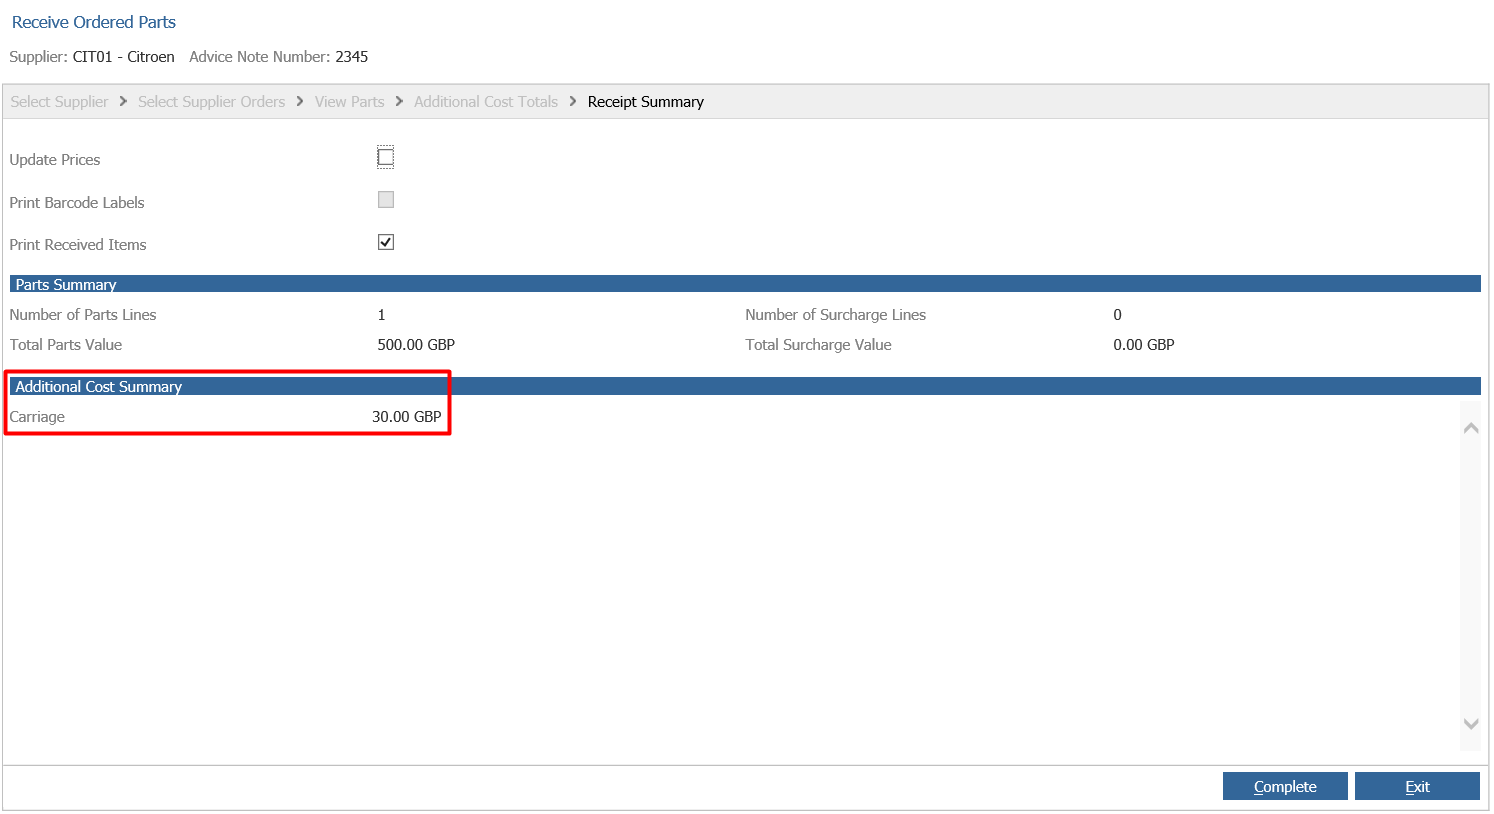
Once the additional costs have been added in, click 'next' and this will take you to the receipt summary screen. The bottom half of the screen will include the additional costs. The receipt can be completed as normal.
Factor = Total of Additional Costs on Order / Total Cost of Parts on Receipt
e.g. in the example above –
Factor = 10 / 33.20
Factor = 0.3012048192771084 (the factor is the full value, this figure is not rounded)
This factor is then applied to each part record individually to calculate a new unit price.
Original Price + (Original Price x Factor) = New Unit Price
e.g. in the example above –
4.56 + (4.56 x 0.3012048192771084) = 5.93
4.11 + (4.11 x 0.3012048192771084) =5.35
24.53 + (24.53 x 0.3012048192771084) =31.92 (this will be rounded to two decimal places)
These values will then show within the accounts postings upon the receipt of this order;
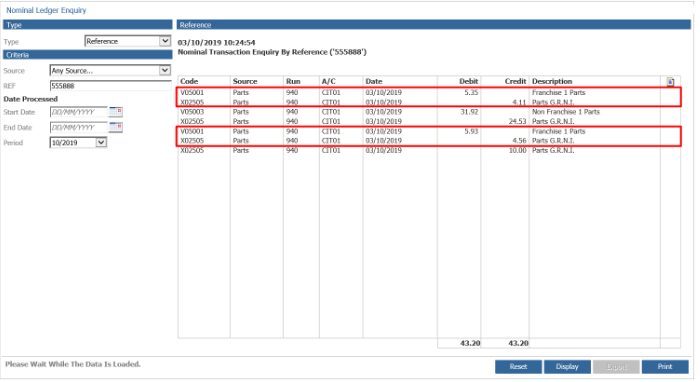
The stock nominal of the relevant Product Groups will be debited with the uplifted values from the order receipt.
The GRNI nominal of the relevant Product Group will be credited with the original unit value.
The Additional Costs GRNI nominal codes will be credited with the amounts the user has typed against these fields. (These Nominal Codes are set within Purchase Costs in the setup)
The uplifted costs can also be seen within the Parts Movement Report via;
Parts > Reporting > Movements
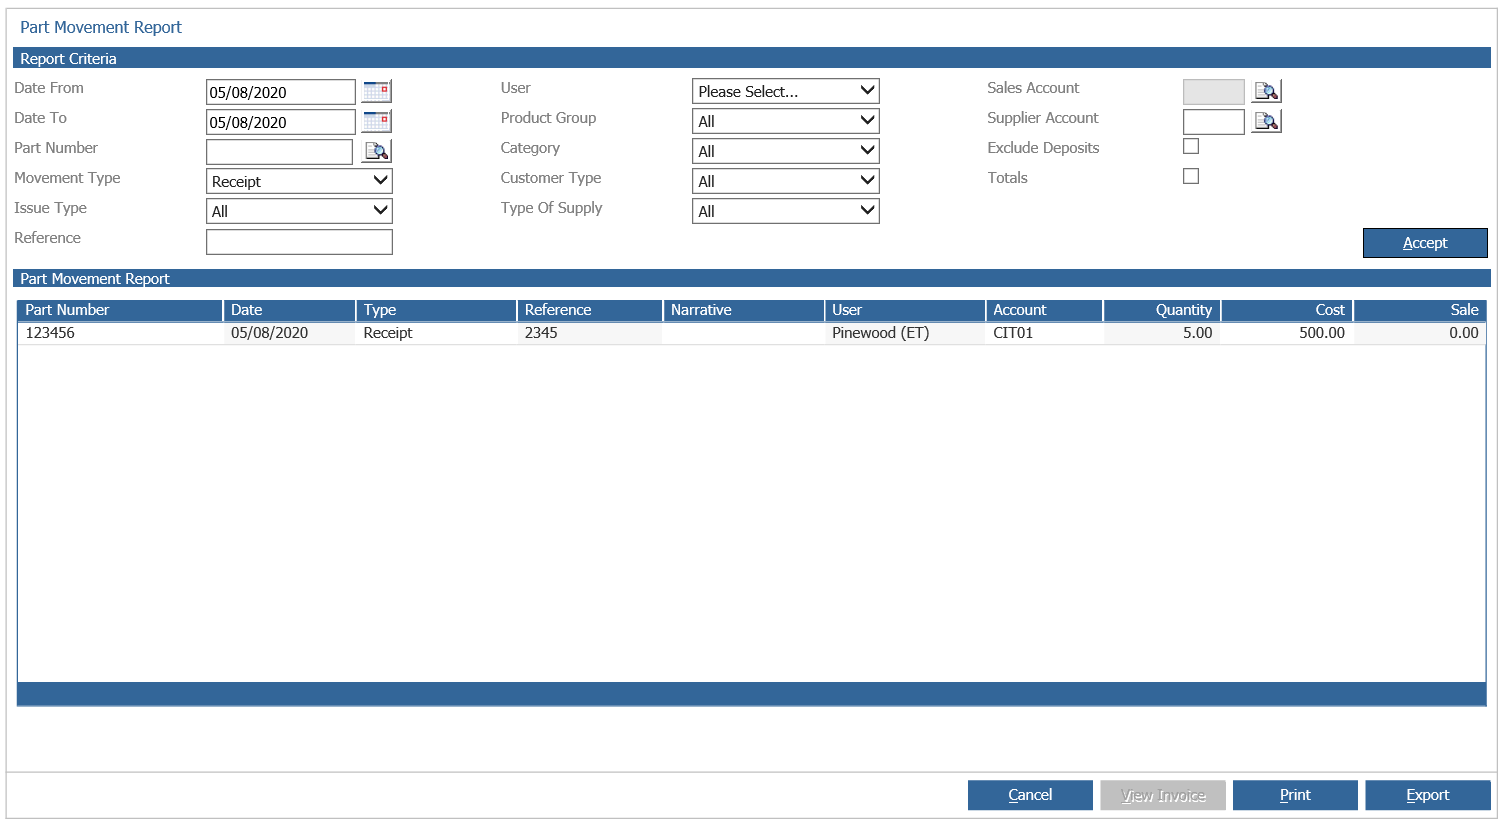
These cost prices will update the Average Cost price against the Part record.
This can then be seen on the GRNI report as follows;
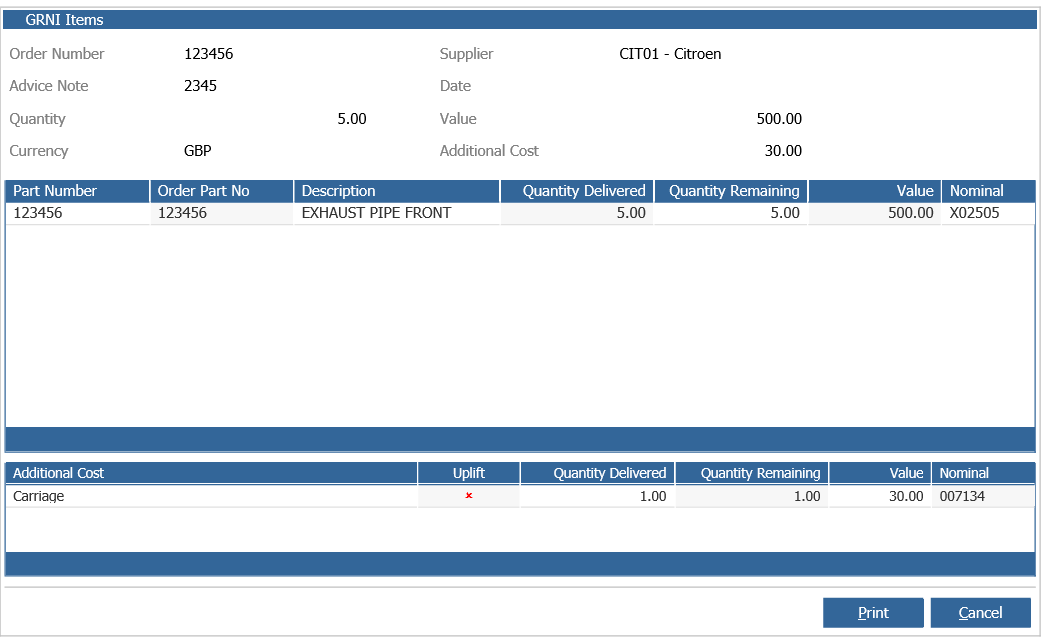
This will all be listed against the same supplier in the GRNI report, but will show the varying nominal codes for the different costs against the order.
Process When Receipting with Different Supplier
The second way the Parts Capitalisation functionality can be set up, is to charge the Additional Costs added to a receipt to different Purchase Ledger accounts. This allows a dealership to split the payment across differing companies for charges such as ‘Freight Costs’.
The setup against the supplier differs slightly for this option, within;
Parts > Maintenance > Supplier Maintenance > Suppliers
Drill into the relevant Supplier Account;
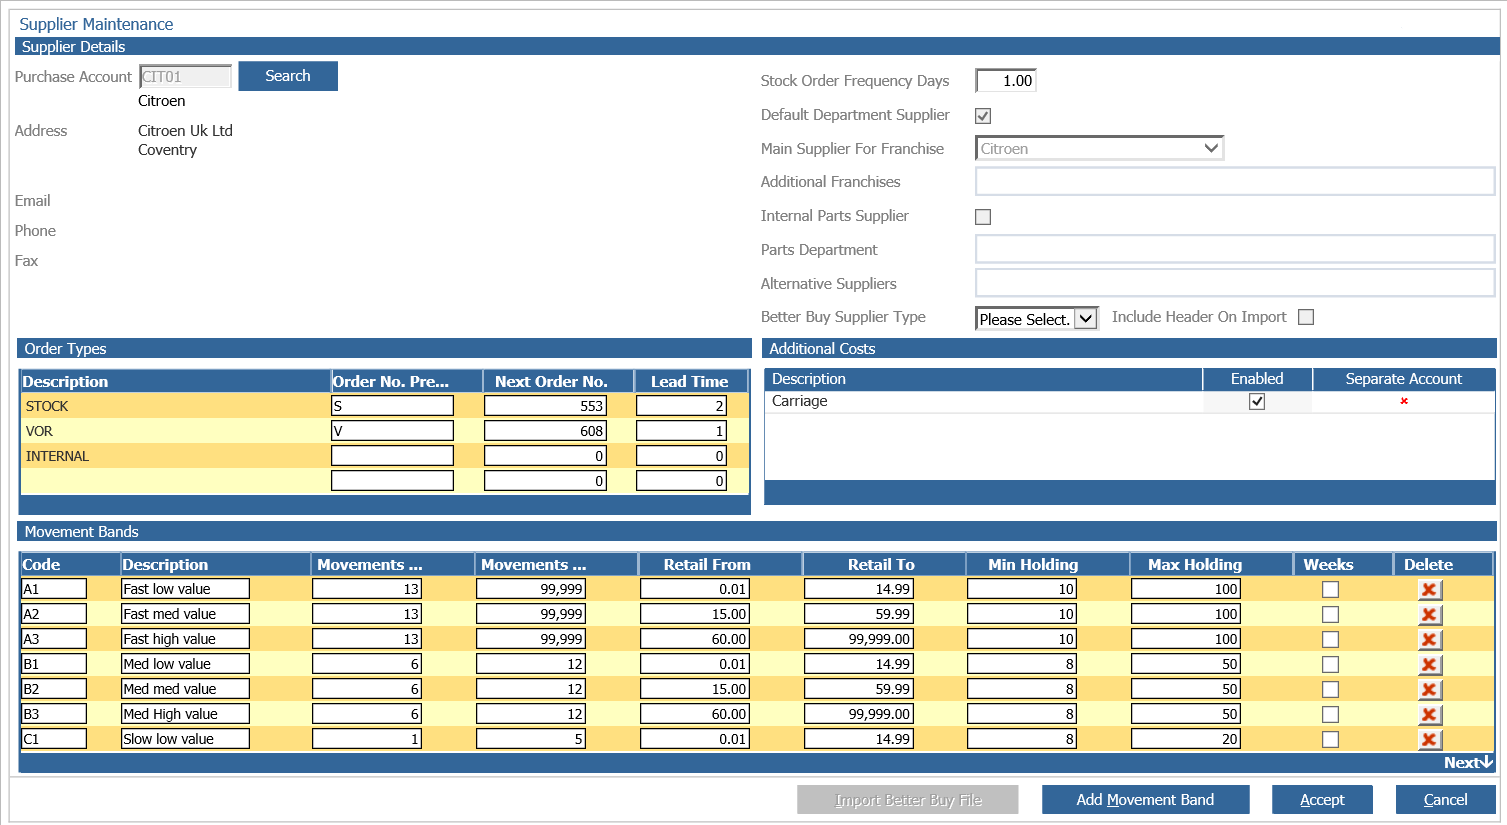
Double click the Additional Cost you wish to set against a separate Purchase Ledger Account and if the charges need to be at receipt or line level;
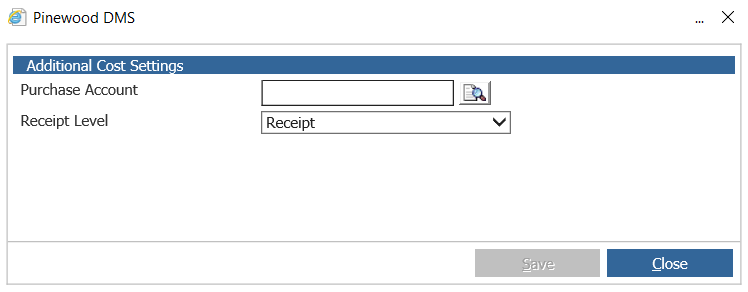
Click  to search for the purchase ledger account.
Select the Purchase Ledger Account you wish to map these charges to;
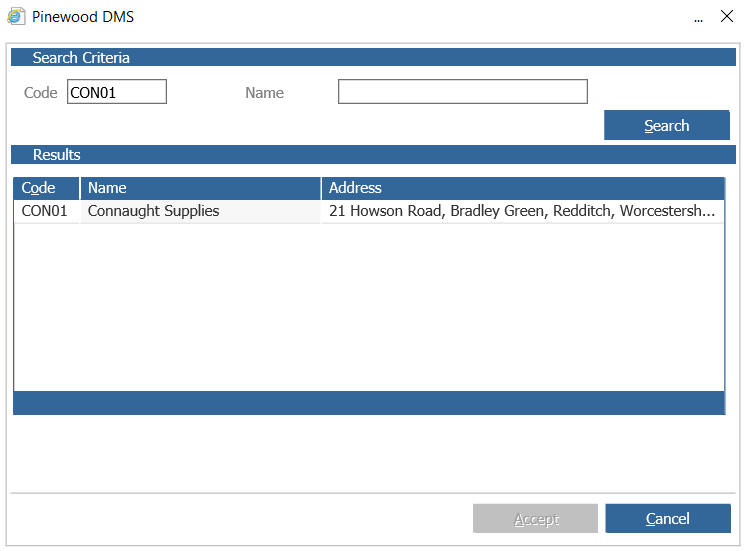
Once selected, this will show within the supplier screen as being mapped to a separate account;
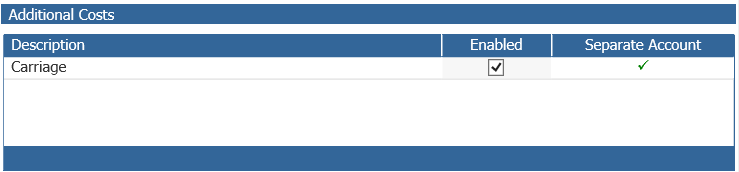
These additional Purchase Ledger accounts do not have to be set up as suppliers already, they simply need to exist as a Transaction Account within this division.
Currently each charge is only able to be allocated against a single Purchase Ledger account, however, in future this may be able to be split across multiple accounts.
When adding additional costs, the first thing the system will do is work out what the ‘factor’ is based on the part records entered into the order being received. This will then allow the system to accurately determine the new average cost of the parts associate to this order.
Once additional costs have been set up there will be an extra screen when receiving ordered parts. After confirming the parts received and clicking 'next' the 'Additional Cost Totals' screen will appear where they can be added in.
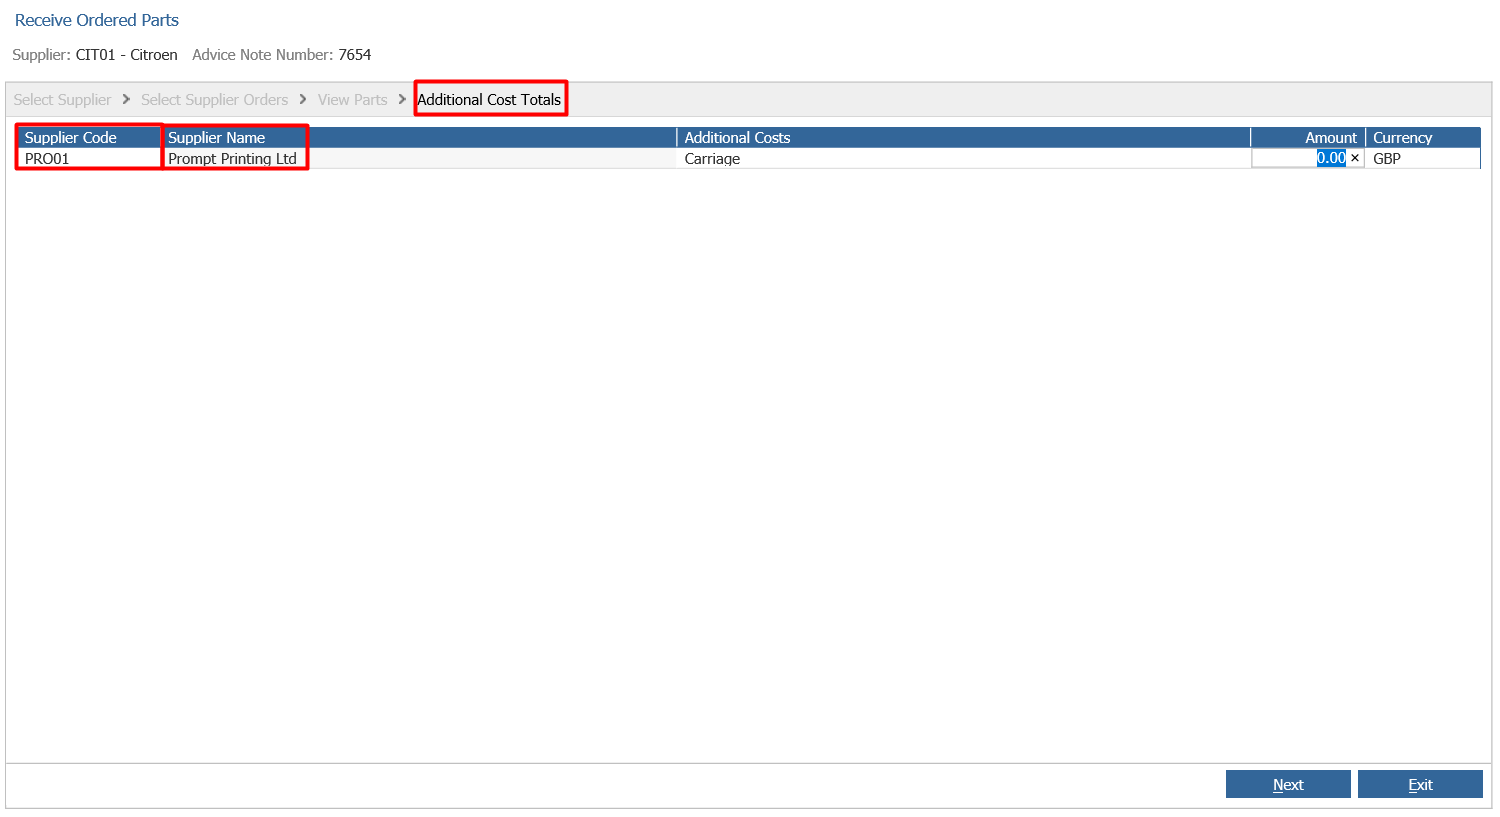
Once the additional costs have been added in, click 'next' and this will take you to the receipt summary screen. The bottom half of the screen will include the additional costs. The receipt can be completed as normal.
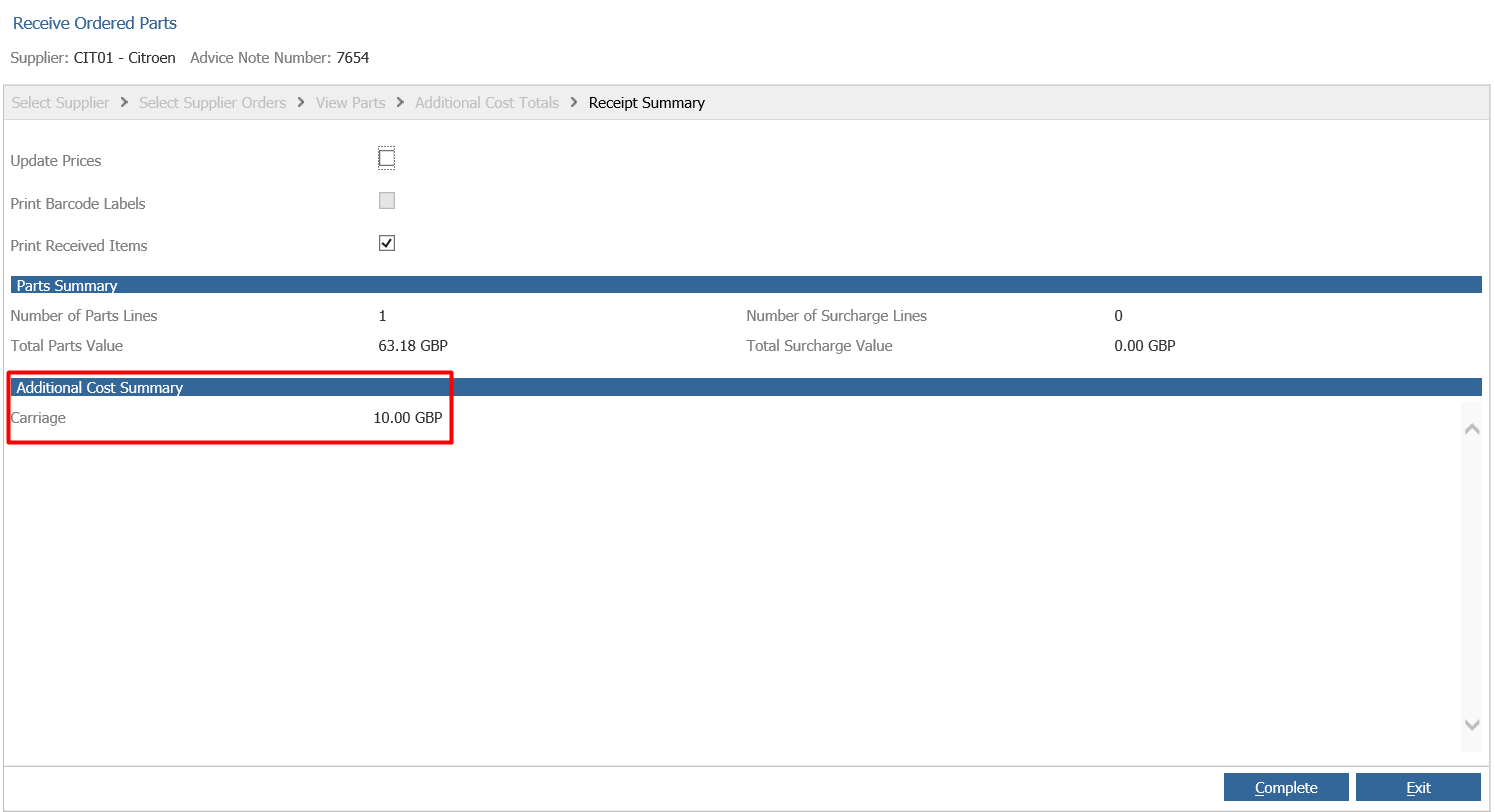
The factor for the order will then be calculated as follows;
Factor = Total of Additional Costs on Order / Total Cost of Parts on Receipt
e.g. in the example above –
Factor = 30 / 189.54
Factor = 0.1582779360557138 (the factor is the full value, this figure is not rounded)
This factor is then applied to each part record individually to calculate a new unit price.
Original Price + (Original Price x Factor) = New Unit Price
e.g. in the example above –
31.59 + (31.59 x 0.1582779360557138) = 36.59 (this will be rounded to two decimal places)
These values will then show within the accounts postings upon the receipt of this order;
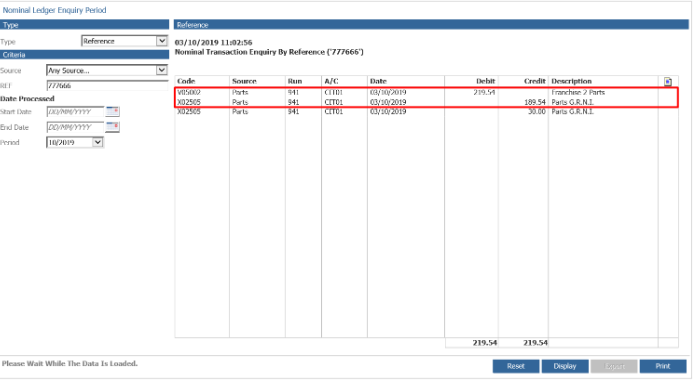
The stock nominal of the relevant Product Groups will be debited with the uplifted values from the order receipt.
The GRNI nominal of the relevant Product Group will be credited with the original unit value.
The Additional Costs GRNI nominal codes will be credited with the amounts the user has typed against these fields. (These Nominal Codes are set within Purchase Costs in the setup)
The uplifted costs can also be seen within the Parts Movement Report via;
Parts > Reporting > Movements;
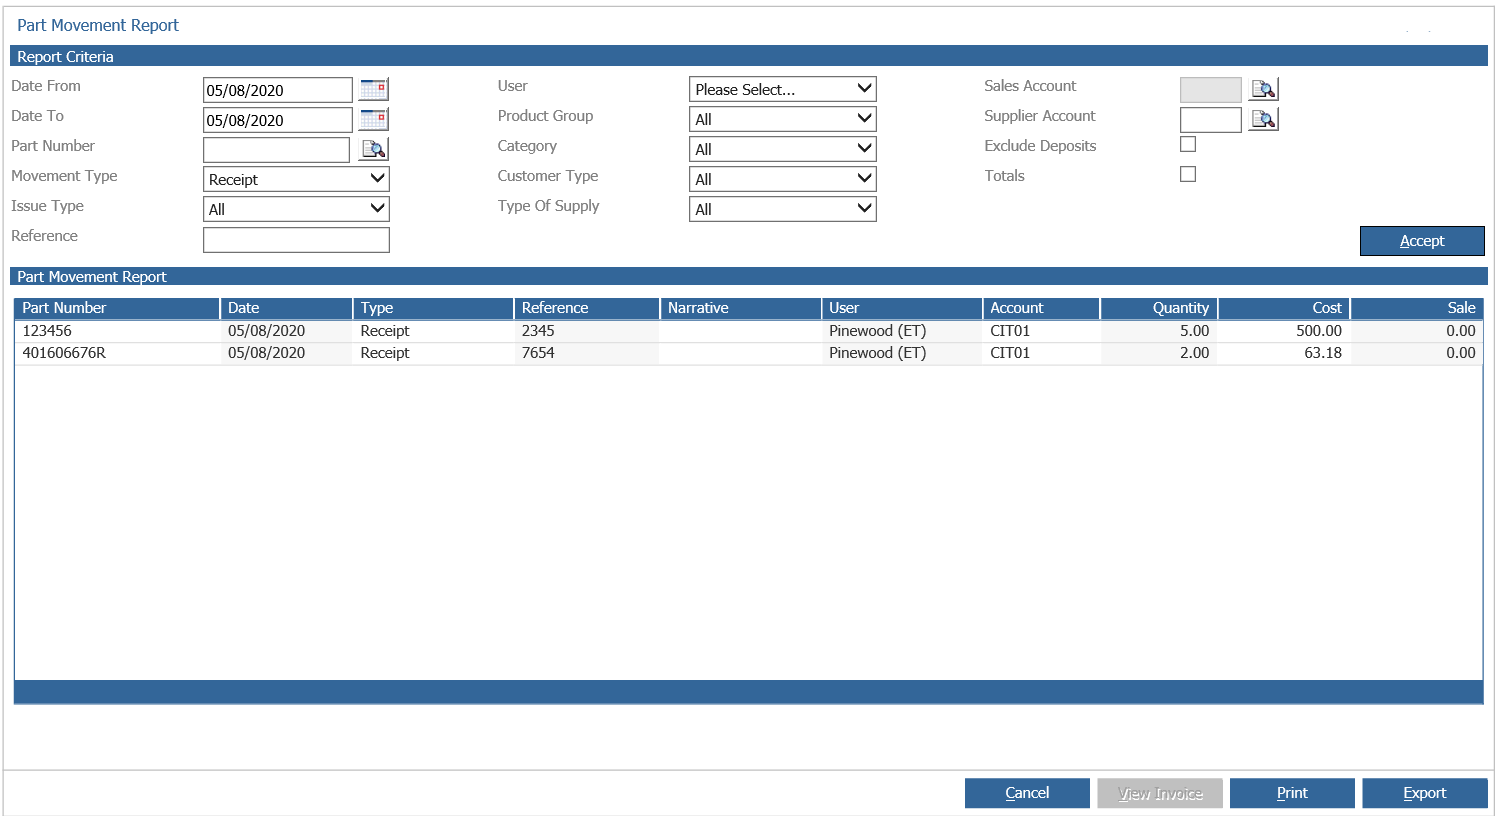
These cost prices will update the Average Cost price against the Part record.
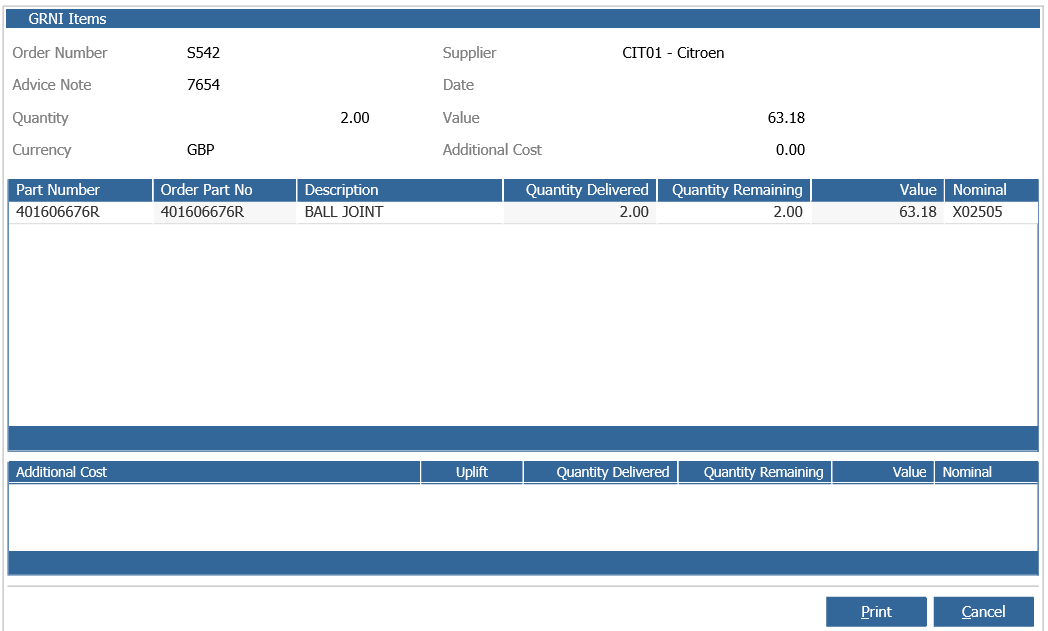
The difference between this option to charge the Additional Costs to a different account appears within the GRNI report.
Here you would see the charges appear separately in the GRNI report as they would be charged to different Purchase Ledger accounts.
So in this example you would see one GRNI line with the parts and any additional charges marked to a different supplier;
Screen Features
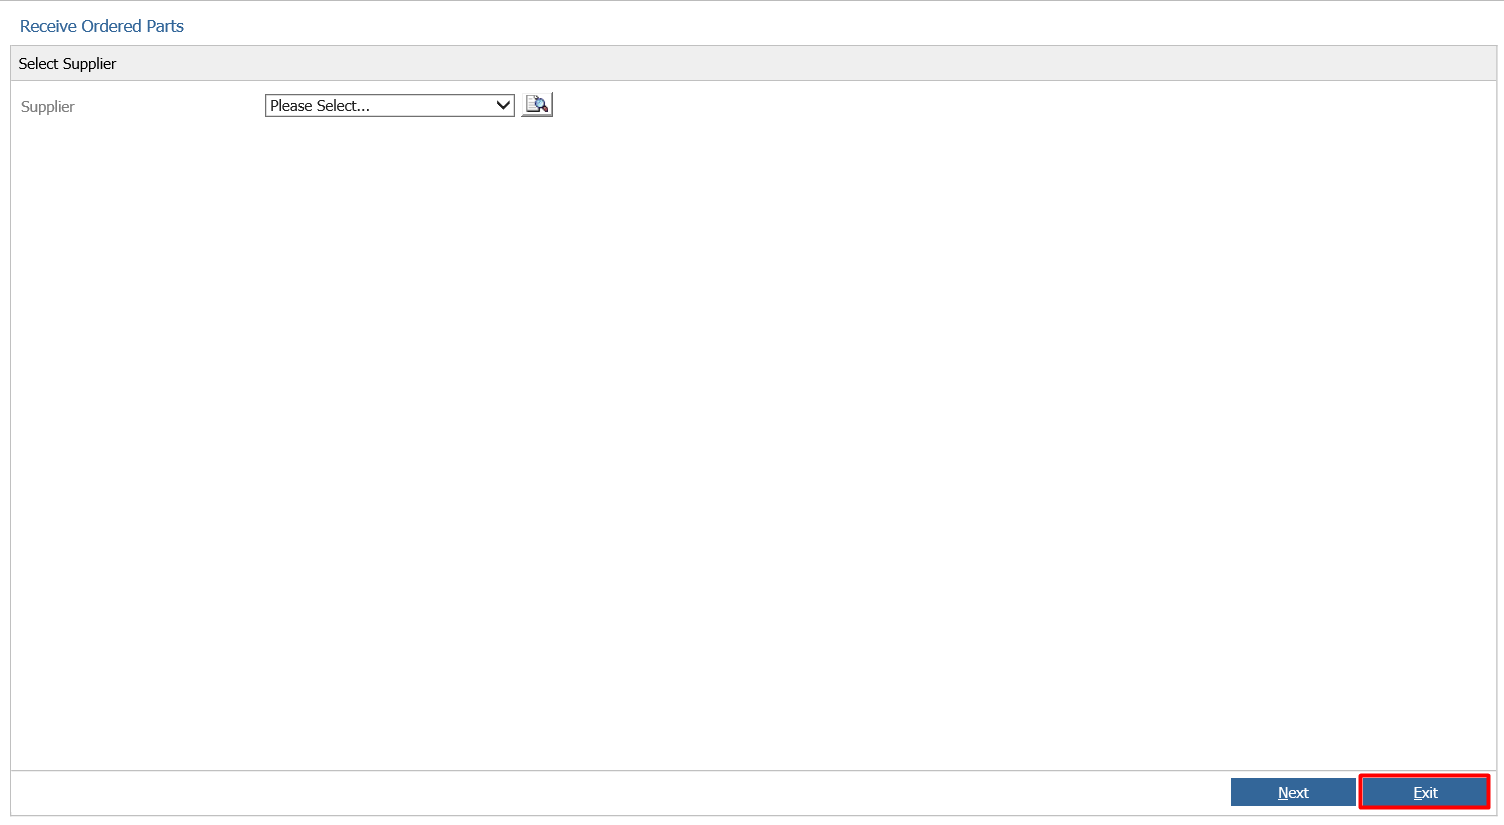
The 'Exit' button is available throughout the receipts process and will remove all changes made to the order if used.