Question
How do I Clear Overdue Appointments from the Contact Diary?
Answer
Follow any of the three methods below.
Method 1
Go to CRM > Sales Reports > Management - Contact Report. In here you will see the amount of appointments you have and anything that is overdue (overdue activities will show in red). As highlighted below, select a Salesperson in the drop down box below to view their Contact Diary which will show the users individual Appointments/Activities.
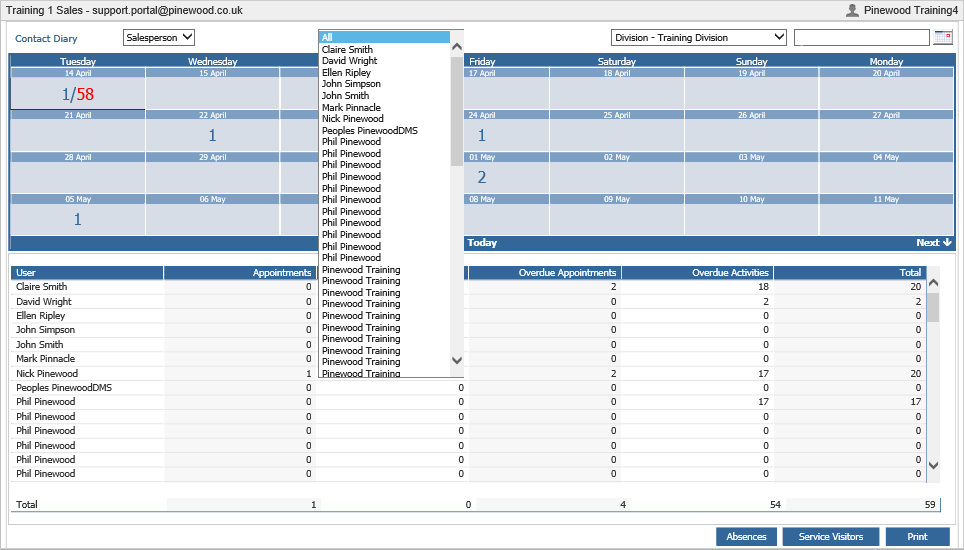
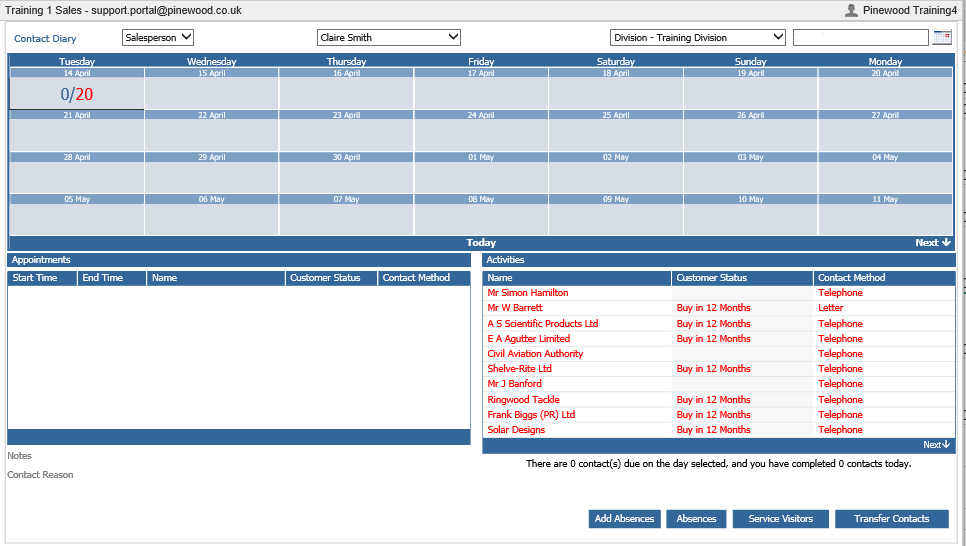
Once you have chosen the Salesperson you wish, see today's appointments on the left and any overdue activities on the right. Double click into one of the overdue activities to begin the process to removing it.
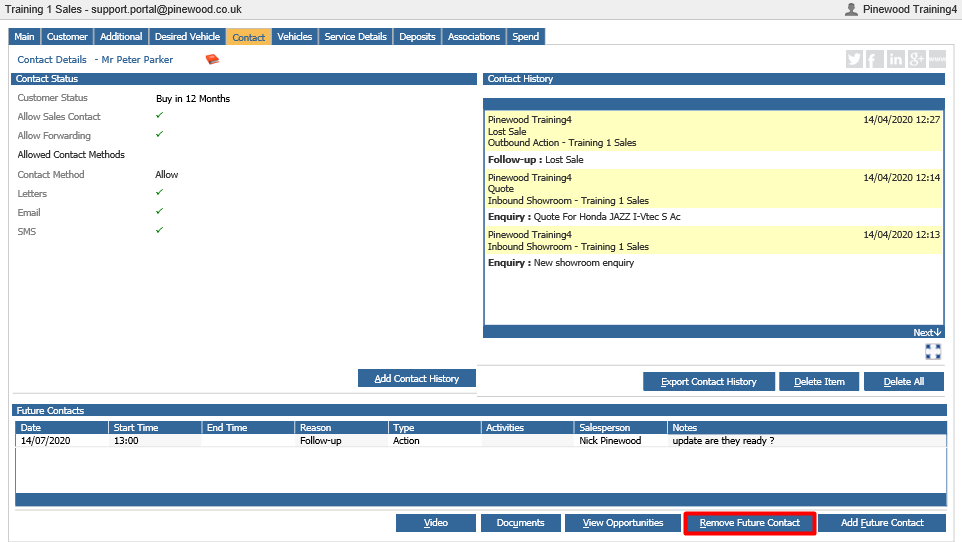
Once in, you will be displayed with the user's CRM record on the 'Main' tab. At the bottom of this page is a 'Fail' button. If you click that, this will remove the overdue opportunity and you will be returned to the Salesperson's Contact Diary.

Method 2
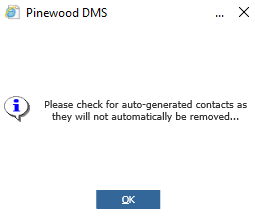
Alternatively, once you're in the customer's CRM record, you can go into the 'Contact' Tab and at the bottom of that page you can see the overdue contact that was set-up. If you single click on that line and click on 'Remove Future Contact', after confirming you the overdue activity will clear. You will also be prompted with a pop-up that warns you that to check for auto-generated contacts as they will not be automatically removed.
Method 3
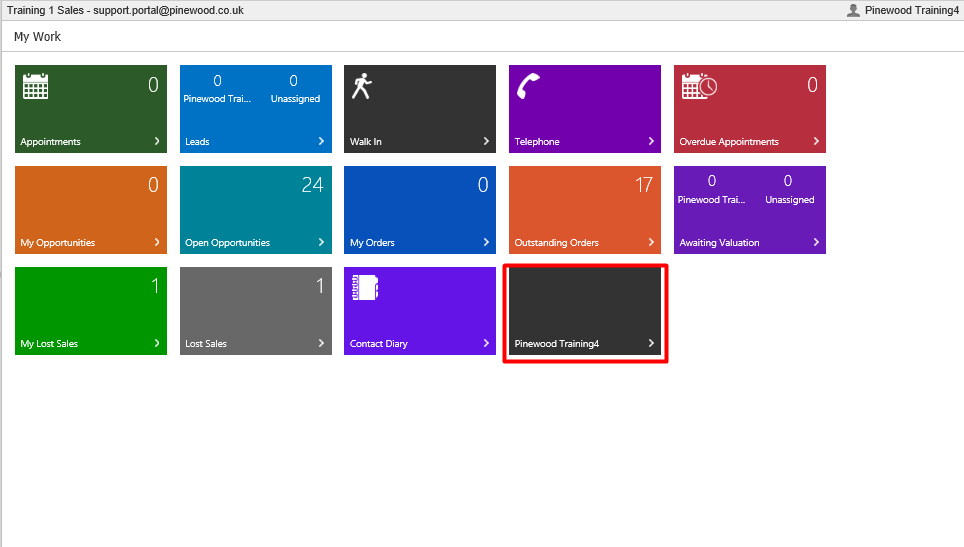
Go into the Showroom module and in 'My Work' you will be displayed with the following screen, select the Emulation Tile. This tile will allow you to select a user and view their Showroom view.
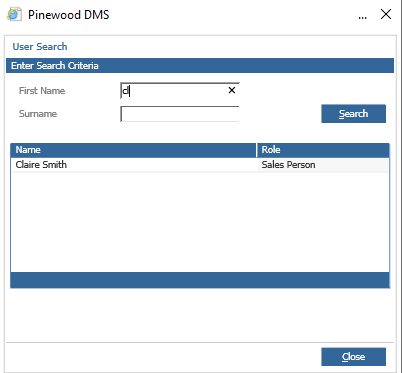
Search for the desired user.
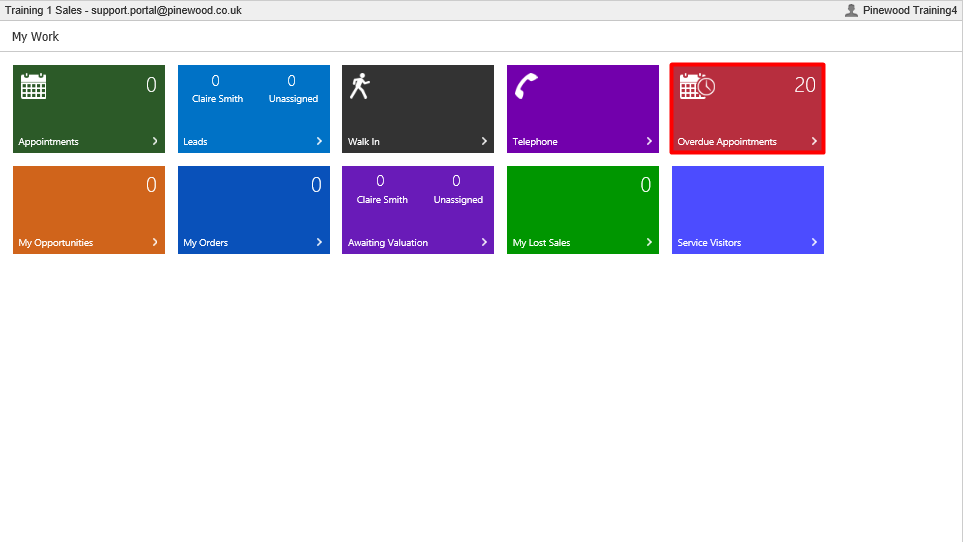
After the user has been selected, you will see the screen below. Select Overdue Appointments to bring up the user's list of overdue appointments.
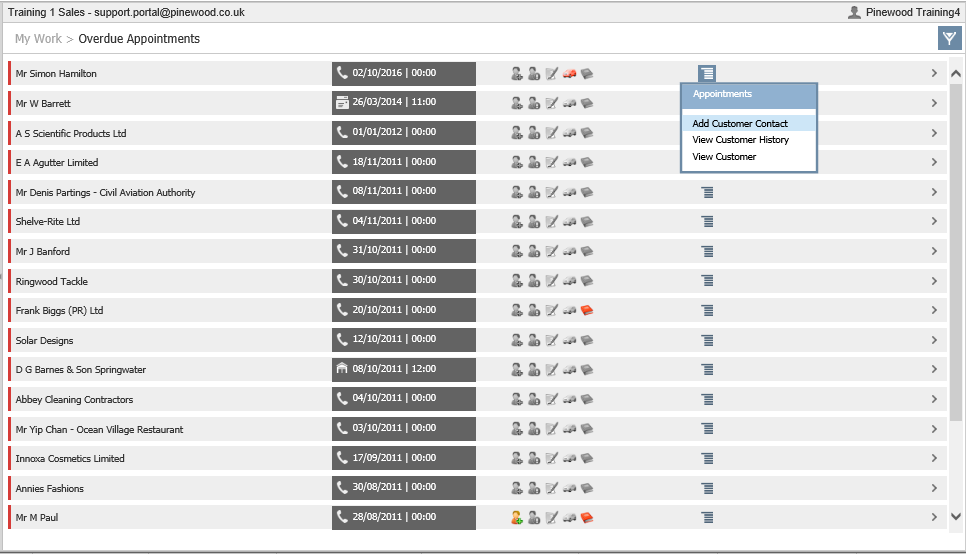
Once you have the list of the user's Overdue Appointments, select which one you would like to clear and click on the button highlighted below. Select 'Add customer contact'.
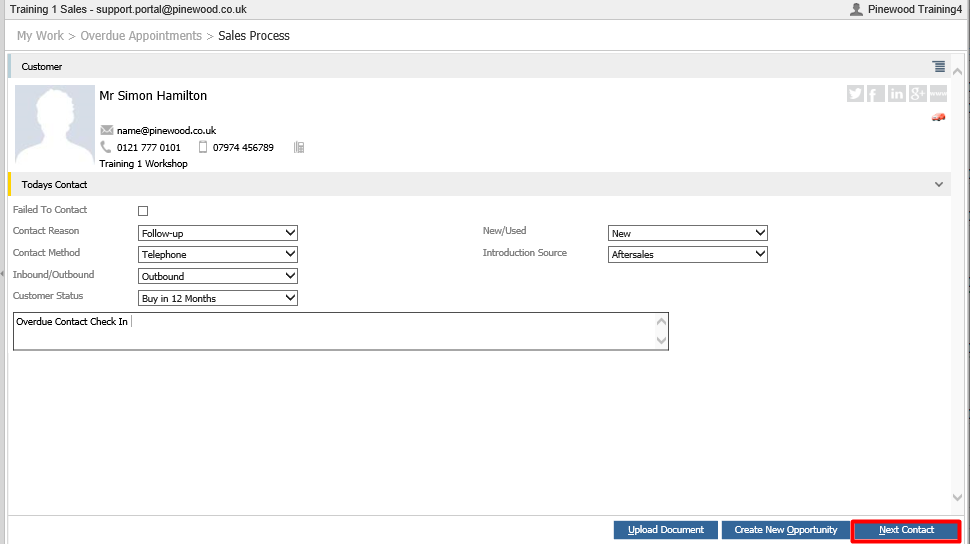
That will bring up the below screen. Fill in the details as and how you want to to create a next contact' for the customer. Once you have filled all the options in and are happy, select 'Next Contact' in the bottom right corner.
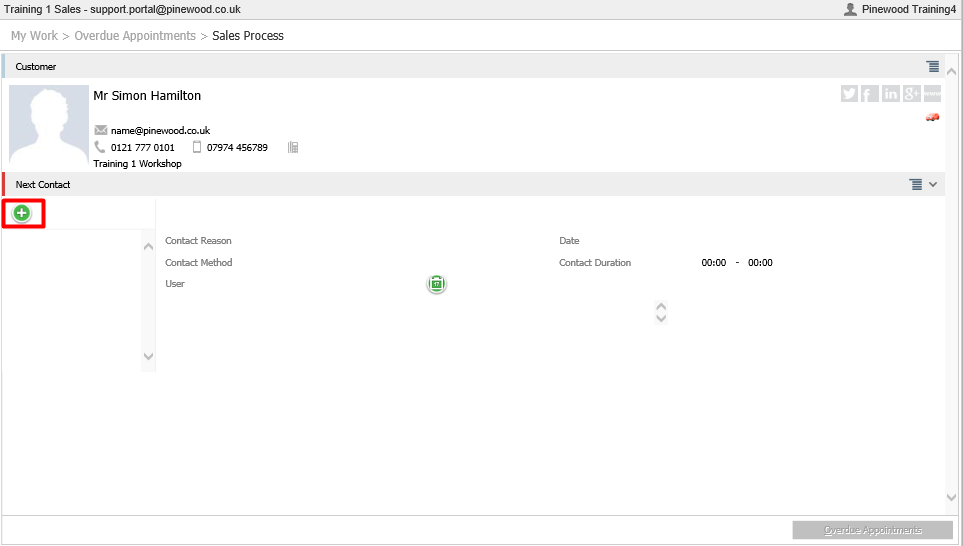
Click on the Green Add button, and fill in the details of your next contact.
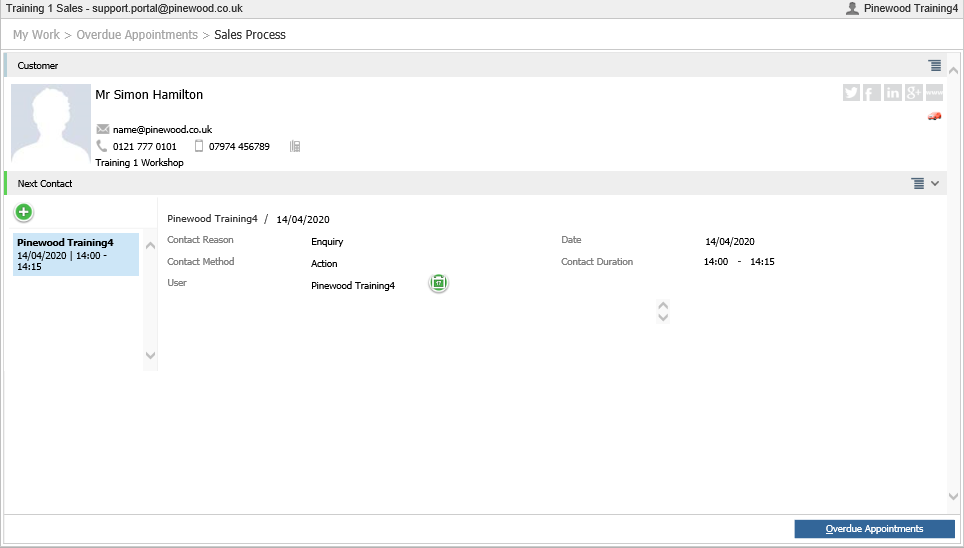
Once they have been filled in and you have saved them, you will see the following screen, meaning that a next contact has been created for the customer.
Once you go back into the overdue appointments for this sales person, you will see that the overdue appointment has cleared and been removed.