Creating a Parts selection defining by franchise could be useful to a dealership as this type of selection will ensure all of your franchise parts have the correct supplier set against them. To begin the process of creating a selection within the Pinewood DMS, select the following options from the left hand menu.
Parts > Selections > Search
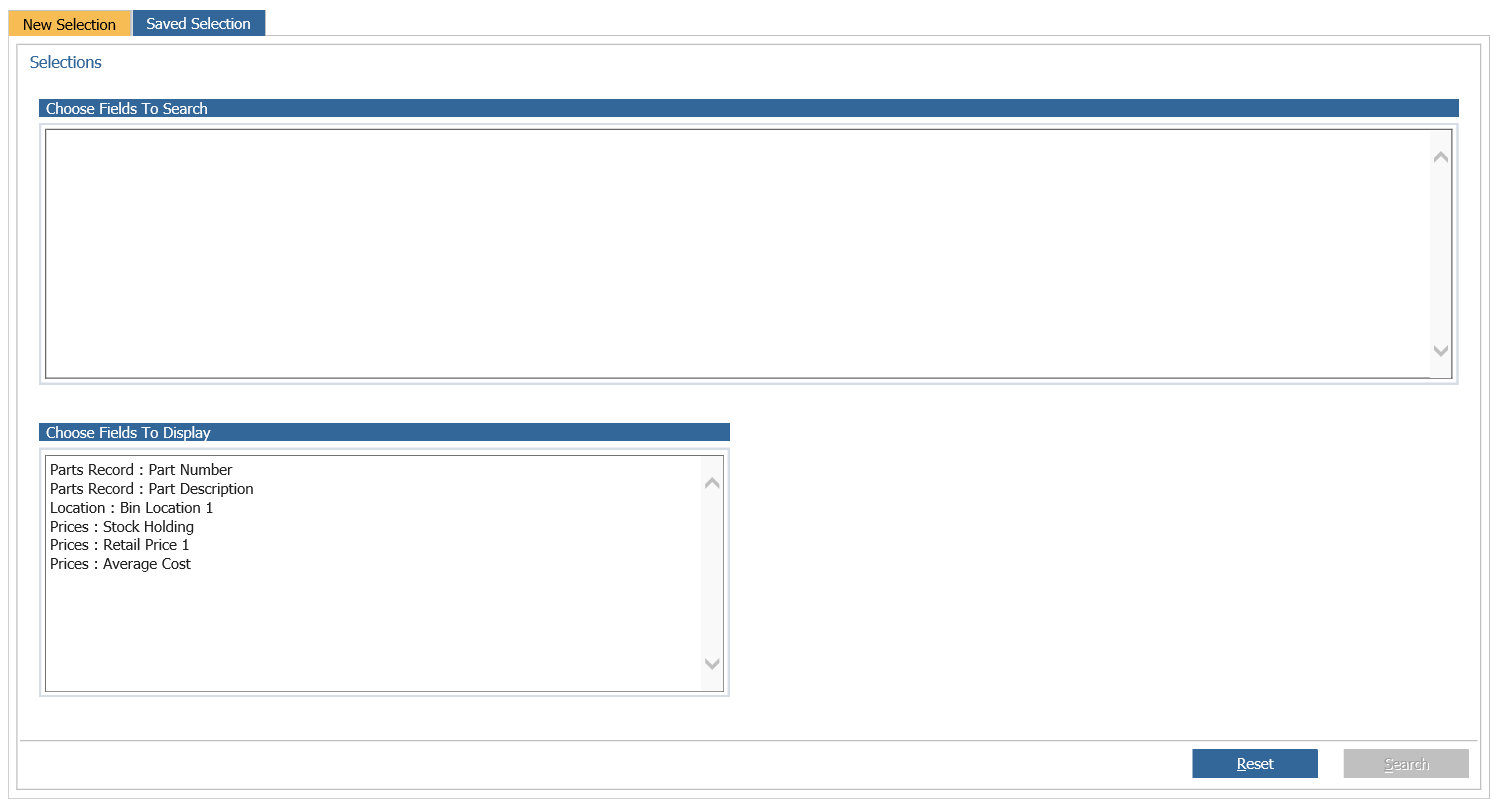
Once this option has been selected the system will display a screen in which you need to build your parts report. The screen will show 2 tabs, one of which is ‘New Selection and the other is ‘Saved selection’ the saved selection tab is to view reports that have previously been made.
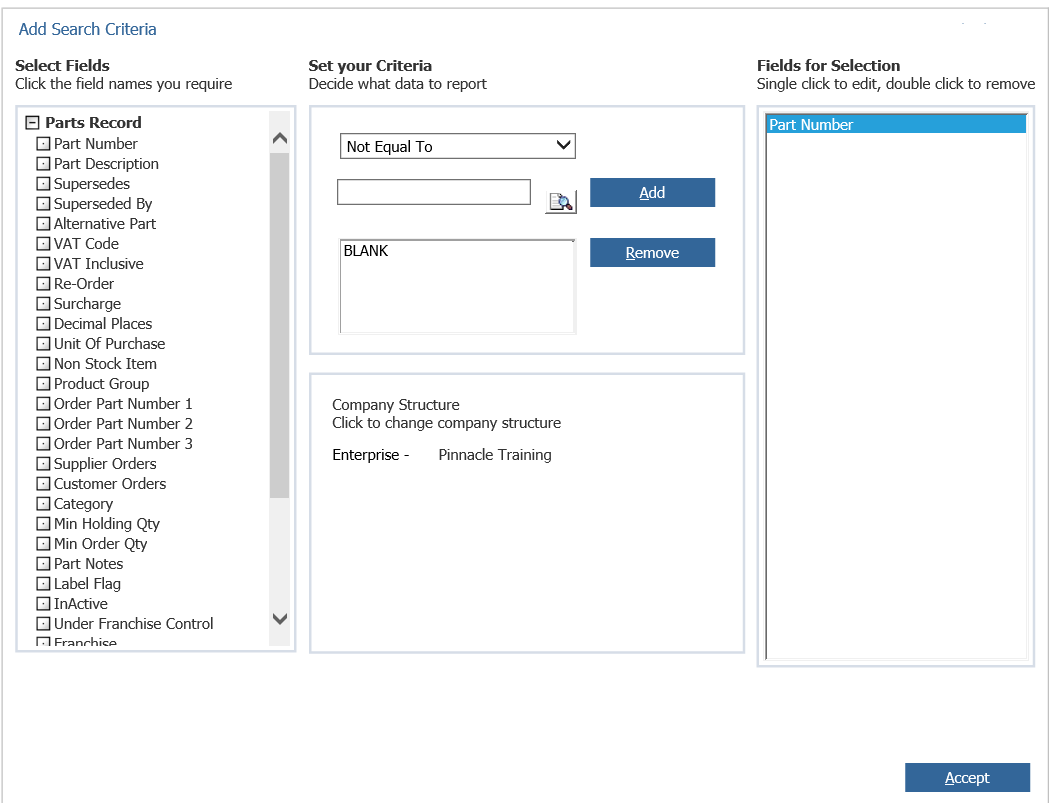
Click in to the ‘Choose fields to search’ box, this is what will need to be completed first. When clicking in to this box you will need to click parts record then part number, in the drop down select ‘Not Equal To’ and in the bellow box enter ‘BLANK’ this will then show all parts that have a part number associated and click ‘Add’. The following screen should look as below;
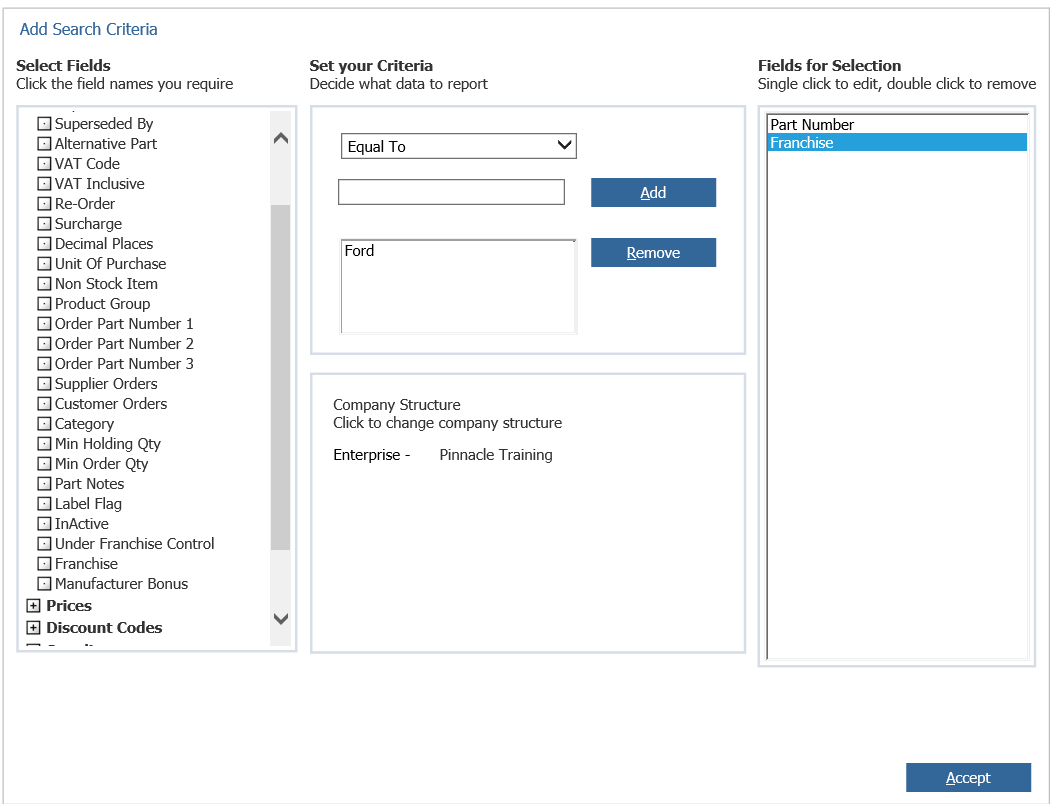
You will then need to click Franchise in the drop down box select ‘Equal To’ and in the bellow box enter the franchise part you wish to search for e.g. Ford and click ‘Add’. This will then be your report built and will only show Parts that have a part number and are a Ford franchise part. The screen should then look as below.
Go to Parts Records > InActive in the drop down select ‘Equal To’ and in the second drop down select ‘No’ then click ‘Add’. This will then only display parts that are currently active in the parts department.
The screen should look as below;
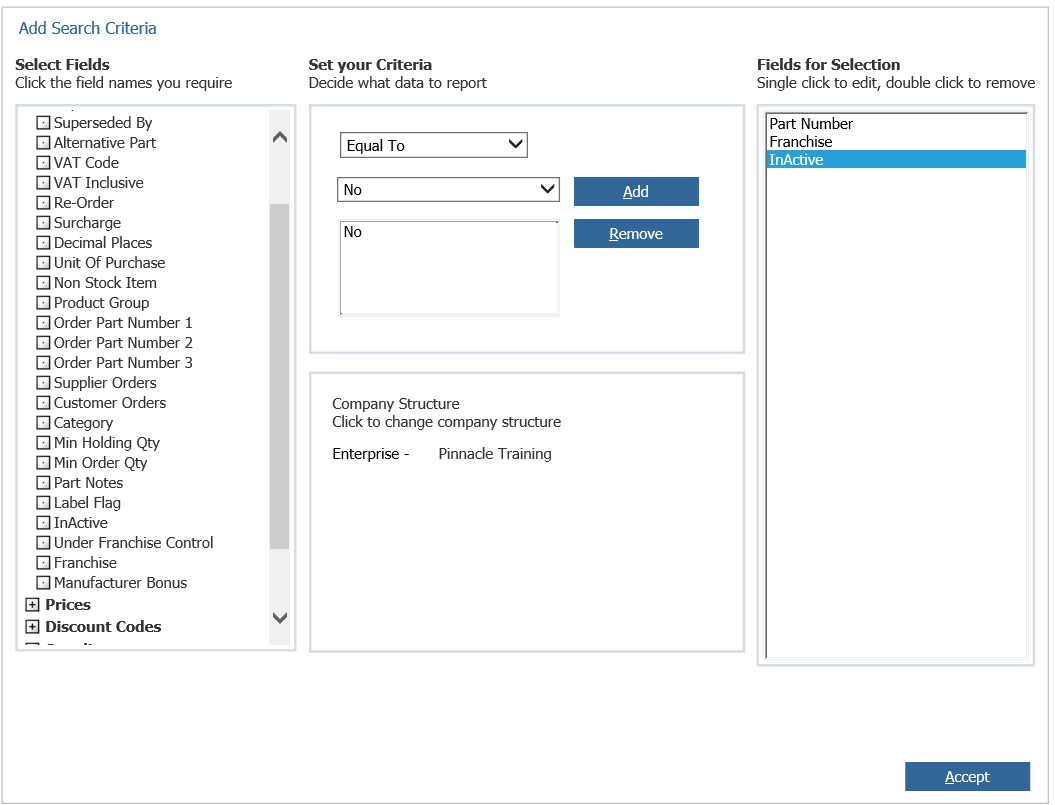
Click Accept.
This will then bring you back to the first screen, click in to the ‘Choose Fields To Display’ box. This box will allow you to see what information you would like to see in the report. For example, Part number, Franchise, Part description and Average Cost have been selected by clicking on the desired fields to show. I have also selected ‘Supplier 1’ to show in the fields to display as this way you can see in the report which part is coming from what supplier and check to see whether this is correct.
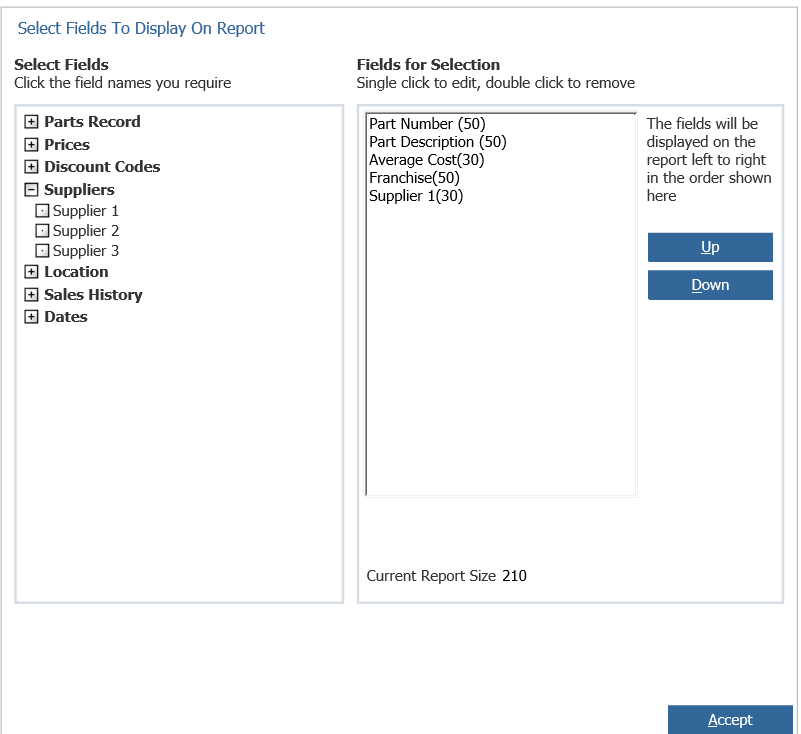
Click Accept.
The bottom right box will allow you to see how your report will be displayed.
Click ‘Search’ and you will be able to view the report created.
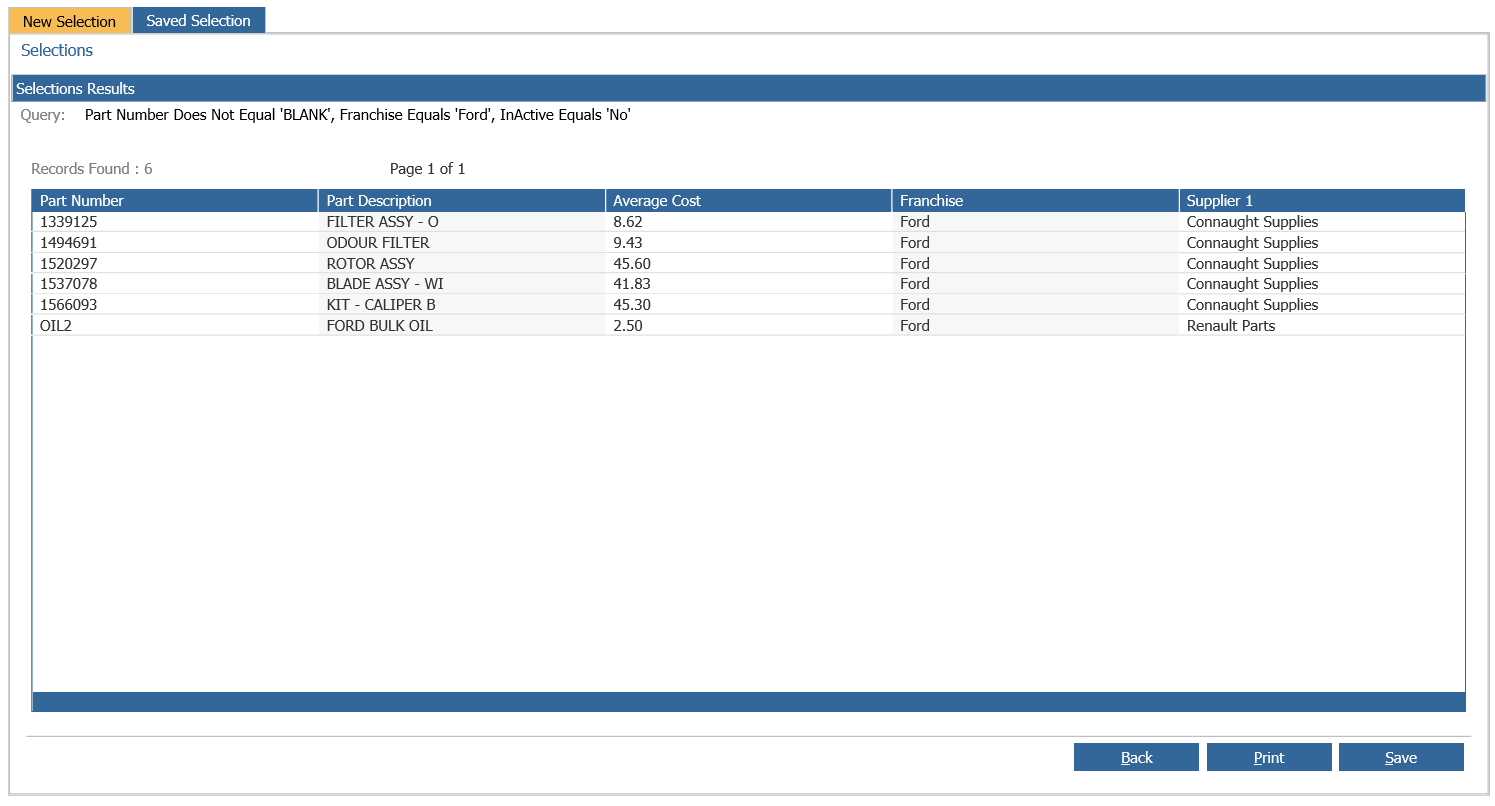
From here you can also save the selection by clicking ‘Save’ this will then appear in the ‘Saved Selection’ tab or you can print out your report by clicking ‘Print’.