
Question
How to set up the Demonstrator Diary in CRM?
Answer
In this guide, we will be going through the steps of setting up the Demonstration Diary within CRM. This feature allows users to book Test Drives of demonstrator vehicles for customer records.
In order to set this up, you must first go to CRM > Parameters > Demonstrator Diary.
Please Note: if this screen is not available within your system, please contact Support to enable it.
Within this screen ensure the ‘Enable Demonstrator Diary’ box is ticked. Next, you will need to add in the ‘Default Demonstration Duration’, this parameter is the length of time in minutes, that the demo will be booked for. This can be amended at the point of booking.
Next, you will need to add ‘Demonstration Car Turnaround’, this is the time in minutes in which the vehicle will be prepared for the next demonstration.
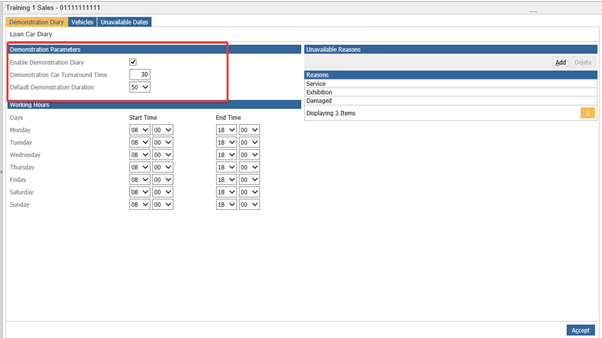
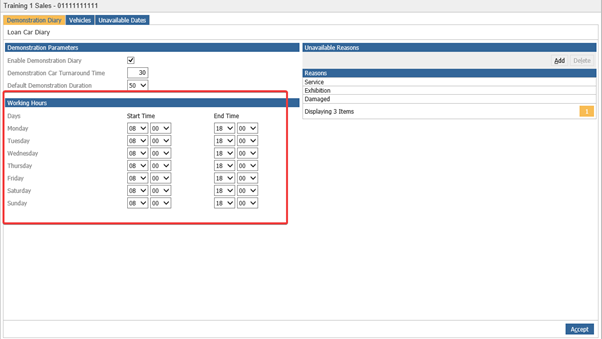
Next, the ‘Working Hours’ will need to be entered. These are the start and end times that the demonstration vehicles will be available each day.
On the right-hand side of the page, you are able to enter, amend and delete ‘Unavailable Reasons’.
Clicking the ‘Add’ button will bring up a popup.
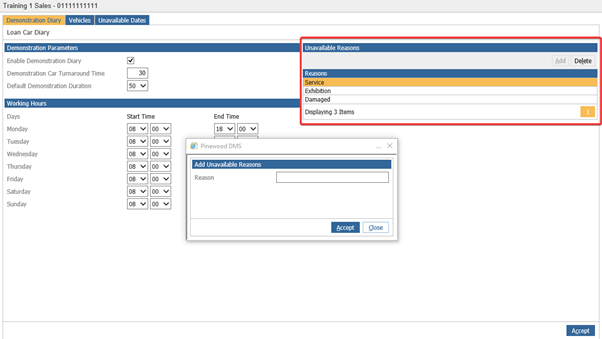
Once all of these fields are complete, press accept.
You can now move to the ‘Vehicles’ tab, and view existing Demonstrator Vehicles, this will display the Registration Number, Vehicle Details, VIN, Transmission, Fuel Type and Start/End Dates for the vehicle to be set as a demonstrator. Within this tab, you can view, add and amend your demonstration vehicles.
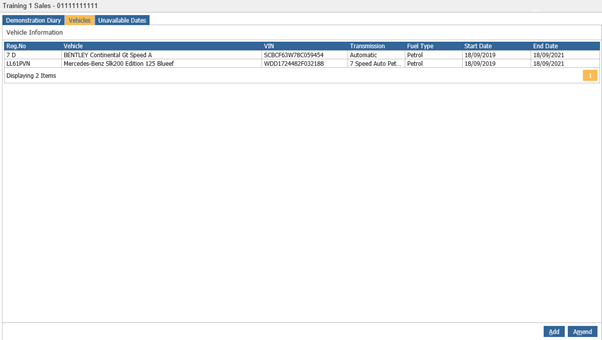
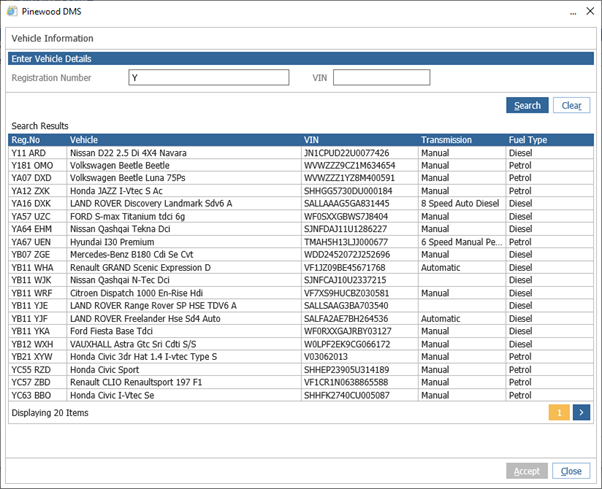
Selecting the ‘Add’ button will allow you to search for an In-Stock vehicle using a Registration or VIN number.
Please Note: the demonstrator vehicle will need to be created within the Vehicle branch before carrying out this step.
Once you have found the correct vehicle record, you can either double click or single click and press ‘Accept’.
You will then be presented with a popup, allowing you to assign dates to the vehicle, and make the vehicle available for demonstrations.
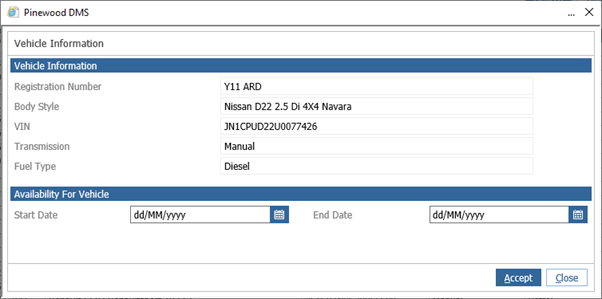
Your vehicle will now appear within the vehicle information section.
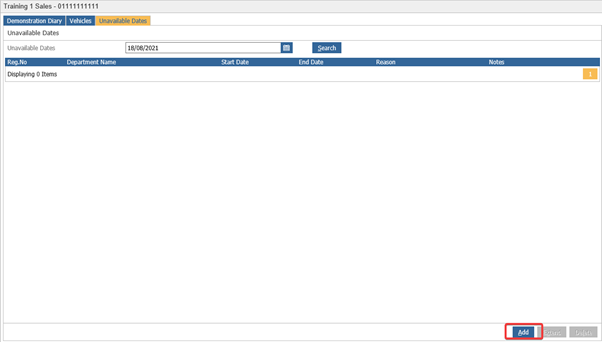
The final step in setting up the Demonstrator Diary will be carried out in the ‘Unavailable Dates’ tab, this section is used to make the vehicles temporarily unavailable.
To mark a vehicle as Unavailable, press ‘Add’ at the bottom of the screen.
Within this popup, you are able to select the relevant vehicle. You will then be asked to select a start date and time, end date and time, an ‘Unavailable Reason’ which you will have set up in the initial screen and any relevant notes.
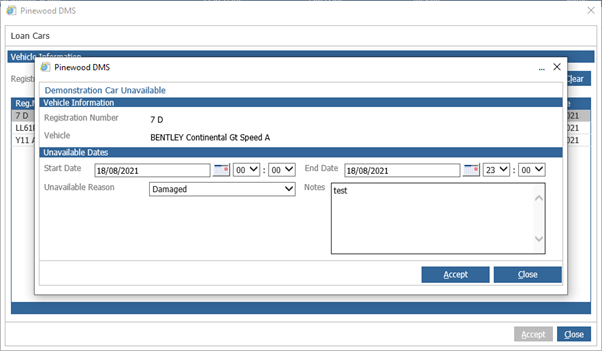
You can then press ‘Accept’ and the selected vehicle will appear in the ‘Unavailable Dates’ tab.
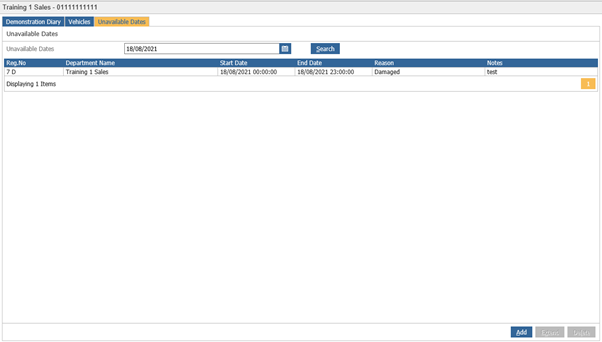
Your demonstrator diary is now set up for you to use.