
To access the Receipts routine within the Cash Book, click on Receipts.
The Receipts posting screen will appear
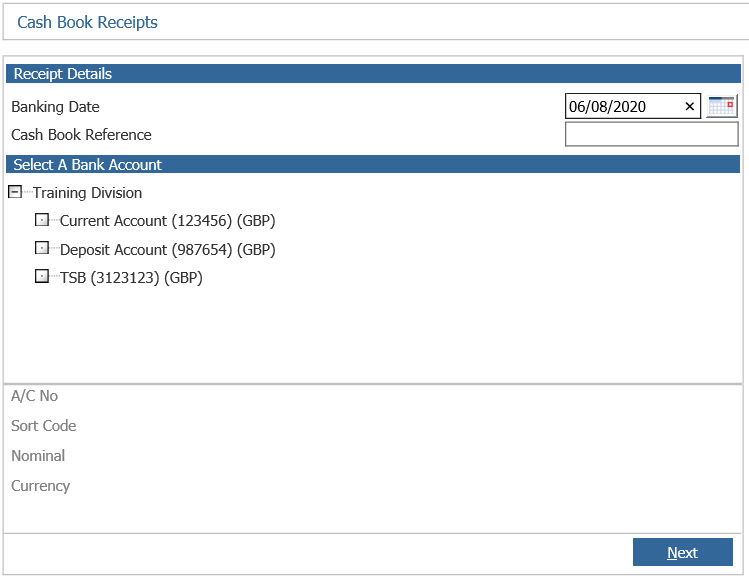
If more than one bank account has been created, double click on the bank account that the receipt will be paid into. Input the ‘Banking Date’, this will determine which period is used and whether the ledger is available, receipts are not allowed into a closed period. The date would traditionally be the date the money was paid into the bank. Enter a cashbook reference. This would generally be the reference from the paying in book or manual cashbook. Click ‘Next’ and the right hand side of the screen appears
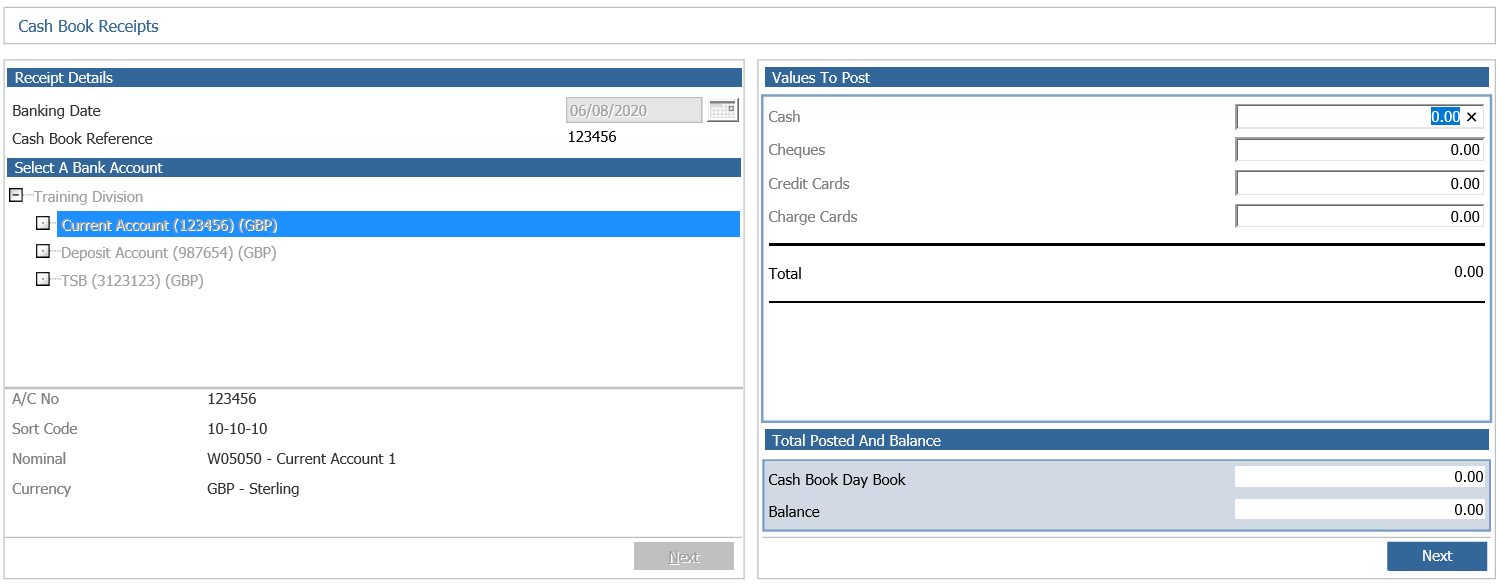
Enter the breakdown of the total receipt between Cash and Cheques as it appears on the paying in slip. Credit Card receipts should be posted for the total amount appearing on the bank statement for the day. These should be completed on a separate posting to the cash and cheque receipt.
The total must be posted between the appropriate ledgers, i.e. Sales Ledger, Purchase Ledger Refunds, Vehicle Ledger, Sundry Receipts, Cash Receipts (Vehicle Deposits) or Card Receipts (for use with credit card integration only).
Click ‘Next’ to proceed.
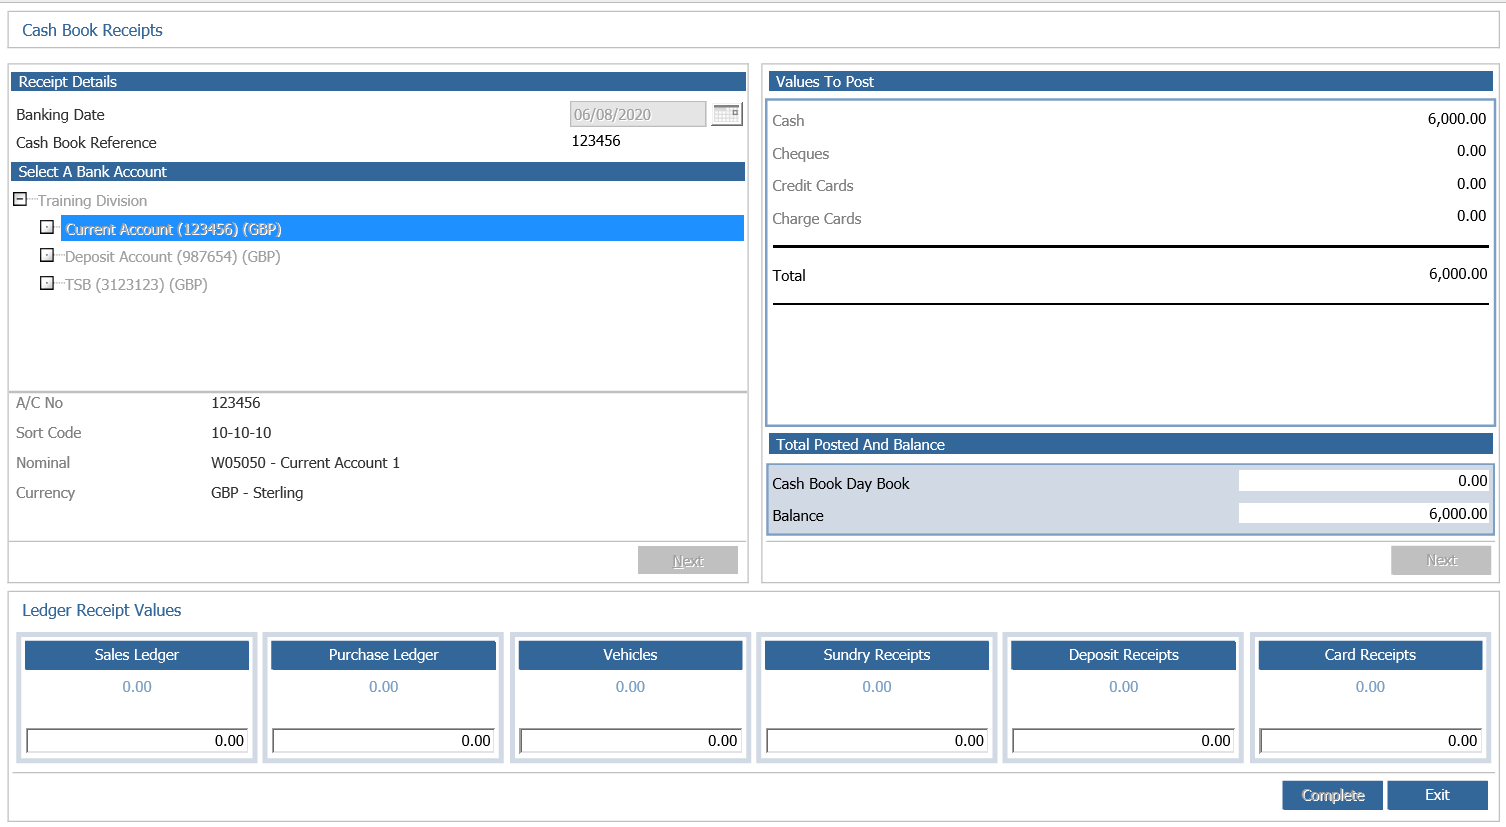
Sales Ledger Receipt
A receipt can clear the account in total, match against individual transactions or post as an unallocated receipt. Enter the total amount of sales ledger receipts contained within the paying in total into the Sales Ledger box, then click on the word ‘Sales Ledger’.
The search screen appears: -
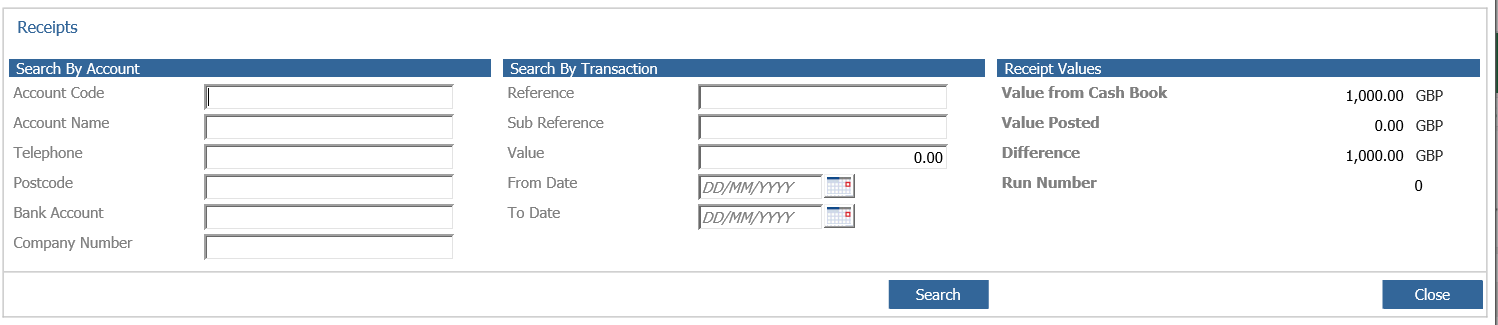
Search for the first sales ledger account for which a receipt is to be posted using either the account code, account name, telephone number or postcode and click ‘Search’.
Confirm that the correct account has been selected by clicking ‘Accept’.
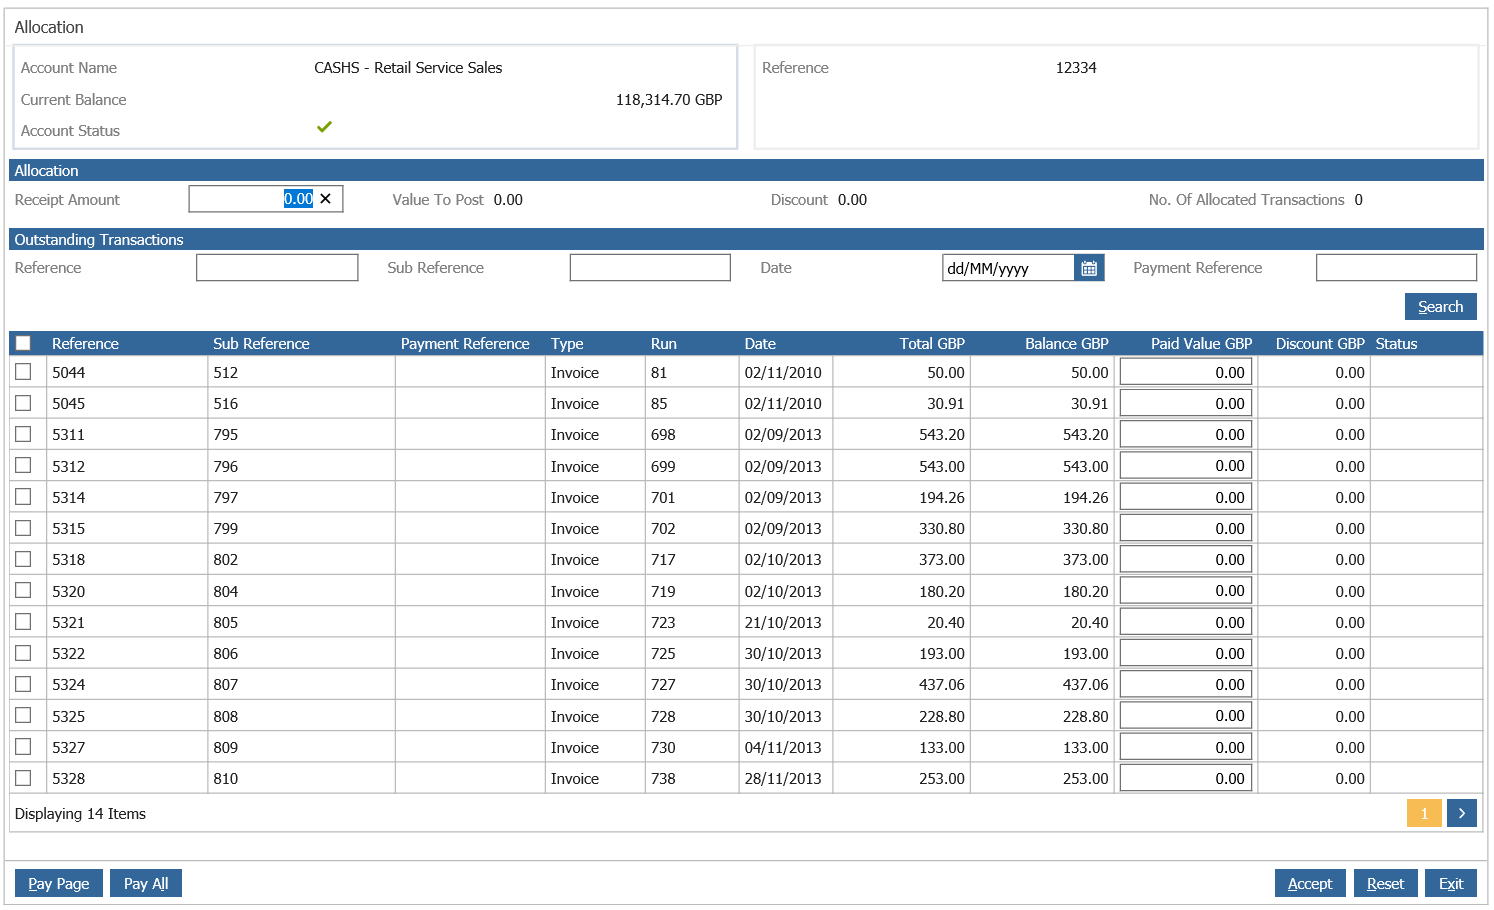
Enter the amount to be receipted onto this sales ledger account into the ‘Receipt Amount’ box and then choose the transactions to be paid. If the transaction amount is to be paid off completely, click on the arrow in the Pay column (the first column). This will put the total amount of the selected transaction in the Paid Value column and flag the transaction as paid. If only partially paid, click on the transaction line in the Paid Value column and enter the part payment value.
Confirm whether this is a part payment or a write off of the underpayment as a discount, subject to the maximum write off value set in Sales Ledger Parameters.
If ‘Part Pay’ is selected, a further screen appears where a narrative must be entered as to why this is only a part payment.
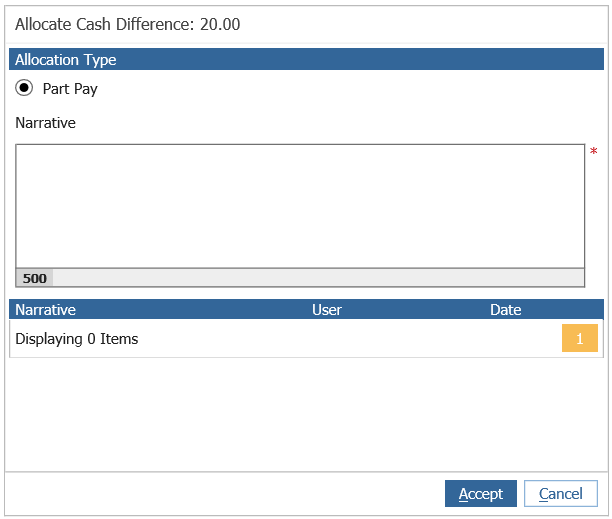
Click ‘Accept’ to continue.
If the difference is to be written off as a discount, select the ‘Write Off’ option. The prompt to enter a narrative appears and then the discount value shows against the transaction on the account and the outstanding balance on the transaction shows as zero. The discount will be posted to the nominal code set against the ‘Sales Ledger Discount Given’ field in the customers Accounting Group.
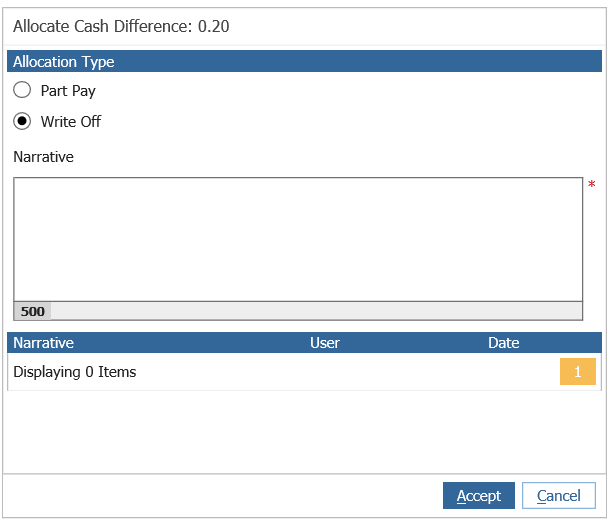
If the amount of discount is greater than the maximum set within the sales ledger parameters, a message will appear saying ‘Discount too large – Refer to Accountant’. The receipt amount will have to be entered as a part payment and a contra journal carried out to move the difference to the discount nominal.
If a transaction has been allocated in error, this allocation can be cancelled by double clicking on the transaction line. A pop up box appears asking for confirmation of the cancellation.
Click ‘Yes’ to continue and the allocation will be removed.
If a payment on account is to be posted, search for the required sales ledger account, enter the receipt amount and then click ‘Accept’ without selecting any transactions. A pop up box appears for confirmation of the posting of unallocated cash.
Click ‘Yes’ to continue.
Enter a narrative for the unallocated transaction and click ‘Accept’.
The other options across the bottom of the screen assist in the allocation process as follows: -

Pay All
Allocate all outstanding transactions on the account. If the customer has paid all invoices except one, select ‘Pay All’ and then double click on the unpaid transaction to cancel that one only.
Pay Page
Allocate all outstanding transactions on the current page of the screen.
Accept
Complete the posting to the sales ledger account.
Reset
Clear all allocations and also the receipt amount entered in the centre left hand side of the screen.
Cancel
Delete all allocations and return to the sales ledger account search screen.
Exit
Save all allocations for 3 days and return to the sales ledger account search screen.
Select each sales ledger account in turn until the total sales ledger receipt value has been allocated.
Once the total amount has been posted, a prompt to print a daybook will appear.
Click ‘Yes’ to continue and select the required printer. Upon returning to the cash book receipts screen, the ledger selected will display the receipt value.
The next ledger can now be selected. If the value posted to individual accounts does not match the total value originally allocated as the Sales Ledger Receipt value, a warning will be displayed and the amount is adjusted to the value allocated to Sales Ledger Accounts.
Purchase Ledger Receipt (Refund)
Where a refund is being made to a supplier, enter the detail in the Purchase Ledger box and click on the words ‘Purchase Ledger’. Search for the correct purchase ledger account and a pop up box appears where the refund value is entered. Click ‘Accept’ to save.
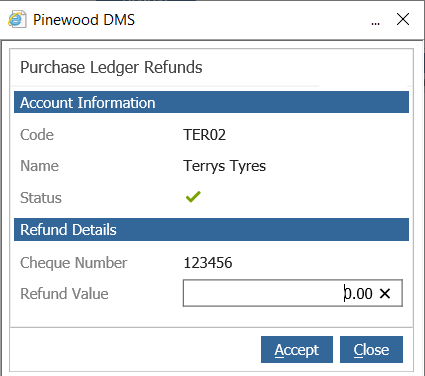
Click ‘Complete Posting’ and print a daybook if required.
Vehicle Receipt
Vehicle receipt values should be entered into the vehicle box. Receipts from vehicle customers or finance companies for final vehicle invoice settlement are entered here.
NOTE: DO NOT ENTER VEHICLE DEPOSITS HERE.
Vehicle Debtors are selected by customer name or the vehicle details. Enter the search criteria and click ‘Search’.
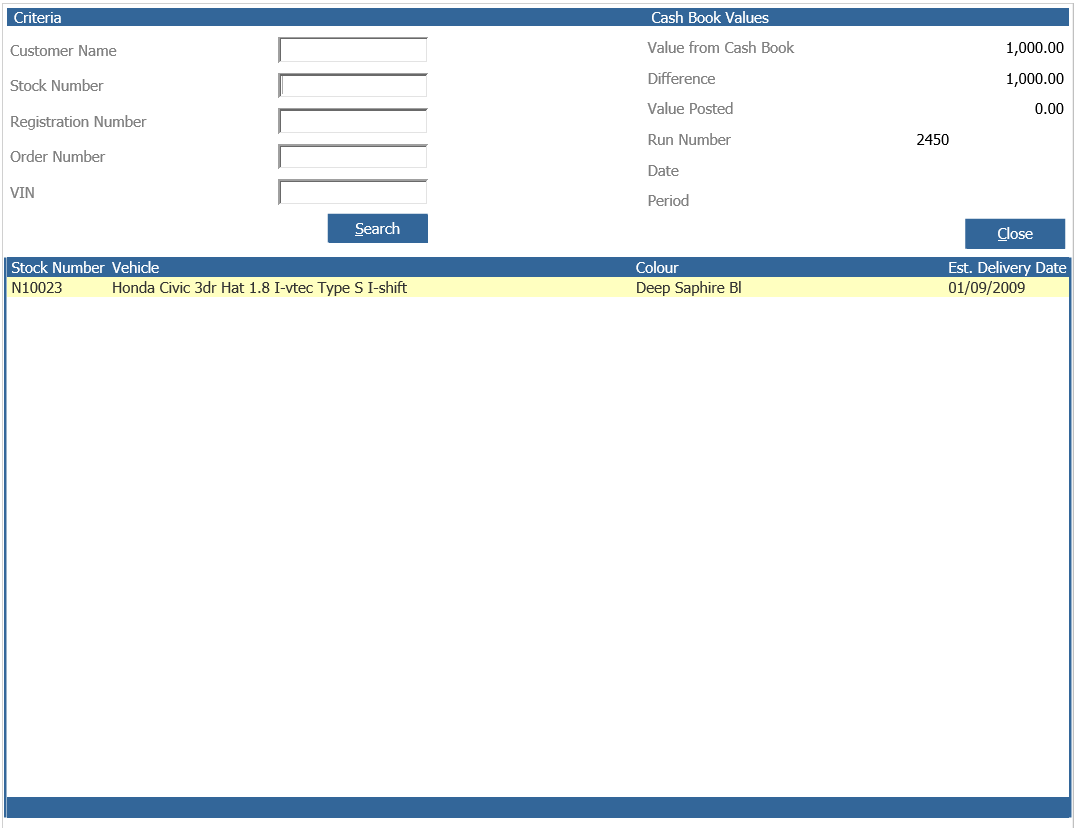
Double click on the stock record to display the vehicle debtor posting screen.
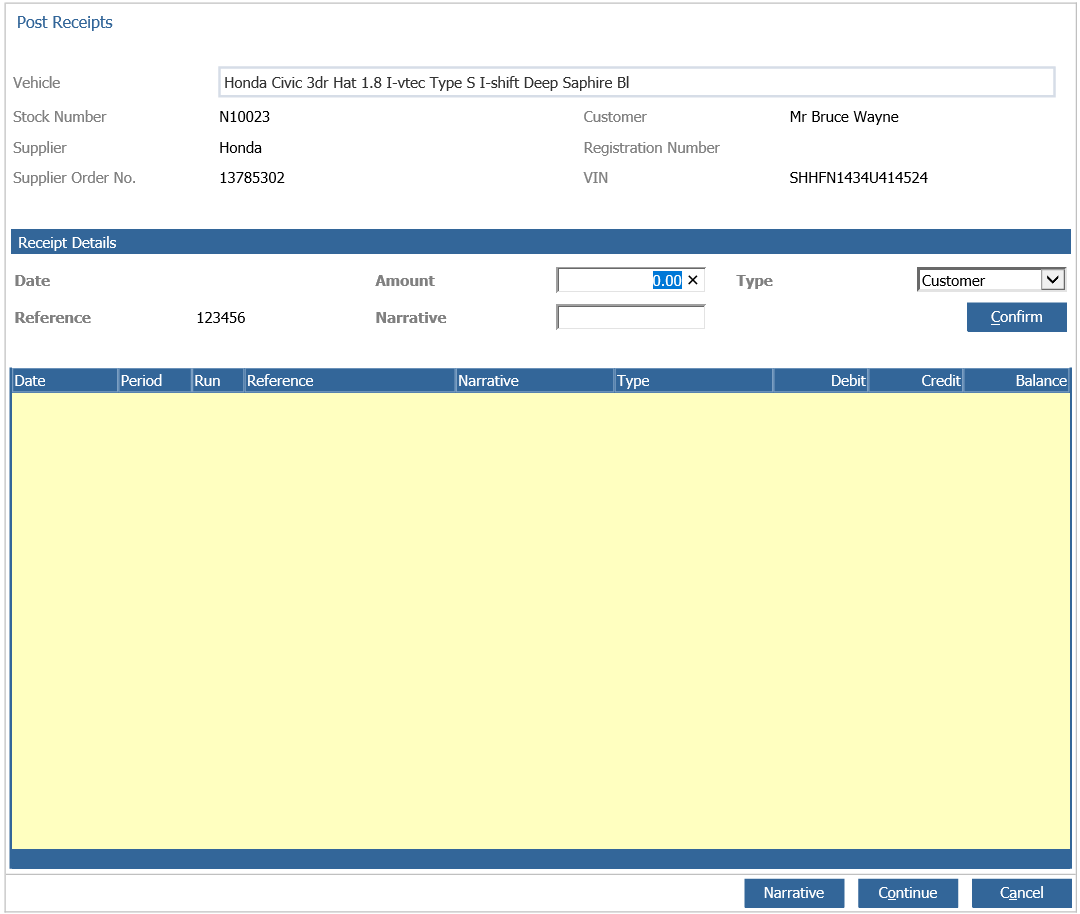
Enter the ‘Amount’ to be posted against the vehicle debtor and select the correct ‘Type’ that the receipt has come from, i.e. from Customer, Finance Company or a Refund. This is important to ensure that the vehicle debtor’s reports provide meaningful information. Receipts entered against the Refund type will post to the creditor for the vehicle. A narrative can be entered against the transaction.
Click ‘Confirm’ to post the value, thus reducing the outstanding balance on the vehicle debtor. Click ‘Continue’ to select the next vehicle until the total vehicle receipts value has been allocated. A daybook may be printed if required.
Sundry Receipts
Input a value within the Sundry Receipt box to post any items directly to a nominal ledger code. Click on the words ‘Sundry Receipt’ to display the sundry receipt posting screen.
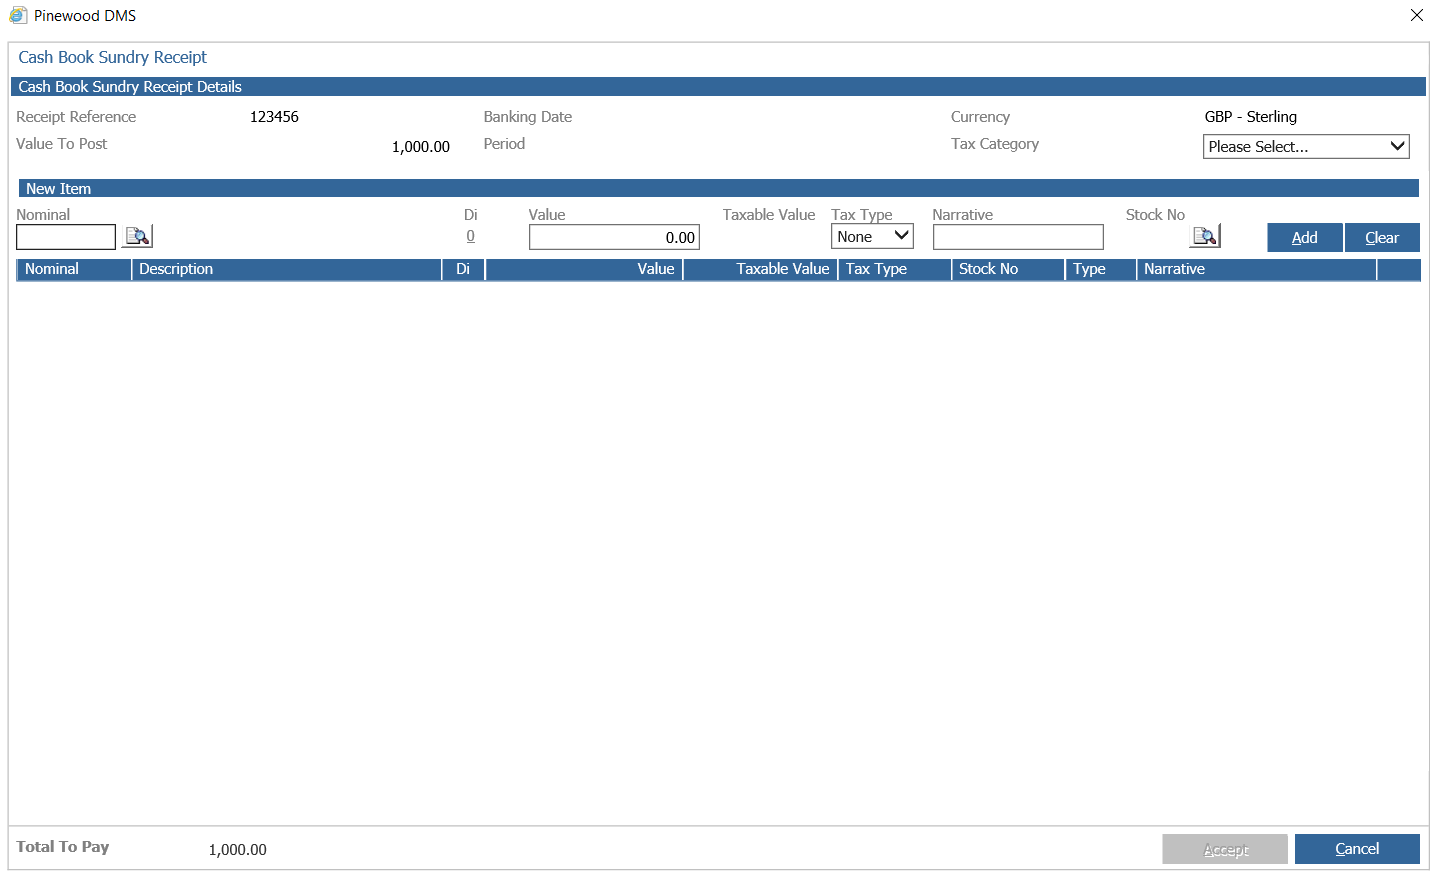
Enter the required nominal code, or search for a code using the search icon. Enter the value to post to the selected nominal code. A narrative may be entered against each individual line. If the posting relates to a stock vehicle, the stock number can be added by using the stock number search icon.
This will allow the stock card to be accessed via the nominal ledger transaction enquiry screen. Click ‘Add’ to post the line to the lower part of the screen. Continue selecting codes until the full value has been posted.
For Tax postings, choose the correct ‘Category’ and the correct Tax code will automatically be selected.
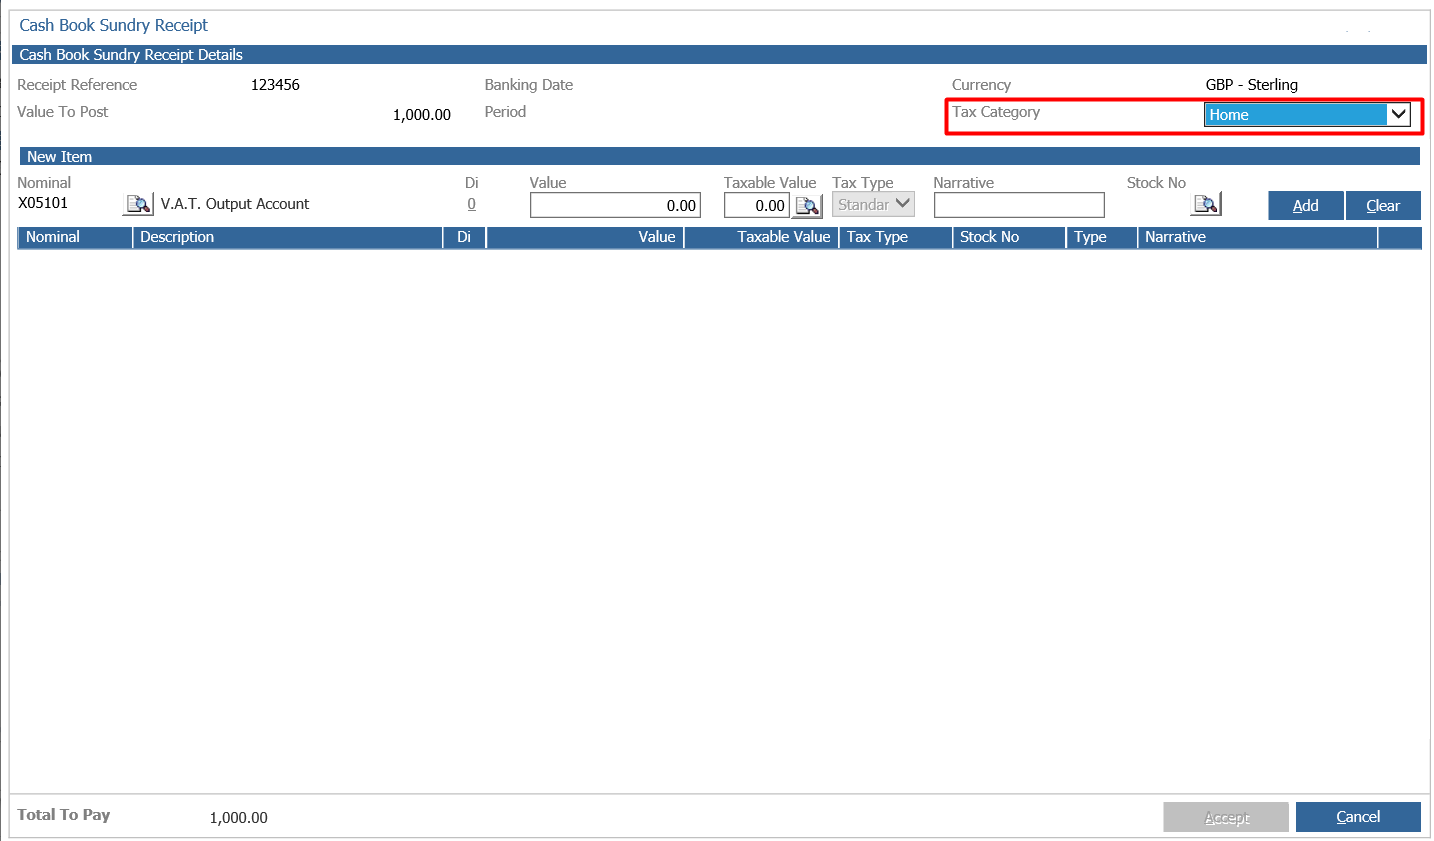
When the value left to post in the bottom left hand corner of the screen is showing zero, click ‘Accept’ to complete the postings.
A daybook may be printed if required.
Cash Receipts (Vehicle Deposits)
Only vehicle or workshop deposits should be entered here as this will credit the nominal code held within Vehicles/Workshop Parameters against Deposits Cash which is a control account. To identify whether or not the receipt has been taken as a Vehicle Deposit, check the Deposits Day Book report within the accounts reporting section of the Vehicles module.
Enter the value of deposits into the Cash Receipts box and then click on the words ‘Cash Receipts’. This will then ask you to choose a module:
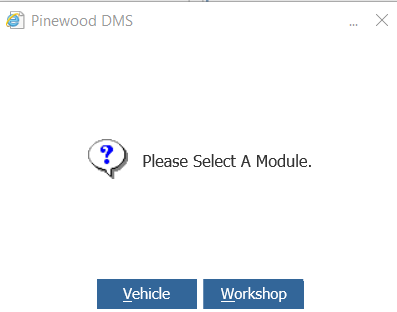
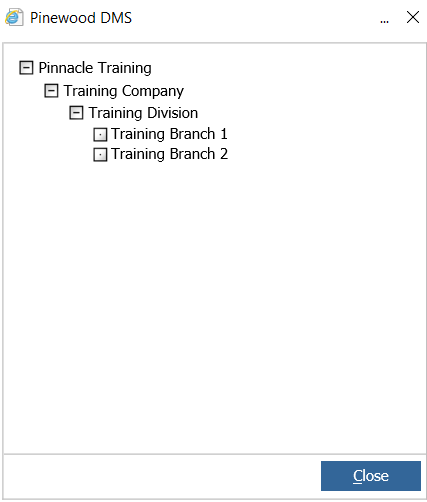
You will then need to select a Vehicle Branch or Workshop Department
The Deposit receipts box then displays:
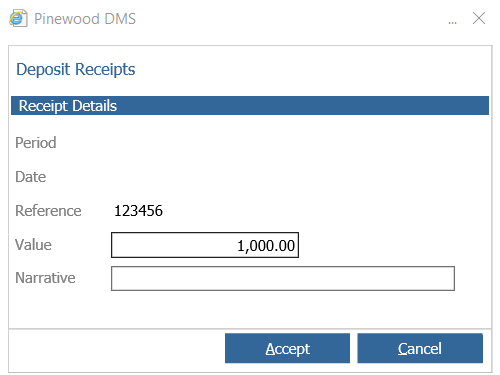
Enter the value and a narrative, usually the customer’s first name and surname then click ‘Accept’. A daybook may be printed if required. Enter the next deposit amount and continue until all deposits have been posted.
Card Receipts
Once credit card payments have been taken by the Aftersales and Sales Departments within the dealership, the receipts must be posted to the cashbook as part of the daily banking routine. If the integrated Pay+ system is not being used, these will be processed in the same way as cash and cheques as detailed above.
If the integrated Pay+ system is in use, as the transaction is authorised, the sales ledger transaction is completed and automatically posted and cleared against the relevant Sales Ledger account with a debit entry left on the credit card control nominal. In the case of vehicle balance payments, the vehicle debtor is credited and the credit card payment will credit this entry and in turn place a debit entry into the nominal code for the bank account.
To receipt the card payments, enter the total amount into the Card Receipts box and click on the words ‘Card Receipts’.
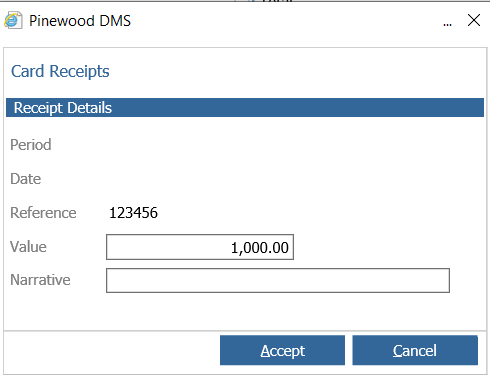
Enter the total card receipts value, a narrative and click ‘Accept’. A daybook may be printed if required.
Once the receipt total value has been fully allocated, a prompt will ask ‘Would you like to complete this cashbook?’
Select ‘Yes’ to complete the posting. If the receipts have been posted directly from a bank statement, enter the statement detail to make the posting a presented item, if this is not the case, leave the boxes blank and click ‘Accept’.
If the receipted value is less or greater than the original value to post, a warning is displayed. The values are posted directly to the ledgers at the point of receipt, so the warning is for reference only. The difference should however be investigated.
Sales Ledger Credit Card Receipts
The Sales Ledger module will allow outstanding transaction values to be paid by credit card. This functionality is only available where Pinewood Pay+ card processing is being used.